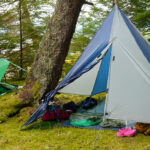
Sitting around the campfire with a steaming cup of coffee is one of the best parts of any outdoor adventure. But taking a sip and tasting last month’s stale tomato soup is a quick way to ruin the moment. Maintaining your camping gear is a crucial skill for any outdoor enthusiast. Knowing how to clean a thermos bottle properly ensures your favorite insulated container stays fresh, safe, and ready for your next trip.
Over time, coffee oils, soup residue, and hard water minerals build up inside the stainless steel chamber. This buildup creates stubborn odors and a weird metallic taste that a simple rinse simply cannot fix. By dedicating a few minutes to deep cleaning your gear, you protect your investment and guarantee that your hot cocoa tastes exactly like hot cocoa.
Why Learning to Clean Your Thermos Helps Campers and Outdoor Beginners
When you first start hiking or camping, buying gear feels like a massive investment. A high-quality insulated flask is not cheap, and you want it to last for decades of trail use. Taking the time to care for your equipment teaches you a fundamental rule of the outdoors: if you take care of your gear, your gear takes care of you.
Poorly maintained flasks harbor bacteria and mold, which can easily make you sick miles away from a bathroom. Furthermore, lingering flavors from sports drinks or chili can permanently alter the taste of your clean drinking water. Proper maintenance prevents the silicone seals from degrading and keeps the vacuum insulation working perfectly. Establishing a good cleaning habit early on builds confidence and helps you transition from a beginner to a seasoned outdoor expert.
Tools and Materials You’ll Need
You do not need expensive commercial cleaners to get your flask looking brand new. Most of the best cleaning supplies are already sitting in your kitchen pantry right now. Baking soda is your best friend because it gently scrubs away stains without scratching the internal stainless steel walls. Distilled white vinegar is excellent for breaking down hard water deposits and eliminating tough odors.
You will also need regular mild dish soap and plenty of hot or boiling water. A bottle brush with soft bristles and a long handle is absolutely essential for reaching the very bottom of the flask. Avoid using bleach, harsh abrasive chemicals, or wire brushes, as these will permanently destroy the stainless steel lining and ruin the vacuum seal of your favorite piece of camping gear.
Step-by-Step Guide on how to clean a thermos bottle
Step 1: Disassemble the Lid and Seals
Start by taking the entire lid apart completely. Your flask lid likely has several moving parts, rubber gaskets, and silicone O-rings that trap moisture and food particles. Use your fingers or a dull butter knife to gently pry the rubber seals away from the plastic housing. Do not pull too hard or you risk stretching the silicone out of shape. Place all of these small components into a shallow bowl of warm, soapy water to soak while you work on the main body of the flask. Leaving these parts together is the number one reason why insulated containers develop mold and funky smells over time.
Step 2: Rinse with Hot Water
Take the empty main body of the flask and fill it completely with hot water straight from your kitchen tap or camping stove. Swirl the hot water around the inside of the container vigorously for about thirty seconds. This initial hot rinse loosens up any sticky residue, sugar syrups, or loose coffee grounds sitting at the bottom. Pour the dirty water down the drain. This step warms up the stainless steel interior, preparing it for the deep cleaning process ahead. Rinsing right away also gives you a clear view of how much stubborn buildup is actually clinging to the interior walls.
Step 3: Add Baking Soda and Vinegar
Now we bring out the heavy hitters for the real cleaning process. Pour two heaping tablespoons of baking soda directly into the bottom of the empty flask. Next, pour in half a cup of distilled white vinegar. The mixture will immediately begin to bubble and fizz up the sides of the container. This chemical reaction is exactly what you want, as the bubbling action lifts stubborn coffee stains and stuck-on food particles away from the metal. Knowing how to clean a thermos bottle means trusting this fizzing reaction to do the heavy lifting. Let the mixture sit undisturbed for about ten minutes to work its magic.
Step 4: Add Boiling Water and Soak
Once the fizzing has died down, carefully pour boiling water into the flask until it reaches the very top rim. Do not put the lid on the container during this step, as the pressure from the heat and remaining vinegar reaction needs to escape. Let the boiling water and cleaning mixture soak inside the container for at least ten minutes, though leaving it for a few hours is even better for severely stained flasks. This intense heat combined with the baking soda breaks down the toughest tea tannins and old dairy proteins hiding in the micro-crevices of the stainless steel.
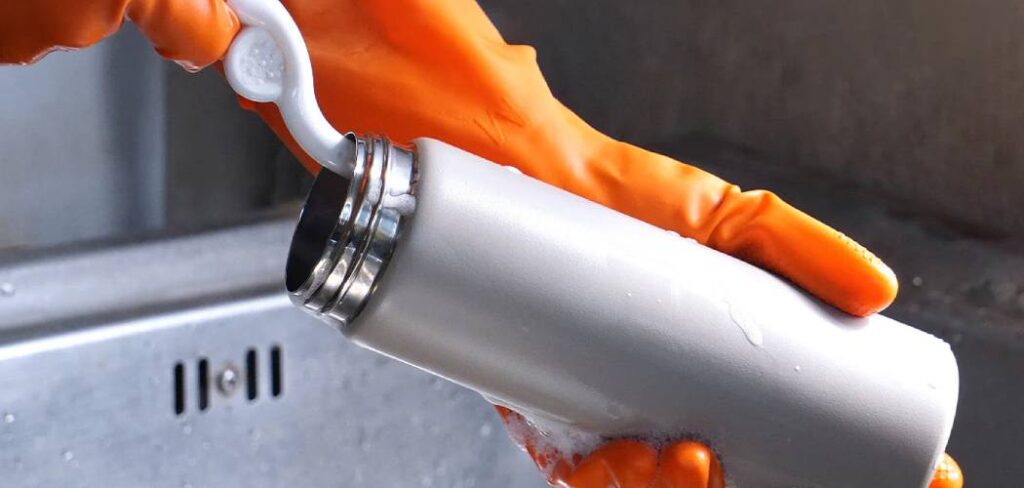
Step 5: Scrub the Interior
Grab your long-handled bottle brush and insert it into the hot water mixture. Scrub the inside walls of the flask using a vigorous up-and-down twisting motion. Pay special attention to the very bottom corners and the threaded neck area at the top, as this is where bacteria love to hide. The soft bristles of your brush will easily sweep away the loosened stains without scratching the delicate steel. If you feel any rough patches of mineral buildup against the brush, spend extra time scrubbing those specific spots until the interior feels completely smooth.
Step 6: Wash the Lid Components
While the main body finishes soaking, return your attention to the bowl of small lid parts. Take a small cleaning brush or a clean toothbrush and scrub the rubber gaskets, plastic threads, and drinking spouts. These small crevices harbor old milk and coffee oils that ruin the taste of your fresh beverages. Rinse each component thoroughly under running warm water to remove all traces of dish soap. Check the rubber O-rings carefully for any signs of black mold or tearing, as these inexpensive parts should be replaced immediately if they are damaged or permanently stained.
Step 7: Final Rinse and Air Dry
Pour the dirty cleaning solution out of the main flask and rinse it under hot tap water at least three times to remove all the baking soda residue. Give the container a quick sniff to ensure no vinegar smell remains. Shake out the excess water from the flask and the lid components. Stand the main container upside down on a clean dish drying rack or a dry towel. Leave the lid completely disassembled and let every single piece air dry overnight. Never reassemble the container while it is still damp, as trapped moisture will instantly breed new mildew.
Critical Mistakes When Learning How to Wash Your Container
The fastest way to destroy a premium insulated container is to put it inside your dishwasher. The extreme heat of a modern dishwasher cycle will melt the exterior paint and completely destroy the vacuum seal between the double walls. Once that vacuum seal is broken, your container will never retain heat or cold again.
Another massive mistake is using chlorine bleach to tackle stubborn coffee stains. Bleach is highly corrosive to stainless steel and will eat away at the interior lining, causing permanent rust spots and structural damage. You should also never use steel wool or harsh abrasive scouring pads on the inside of the container. These aggressive tools leave microscopic scratches in the metal where bacteria and odors will permanently nest. Finally, putting the lid back on before the interior is totally bone dry is a guaranteed way to grow musty mildew. Always practice patience and let the air flow freely through the open container overnight.
Expert Tips
As a trail guide, I always tell my groups to rinse their flasks out the very second they finish their drink. A quick swish of water on the trail prevents sugar and dairy from hardening into a stubborn crust. If you are dealing with a severe odor that baking soda cannot fix, try using denture cleaning tablets.
Drop two tablets into a flask full of hot water and let it sit overnight. Denture tablets are specifically designed to gently remove stains and bacteria without damaging delicate materials. Store your flask with the lid completely off when it sits in your gear closet between camping trips to keep the interior smelling fresh.
Frequently Asked Questions
Can I use lemon juice instead of vinegar to clean my flask?
You can absolutely use lemon juice as a natural alternative to distilled white vinegar. Lemon juice contains high levels of citric acid which works brilliantly to break down hard water stains and eliminate bad odors. Simply squeeze the juice of one whole lemon into the container with the baking soda instead of using vinegar.
How often should I perform a deep clean?
You need to perform a thorough deep clean at least once a week if you use your insulated container every single day. If you only use it occasionally for weekend camping trips, you should deep clean it immediately after you return home. Rinsing with hot soapy water after each individual use will stretch the time needed between deep cleaning sessions.
Why does my coffee still taste metallic after washing?
A metallic taste usually means that coffee oils have gone rancid and bonded to the microscopic pores of the stainless steel lining. It can also indicate that you used a harsh abrasive tool that scratched the protective chromium oxide layer of the metal. Try soaking the container overnight with boiling water and three tablespoons of baking soda to neutralize the lingering rancid oils.
Is it safe to put my rubber seals in the dishwasher?
You should never put the silicone gaskets or rubber seals in the dishwasher. The intense heat and harsh commercial detergents used in dishwashers will dry out the silicone and cause it to crack over time. Always wash these delicate moving parts by hand using warm water and a very mild liquid dish soap to preserve their elasticity.
What should I do if my lid smells like old milk?
An old dairy smell means milk proteins are trapped somewhere inside the complex lid mechanism. You must take the lid entirely apart, removing every single rubber gasket and plastic ring. Soak all of these disassembled parts in a bowl of warm white vinegar for thirty minutes before scrubbing them aggressively with a clean toothbrush.
Keep Your Trail Drinks Tasting Perfect
Nothing ruins a beautiful morning hike faster than taking a sip of coffee that tastes exactly like yesterday’s minestrone soup. By taking a few extra minutes after every trip to maintain your gear, you guarantee a perfect sip every single time. The process of how to clean a thermos bottle might seem tedious at first, but it quickly becomes a satisfying ritual that protects your investment. Grab your baking soda, start scrubbing, and get ready to enjoy a perfectly fresh, hot beverage on your next outdoor adventure. Get your gear packed up, hit the trail, and enjoy the pristine taste of the great outdoors.
About Caleb
Caleb Merritt is a Virginia-based outdoor writer and gear analyst who has spent over a decade sleeping on the ground, crossing mountain passes, and obsessively shaving grams off his pack weight. He holds a Bachelor of Science in Environmental Science from James Madison University, where he also served as president of the university’s outdoor recreation club. After graduating, he spent three years as a wilderness educator with a backcountry youth program in the Shenandoah Valley — teaching Leave No Trace ethics, backcountry navigation, and campcraft — before moving into full-time writing in 2018.
His work focuses on one core belief: the best gear is the gear you understand. Whether he’s doing a side-by-side weight comparison of ultralight shelters or writing a beginner’s guide to building a sub-20-lb base weight kit, Caleb writes with the same directness you’d expect from a trusted trail partner. He has logged more than 4,000 miles across iconic routes including the John Muir Trail, the Wind River Range, Vermont’s Long Trail, and the Collegiate Peaks Loop in Colorado.
Areas of Expertise
- Ultralight backpacking systems and base weight optimization
- Tent, tarp, and shelter testing across three-season and shoulder-season conditions
- Sleeping bag and quilt temperature rating verification
- Backpacking nutrition, meal planning, and calorie-per-ounce analysis
- Leave No Trace principles and wilderness ethics
- Campfire safety, bear country protocols, and water treatment methods
- Gear care, repair, and long-term durability assessment
Education
James Madison University — B.S. in Environmental Science, 2015
During his time at JMU, Caleb served as President of the Outdoor Recreation Club, where he planned and led more than 30 backcountry trips annually across the Blue Ridge Mountains and Appalachian Trail corridor. The role sharpened his ability to assess gear performance under real conditions, manage group safety in remote environments, and develop the kind of practical trail knowledge that no classroom can teach.
Professional Experience
Gear Writer & Senior Contributor — [Your Website Name]
Produces in-depth gear reviews, buyer’s guides, and how-to content across backpacking, camping, and ultralight hiking categories. Tests all gear in real field conditions before publishing recommendations.
Wilderness Educator & Trip Leader — Shenandoah Backcountry Youth Program — 2015–2018 Led multi-day backcountry expeditions for teens and young adults throughout Shenandoah National Park and George Washington National Forest. Taught LNT principles, orienteering, first aid awareness, and campcraft fundamentals.
Outdoor Recreation Club President — James Madison University — 2013–2015 Organized and led university-sponsored hiking, backpacking, and camping trips in the Blue Ridge Mountains and Appalachian Trail corridor. Managed club budget, safety protocols, and trip logistics for a membership of 120+ students.
Editorial Standards
Every piece of gear Caleb recommends has been personally tested in the field — not just unboxed and described. His review process includes a minimum of two overnight trips per shelter, a full-season evaluation for sleep systems, and side-by-side comparisons wherever possible. He does not accept payment for positive reviews. Affiliate relationships, where they exist, are always disclosed in accordance with FTC guidelines.
All factual claims about gear specifications, trail distances, and safety recommendations are cross-referenced against manufacturer data sheets and established sources such as the Leave No Trace Center for Outdoor Ethics and the American Hiking Society before publication.