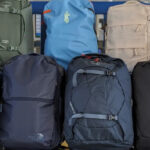
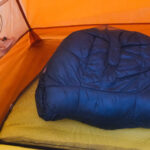
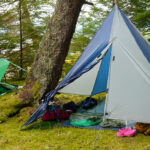
Waking up in the middle of the night to a puddle of water inside your sleeping area ruins the entire camping experience. Even if you purchase high-quality outdoor gear, heavy rain can easily find its way through the tiny stitching holes where the fabric panels connect. Understanding exactly how to seam seal a tent solves this problem and guarantees you stay warm and dry during unpredictable weather.
Many beginners feel intimidated by gear maintenance, but waterproofing your outdoor shelter takes very little technical skill. With a few basic supplies and a spare afternoon, you can completely weather-proof your shelter. This simple maintenance routine extends the lifespan of your gear and gives you absolute peace of mind whenever storm clouds gather over your campsite.
Why Seam Sealing Is Important
Manufacturers build outdoor shelters by stitching large panels of waterproof fabric together using heavy-duty industrial sewing machines. While the fabric itself repels water perfectly, the sewing needle punches thousands of microscopic holes along every single stitched line. If left untreated, surface tension draws rainwater directly through these tiny gaps and into your living space. Applying a protective liquid barrier directly over these stitched areas completely fills the microscopic holes and locks out moisture. Regular maintenance stops slow leaks before they soak your sleeping bag and ruin your trip. Protecting these vulnerable stitched joints also prevents the threads from rotting or fraying over time, which dramatically extends the overall lifespan of your expensive camping equipment.
8 Step-by-Step Guide on How to Seam Seal a Tent
Step 1: Preparation for How to Seam Seal a Tent
Setting up your workspace correctly makes the entire waterproofing process much easier and prevents accidental messes. Find a dry, well-ventilated area like an open garage or a shaded spot in your backyard. You need plenty of room to spread the fabric out completely flat without it bunching up or dragging through the dirt. Pitch the shelter completely taut just like you would at a campsite, making sure all the fabric panels stretch tightly. A taut surface opens up the stitched joints, allowing the protective liquid to penetrate deeply into the thread holes. Keep a clean rag and some rubbing alcohol nearby so you can quickly handle any unexpected spills or sticky mistakes during the application phase.
Step 2: Clean the Stitched Areas Thoroughly
Dirt, dust, and natural oils from your hands prevent the liquid barrier from sticking properly to the fabric. Before applying any product, you must thoroughly scrub every single stitched line on both the rainfly and the interior floor. Dip a clean sponge or a soft-bristled toothbrush into a mixture of warm water and mild unscented dish soap. Gently scrub the targeted areas to remove all hidden grime trapped inside the threads. Once you finish scrubbing the dirt away, wipe down the entire area with a cloth soaked in standard rubbing alcohol. This final wipe removes stubborn grease and guarantees a perfectly sterile surface. Allow the fabric to air dry completely before moving forward to the next stage.
Step 3: Choose the Correct Waterproofing Product
Picking the right liquid barrier requires checking the exact material of your specific camping shelter. Outdoor fabrics generally fall into two distinct categories, and each requires a completely different chemical formula. If your gear features a silicone-treated nylon construction, commonly known as silnylon, you must buy a pure silicone-based product. If your shelter uses polyurethane-coated fabrics, which is standard on most traditional models, you need a polyurethane-specific formula. Mixing these two chemicals up results in a sticky, peeling mess that provides zero water resistance. Always read the manufacturer tags located on the inside of the storage bag to confirm your fabric type before making a purchase. Using the correct formula ensures a permanent, flexible bond.
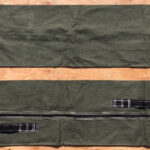
Step 4: Locate the Factory Tape and Untreated Joints
Most modern camping shelters come with clear protective tape applied over the stitched joints directly from the factory. You do not need to apply additional liquid over joints that already feature perfectly intact factory tape. Carefully inspect the entire inside of the rainfly and the interior floor to identify which areas lack this clear tape. Pay special attention to complex corners, heavy tie-out points, and areas where multiple panels intersect, as factories often leave these tricky spots untreated. If you spot old factory tape that looks flaky, yellowed, or peeling away from the fabric, gently peel it off completely. You must remove damaged tape so you can apply a fresh liquid barrier directly to the bare threads.
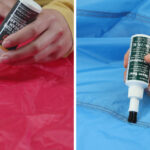
Step 5: The Main Process of How to Seam Seal a Tent
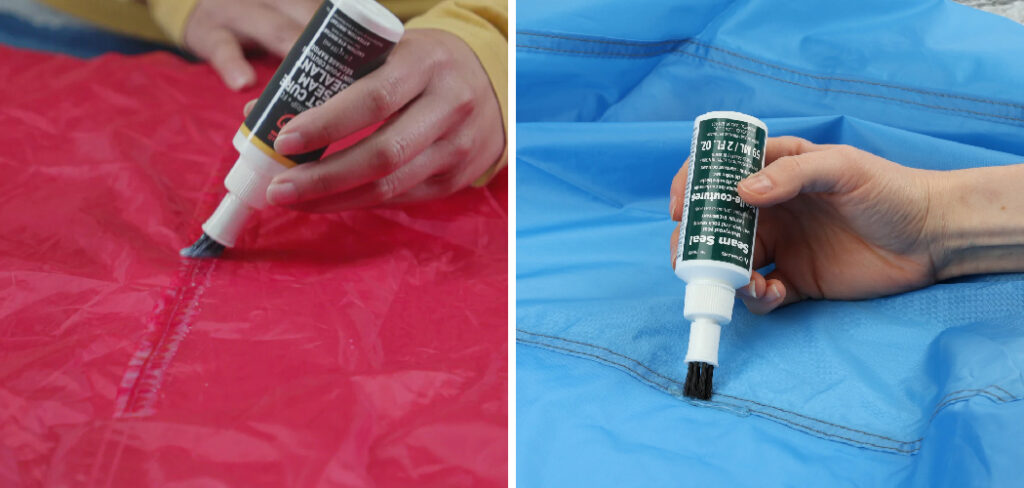
Now you can finally begin applying the protective chemical directly to the vulnerable areas. Take your specialized liquid and gently squeeze a thin, even bead directly over the exposed threads. Work in short, manageable sections so the chemical does not begin curing before you finish spreading it. Use the small bristle brush attached to the tube, or a separate small paintbrush, to work the liquid deeply into the needle holes. Push the bristles firmly against the fabric to ensure the liquid penetrates the tiny gaps rather than just sitting uselessly on top. Keep the layer relatively thin, as heavy clumps take days to cure and often crack when you eventually fold the fabric for storage.
Step 6: Wipe Away the Excess Chemical
Applying too much chemical creates an ugly, thick crust that flakes off during your next camping trip. Immediately after brushing the liquid into a designated section, grab a clean paper towel or a soft rag to manage the overflow. Gently wipe the edges of your freshly painted line to remove any stray drips or excessive blobs resting outside the main stitched area. You want a smooth, nearly invisible film covering the threads, not a raised bump of sticky glue. Take your time inspecting each treated section under a bright light to catch hidden drips before they harden into a permanent stain. Maintaining a neat workspace guarantees your shelter remains flexible and easy to pack away.
Step 7: Allow the Treated Gear to Cure Completely
Patience remains the most critical factor once you finish painting the liquid onto the fabric. You must leave the shelter pitched tightly in your dry, well-ventilated workspace for at least twenty-four hours to let the chemicals fully harden. Never pack the fabric away while the treated areas still feel tacky to the touch, or the panels will permanently glue themselves together inside the storage bag. Keep the gear completely out of direct, intense sunlight, as extreme heat often causes the chemicals to cure unevenly and crack. Once the surface feels completely dry and smooth like rubber, sprinkle a light dusting of talcum powder over the treated areas to eliminate any lingering stickiness before finally packing it up.
Step 8: Testing Your Work After Learning How to Seam Seal a Tent
You never want to discover a missed spot during a midnight thunderstorm in the wilderness. Before taking your newly treated gear on an actual trip, run a controlled moisture test in your backyard. Leave the shelter pitched tightly and grab a standard garden hose with a spray nozzle attachment. Spray a heavy, continuous shower of water directly over the treated sections for about five minutes to simulate a heavy downpour. Step inside the shelter and carefully inspect the interior walls and floor for any damp spots or rogue drips. If you notice a tiny leak, simply let the fabric dry out completely and apply a tiny dab of your remaining liquid barrier to patch the specific gap.
Frequently Asked Questions (FAQ)
Do I need to treat the inside or the outside of the fabric?
You should always apply the protective liquid directly to the inside of the fabric panels. Treating the interior protects the chemical barrier from harsh ultraviolet sunlight, rough tree branches, and abrasive dirt that easily scrapes off exterior coatings.
- Pitch the shelter inside out if possible.
- Focus on the shiny side of the fabric.
- Keep the exterior completely free of sticky residue.
How often should I reapply the protective coating?
Most high-quality treatments last for several years under normal camping conditions. You generally only need to reapply the liquid when you physically notice the old coating beginning to flake away, or if you start experiencing minor leaks during rainstorms. Inspect your gear at the start of every single camping season to catch peeling sections early before they fail entirely.
Can I use regular super glue instead of specialized products?
You must never use standard household glues or hardware store caulking to fix your outdoor gear.
- Regular glues dry completely rigid and will crack when folded.
- Household caulking eventually rots the delicate nylon fibers.
- Only use flexible, fabric-specific formulas designed specifically for outdoor equipment.
How long does the liquid take to dry completely?
Curing times vary based on your local humidity and the specific formula you purchased. Generally, you must wait a minimum of twenty-four hours before packing the fabric away. If the air feels particularly damp or cold, the curing process might take up to forty-eight hours. Always touch the treated area to ensure it feels dry and rubbery.
What should I do if the panels stick together in storage?
If you packed the gear away too early and the panels adhered to each other, carefully peel them apart using very slow, gentle pressure to avoid tearing the delicate nylon. Once separated, you must scrub the damaged coating off with rubbing alcohol and reapply a fresh layer. Always use talcum powder to prevent this frustrating issue.
Conclusion
Taking a proactive approach to maintaining your outdoor gear guarantees you stay comfortable, warm, and completely dry regardless of the weather forecast. By taking the time to thoroughly clean your fabric, choosing the correct chemical formula, and carefully applying the liquid barrier to every vulnerable stitched joint, you permanently lock out unwanted moisture. Do not wait for a disastrous midnight rainstorm to reveal the hidden flaws in your favorite equipment. Grab the necessary supplies this weekend and practice how to seam seal a tent in your own backyard. Investing just a single afternoon into this simple, beginner-friendly maintenance routine completely transforms your camping experience and adds years of reliable life to your valuable outdoor shelter.
About Caleb
Caleb Merritt is a Virginia-based outdoor writer and gear analyst who has spent over a decade sleeping on the ground, crossing mountain passes, and obsessively shaving grams off his pack weight. He holds a Bachelor of Science in Environmental Science from James Madison University, where he also served as president of the university’s outdoor recreation club. After graduating, he spent three years as a wilderness educator with a backcountry youth program in the Shenandoah Valley — teaching Leave No Trace ethics, backcountry navigation, and campcraft — before moving into full-time writing in 2018.
His work focuses on one core belief: the best gear is the gear you understand. Whether he’s doing a side-by-side weight comparison of ultralight shelters or writing a beginner’s guide to building a sub-20-lb base weight kit, Caleb writes with the same directness you’d expect from a trusted trail partner. He has logged more than 4,000 miles across iconic routes including the John Muir Trail, the Wind River Range, Vermont’s Long Trail, and the Collegiate Peaks Loop in Colorado.
Areas of Expertise
- Ultralight backpacking systems and base weight optimization
- Tent, tarp, and shelter testing across three-season and shoulder-season conditions
- Sleeping bag and quilt temperature rating verification
- Backpacking nutrition, meal planning, and calorie-per-ounce analysis
- Leave No Trace principles and wilderness ethics
- Campfire safety, bear country protocols, and water treatment methods
- Gear care, repair, and long-term durability assessment
Education
James Madison University — B.S. in Environmental Science, 2015
During his time at JMU, Caleb served as President of the Outdoor Recreation Club, where he planned and led more than 30 backcountry trips annually across the Blue Ridge Mountains and Appalachian Trail corridor. The role sharpened his ability to assess gear performance under real conditions, manage group safety in remote environments, and develop the kind of practical trail knowledge that no classroom can teach.
Professional Experience
Gear Writer & Senior Contributor — [Your Website Name]
Produces in-depth gear reviews, buyer’s guides, and how-to content across backpacking, camping, and ultralight hiking categories. Tests all gear in real field conditions before publishing recommendations.
Wilderness Educator & Trip Leader — Shenandoah Backcountry Youth Program — 2015–2018 Led multi-day backcountry expeditions for teens and young adults throughout Shenandoah National Park and George Washington National Forest. Taught LNT principles, orienteering, first aid awareness, and campcraft fundamentals.
Outdoor Recreation Club President — James Madison University — 2013–2015 Organized and led university-sponsored hiking, backpacking, and camping trips in the Blue Ridge Mountains and Appalachian Trail corridor. Managed club budget, safety protocols, and trip logistics for a membership of 120+ students.
Editorial Standards
Every piece of gear Caleb recommends has been personally tested in the field — not just unboxed and described. His review process includes a minimum of two overnight trips per shelter, a full-season evaluation for sleep systems, and side-by-side comparisons wherever possible. He does not accept payment for positive reviews. Affiliate relationships, where they exist, are always disclosed in accordance with FTC guidelines.
All factual claims about gear specifications, trail distances, and safety recommendations are cross-referenced against manufacturer data sheets and established sources such as the Leave No Trace Center for Outdoor Ethics and the American Hiking Society before publication.