Heading out for your first major trail adventure feels incredibly exciting. You have your boots tied, your water bottles filled, and your snacks packed tightly away. However, you might find yourself staring at your long, awkward trekking poles and wondering what to do with them when the terrain levels out.
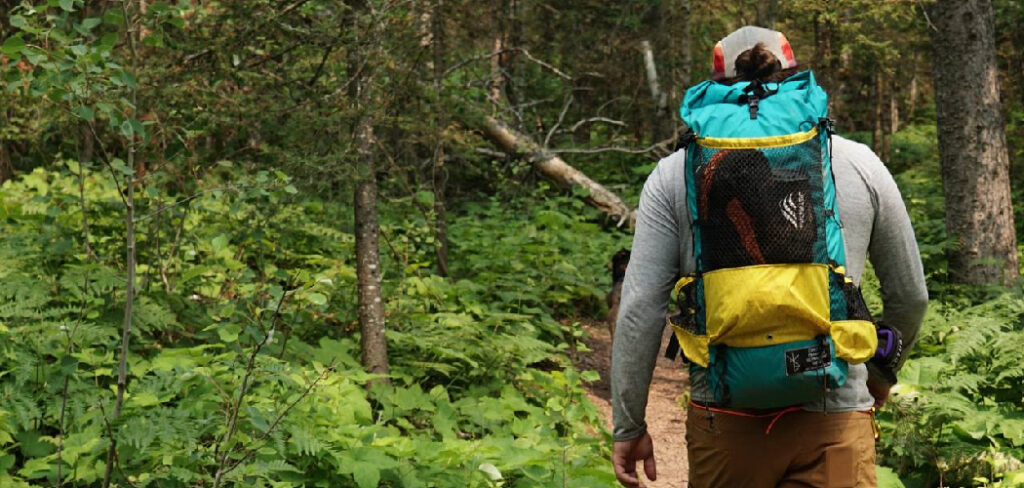
Knowing how to attach hiking poles to backpack is a fundamental skill that transforms a clunky carrying experience into a smooth, hands-free hike. Many beginners struggle with poles shifting, bouncing, or snagging on low-hanging branches because they skip the proper fastening techniques. Grasping this simple process will keep your gear secure and your focus entirely on the beautiful scenery ahead. This guide will walk you through the exact steps to secure your trekking poles safely and comfortably for any outdoor excursion.
Why Securing Your Trekking Gear Matters
Learning to properly stow your gear makes a massive difference for campers and outdoor beginners. When your trail equipment hangs loosely on your pack, it creates an unbalanced load that pulls on your shoulders. This uneven weight distribution causes premature fatigue and can lead to severe back pain over long miles. Loose gear also poses a significant safety hazard on narrow, overgrown trails.
Unsecured poles can easily catch on passing bushes, vines, or rocks, potentially pulling you off balance when you least expect it. Properly fastened equipment stays tight against your body, keeping your center of gravity stable. This stability gives you the confidence to scramble over boulders or cross shallow streams with your hands completely free. Mastering this technique protects your expensive equipment from damage while keeping you safe on unpredictable terrain.
Tools and Materials You’ll Need
Before you start organizing your gear for the trail, you need to gather a few essential items. Having the right attachment points makes the entire process seamless and frustration-free. Most modern outdoor bags come with these features built right into the fabric.
- A specialized hiking pack featuring bottom gear loops
- Adjustable bungee cords or elastic tie-offs on the upper pack
- Side compression straps for extra tension
- Your collapsible or folding trekking poles
- Rubber tip protectors (optional, but highly recommended for preventing fabric tears)
These built-in features work together to create a tension system that holds everything firmly in place. If your pack lacks dedicated bungee cords, you can easily thread your own elastic shock cord through the existing daisy chain webbing.
8 Step-by-Step Guide on How to Attach Hiking Poles to Backpack
Step 1 – Clean and Collapse the Shafts
Before you attempt to stow anything, you need to prepare the equipment properly. Start by wiping down the metal or carbon fiber shafts with a dry cloth to remove dirt, mud, and moisture. Leaving grit on the metal can grind into the locking mechanisms and cause severe damage over time.
Next, unlock the levers or twist locks and collapse the sections down to their shortest possible length. If you use a folding Z-pole style, snap the sections apart and fold them together tightly into their zigzag shape. Making the item as compact as possible reduces leverage and prevents bouncing when you walk. You want a tight, dense package that sits flush against the side of your bag. This initial preparation makes knowing how to attach hiking poles to backpack much easier and far more secure.
Step 2 – Locate the Dedicated Gear Loops
Once your equipment is clean and compact, take a close look at the exterior of your bag. You want to identify the specific attachment points designed by the manufacturer for carrying tools. Search near the bottom corners of the fabric, right where the main compartment meets the base.
You will typically find two small webbing loops or sturdy elastic rings on either side. These bottom loops serve as the foundation of your attachment system, bearing the downward weight of the metal tips. Take a moment to pull on these loops to ensure they are fully intact and not frayed from previous trips. Understanding where these foundational points sit helps you visualize how the entire tension system will come together.
Step 3 – Slide the Tips Through the Bottom Loops
With the loops identified, take your collapsed equipment in your hands. Point the sharp carbide tips or rubber ends straight down toward the ground. Carefully thread the pointed end of the first pole directly through the left bottom loop. You want the loop to catch and hold the lower section securely.
Push the shaft down until the plastic mud basket rests firmly against the webbing. The basket acts as a natural stopper, preventing the entire shaft from sliding straight through the opening. If you removed your baskets for summer hiking, you might need to wrap the loop twice to create a tighter hold. Repeat this exact same motion on the right side of your bag with the second piece of equipment.
Step 4 – Secure the Baskets Against the Fabric
Positioning the mud baskets correctly prevents unwanted rattling and swinging. Once the tips are threaded through the bottom loops, rotate the shafts slightly. You want the flat side of the plastic basket to sit completely flush against the tough nylon fabric of your bag.
If the basket angles outward, it will constantly catch on surrounding brush and cause annoying vibrations that travel right into your spine. Pressing them flat against the pack creates a streamlined profile that moves with your body. Feel the tension at the bottom to ensure the tip is seated deeply in the loop. A snug fit at the base guarantees that the rest of the fastening process will hold up under the stress of a long hike.
Step 5 – Fasten the Upper Shafts with Bungee Cords
Now that the bottom is anchored, you need to secure the top portion to prevent it from swinging away from your body. Look toward the upper third of your bag, directly above the bottom loops you just used. You will find small bungee cords, elastic toggles, or velcro straps waiting to be utilized.
Pull the handle of your equipment flat against the side of the bag. Stretch the elastic bungee cord completely around the grip or the upper metal shaft. Hook the plastic toggle back onto itself to lock the elastic in place. You should feel a strong, tight pull holding the handle firmly against the pack material. This upper anchor point is crucial for keeping the load vertical and completely stable.
Step 6 – Tighten the Side Compression Straps
For maximum security, you need to engage the built-in tension straps located on the sides of your bag. These adjustable nylon bands usually run horizontally across the main compartment. Unbuckle the strap, route it directly over the middle section of your collapsed equipment, and snap the buckle back together.
Pull the loose end of the webbing firmly to cinch the load tight. You should hear a satisfying click from the buckle and feel the fabric compress inward. This middle anchor removes any remaining gap between the metal shaft and the side of your bag. It essentially merges the equipment into the overall structure of your pack, completely eliminating any independent movement or sway.
Step 7 – Tuck Away Loose Ends and Straps
A clean exterior profile represents a safe and professional setup. After you tighten all the buckles and elastic toggles, you will likely have long pieces of nylon webbing dangling from the sides. Take a moment to roll up these loose ends and tuck them neatly behind the taut straps.
Leaving strings hanging freely invites disaster on rugged trails. Stray webbing can easily get sucked into moving branches, snag on passing rocks, or even trip up your hiking partner walking closely behind you. Tucking everything away guarantees a streamlined, aerodynamic profile. Taking this extra minute to clean up your straps proves you truly understand how to attach hiking poles to backpack like a seasoned outdoor professional.
Step 8 – Perform a Shake Test Before Hitting the Trail
The final step guarantees your setup will survive rough conditions. Pick your fully loaded bag up by the top haul handle and hold it in front of you. Give the entire pack a rigorous, aggressive shake from side to side and up and down.
Listen closely for any metallic rattling and watch to see if the handles shift away from the fabric. If the equipment wiggles or feels loose, you need to go back and pull the compression straps tighter. The metal shafts should feel like a solid, immovable part of the bag itself. Once you pass this dynamic shake test, you can confidently swing the bag onto your back and start your journey with total peace of mind.
Common Mistakes When Stowing Your Gear
Many beginners make critical errors when securing their gear that lead to damaged equipment and frustrating delays. The most frequent mistake involves leaving the metal shafts fully extended when tying them down. Securing a long, rigid object to a flexible bag creates a massive leverage point that towers over your head. This setup guarantees that the handles will snag on low tree branches, potentially ripping the attachment loops completely off your bag. Always collapse your gear to its shortest possible length before trying to tie it down.
Another major error happens when hikers ignore the bottom gear loops and try to shove the handles straight into the side water bottle pockets. While this seems incredibly convenient at first glance, it stretches out the elastic mesh over time and ruins the pocket’s ability to hold a water bottle securely. Furthermore, the sharp carbide tips end up pointing straight up near your face or your hiking partner’s eyes. You should always utilize the dedicated webbing loops designed specifically to bear the weight and protect the mesh pockets from sharp edges. Taking shortcuts with your attachment strategy usually results in torn fabric, lost equipment, and a miserable time on the trail.
Expert Tips for Trail Readiness
To truly hike like an expert, you should always keep rubber tip protectors on your gear when they are stowed away. Carbide tips are incredibly sharp and easily puncture expensive waterproof materials if they shift during a steep climb. The small rubber caps cost very little but save you from replacing a heavily damaged pack.
Additionally, try storing your gear upside down if you are using a bag without dedicated bottom loops. You can place the smooth handles into the side pockets and use the upper compression straps to tie off the lower sections. This alternative method keeps the sharp tips pointed down and protects your mesh pockets from tearing. Always adjust the tension of your straps after the first mile, as materials tend to stretch slightly as you warm up.
Frequently Asked Questions
Do I really need a backpack with specific attachment loops?
You do not strictly need dedicated loops, though they make the process much faster and more secure. If your bag lacks specific tool loops, you can use the side compression straps and deep water bottle pockets to achieve a similar result. Just ensure you protect the mesh fabric by placing the soft handles into the pocket rather than the sharp carbide tips.
Can I leave my mud baskets on while my gear is stored?
Leaving the mud baskets on actually helps secure the load much better. The wide plastic rim stops the narrow metal tip from sliding entirely through the bottom webbing loop. Just make sure to rotate the shaft so the flat edge of the plastic basket rests completely flush against the side of your bag to prevent snagging.
How do I stop my equipment from rattling when I walk?
Rattling happens when there is empty space between the metal shafts and the fabric of your bag. To fix this, you need to utilize the side compression straps. Route the horizontal nylon webbing over the middle of the collapsed sections and pull the slack aggressively tight to pull the items directly against the main compartment.
What should I do if my bag only has one set of loops?
If your bag only features one set of loops on a single side, you can easily store both pieces of equipment together. Collapse them completely, stack them tightly against each other, and thread both tips through the single bottom loop. You will need to stretch the upper bungee cord a bit further to wrap around both handles securely.
Is it safe to carry my gear horizontally across the top lid?
Carrying long items horizontally across the top of your bag is generally a bad idea for trail safety. The extended handles stick out past your shoulders and will constantly catch on trees, vines, and fellow hikers. Always store your equipment vertically down the sides or back of the pack to maintain a narrow, safe profile.
Conclusion
Mastering your gear setup is one of the most rewarding steps in becoming a confident outdoor adventurer. A well-organized pack allows you to move freely, safely, and efficiently across any landscape you encounter. You no longer have to worry about clumsy equipment swinging around, snagging on brush, or throwing you off balance during a tricky river crossing. Taking a few extra minutes at the trailhead to secure everything properly pays off massively over a ten-mile journey.
Now that you know exactly how to attach hiking poles to backpack, you can tackle steep ascents and flat valley floors with total confidence. You have the knowledge to adapt to changing terrain, stowing your gear when you need your hands and deploying it quickly when the hills get steep. Keep practicing this simple fastening routine until it becomes muscle memory. Grab your bag, secure those straps tightly, and step out onto your next great trail adventure with a perfectly balanced load.

About Caleb
Caleb Merritt is a Virginia-based outdoor writer and gear analyst who has spent over a decade sleeping on the ground, crossing mountain passes, and obsessively shaving grams off his pack weight. He holds a Bachelor of Science in Environmental Science from James Madison University, where he also served as president of the university’s outdoor recreation club. After graduating, he spent three years as a wilderness educator with a backcountry youth program in the Shenandoah Valley — teaching Leave No Trace ethics, backcountry navigation, and campcraft — before moving into full-time writing in 2018.
His work focuses on one core belief: the best gear is the gear you understand. Whether he’s doing a side-by-side weight comparison of ultralight shelters or writing a beginner’s guide to building a sub-20-lb base weight kit, Caleb writes with the same directness you’d expect from a trusted trail partner. He has logged more than 4,000 miles across iconic routes including the John Muir Trail, the Wind River Range, Vermont’s Long Trail, and the Collegiate Peaks Loop in Colorado.
Areas of Expertise
- Ultralight backpacking systems and base weight optimization
- Tent, tarp, and shelter testing across three-season and shoulder-season conditions
- Sleeping bag and quilt temperature rating verification
- Backpacking nutrition, meal planning, and calorie-per-ounce analysis
- Leave No Trace principles and wilderness ethics
- Campfire safety, bear country protocols, and water treatment methods
- Gear care, repair, and long-term durability assessment
Education
James Madison University — B.S. in Environmental Science, 2015
During his time at JMU, Caleb served as President of the Outdoor Recreation Club, where he planned and led more than 30 backcountry trips annually across the Blue Ridge Mountains and Appalachian Trail corridor. The role sharpened his ability to assess gear performance under real conditions, manage group safety in remote environments, and develop the kind of practical trail knowledge that no classroom can teach.
Professional Experience
Gear Writer & Senior Contributor — [campeox.com]
Produces in-depth gear reviews, buyer’s guides, and how-to content across backpacking, camping, and ultralight hiking categories. Tests all gear in real field conditions before publishing recommendations.
Wilderness Educator & Trip Leader — Shenandoah Backcountry Youth Program — 2015–2018 Led multi-day backcountry expeditions for teens and young adults throughout Shenandoah National Park and George Washington National Forest. Taught LNT principles, orienteering, first aid awareness, and campcraft fundamentals.
Outdoor Recreation Club President — James Madison University — 2013–2015 Organized and led university-sponsored hiking, backpacking, and camping trips in the Blue Ridge Mountains and Appalachian Trail corridor. Managed club budget, safety protocols, and trip logistics for a membership of 120+ students.
Editorial Standards
Every piece of gear Caleb recommends has been personally tested in the field — not just unboxed and described. His review process includes a minimum of two overnight trips per shelter, a full-season evaluation for sleep systems, and side-by-side comparisons wherever possible. He does not accept payment for positive reviews. Affiliate relationships, where they exist, are always disclosed in accordance with FTC guidelines.
All factual claims about gear specifications, trail distances, and safety recommendations are cross-referenced against manufacturer data sheets and established sources such as the Leave No Trace Center for Outdoor Ethics and the American Hiking Society before publication.