Picture this: you are miles away from civilization, enjoying a scenic ride on your favorite trail, when disaster strikes. Your drivetrain snaps or bends, leaving you stranded without your specialized repair kit. Knowing how to change a bike chain without a chain tool transforms a potential nightmare into a minor inconvenience. This essential mechanical skill empowers you to handle emergency repairs using basic items you likely already have.
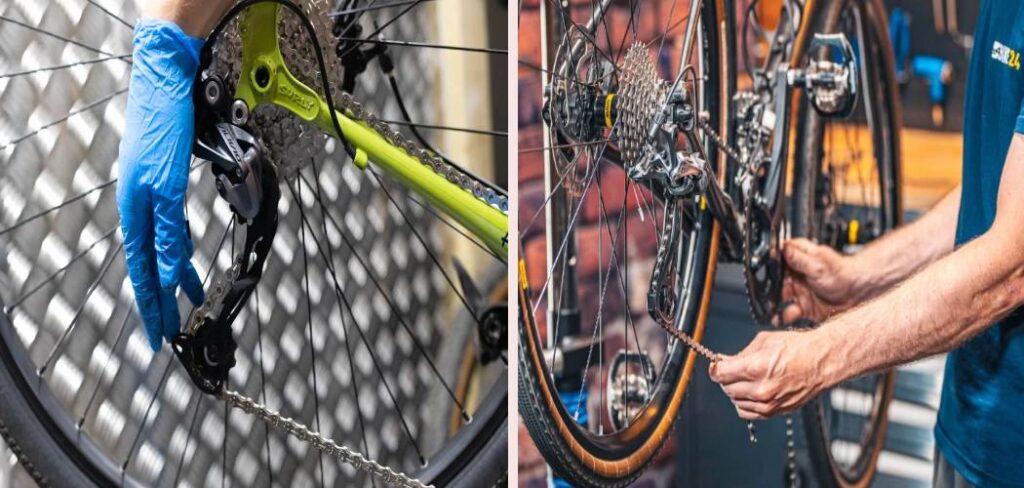
Many cyclists rely entirely on specialized workshop gear to handle routine maintenance. We want to show you a different approach that builds confidence and self-reliance on the trail. You do not need to be a professional mechanic to master this process. By following a logical sequence and applying simple mechanical principles, you can get back in the saddle quickly. This guide will teach you exactly how to safely remove a broken link, install a fresh replacement, and resume your ride with complete confidence.
Why Learning This Skill Matters
Outdoor enthusiasts and beginner cyclists often underestimate the importance of field repair skills until they face an unexpected breakdown. Learning this specific maintenance technique builds immense confidence and drastically reduces your reliance on expensive bike shops. When you ride far from urban areas, cell service and rescue options are rarely guaranteed. Being able to fix your drivetrain independently ensures you never have to walk your bicycle for miles across rough terrain.
Understanding the mechanics of your drivetrain also makes you a more attentive rider. You begin to notice subtle changes in shifting performance and can diagnose problems before they result in catastrophic failure. For campers and bikepackers, carrying fewer heavy metal tools reduces pack weight, which significantly improves the overall riding experience. Ultimately, mastering this repair method saves you time, keeps you safe, and fosters a deeper connection with your equipment.
Tools and Materials You’ll Need
Even without specialized extraction devices, you need a few common items to perform this replacement successfully. First and foremost, you must have a replacement chain equipped with a master link, often called a quick link. This component is non-negotiable because it allows you to connect the ends together manually. You will also need a pair of standard needle-nose pliers. These pliers provide the leverage necessary to manipulate the metal plates securely.
A piece of stiff wire or a bent paperclip serves as an excellent temporary holder to keep tension off the system while you work. Heavy-duty work gloves will protect your hands from grease and sharp metal edges. We also highly recommend having a clean rag and some biodegradable degreaser to wipe down the components before handling them. Finally, a small bottle of bicycle-specific lubricant is crucial for treating the new components once you finish the installation process.
10 Step-by-Step Guide on How to Change a Bike Chain Without a Chain Tool
Step 1 – Preparing Your Workspace and Bicycle
Safety and stability form the foundation of any successful mechanical repair. Begin by securing your bicycle in an upright position. If you do not own a dedicated maintenance stand, simply lean the bicycle against a sturdy wall or a large tree. Shift your gears so that the chain rests on the smallest cog in the rear cassette and the smallest chainring in the front.
This specific gear combination minimizes the tension applied by the rear derailleur, making the entire system much easier to manipulate. Take a moment to inspect the area around the drivetrain and clear away any debris or mud. Put on your heavy-duty work gloves to protect your skin from the inevitable accumulation of grease and grime. Wipe down the entire visible section of the drivetrain with a clean rag to ensure you have a clear view of the links you need to service.
Step 2 – Locating the Master Link on Your Old Chain
The master link acts as the single connecting point designed for easy removal and installation. Finding it requires a keen eye and a bit of patience. Slowly rotate your pedals backward while closely examining the individual metal plates passing over the cassette. You are looking for a unique pair of outer plates that look slightly different from the rest.
These specific plates typically feature a slotted hole rather than a perfectly round pin enclosure. Often, manufacturers stamp an arrow or use a slightly different color to make this component stand out. If the entire system is coated in thick dirt, use your rag to clean off the side plates as they pass by. Once you spot the connecting plates, rotate the pedals until this section sits perfectly midway between the front chainring and the rear cassette, giving you the best angle for removal.
Step 3 – Creating Slack in the Drivetrain
Removing a master link requires zero tension on the immediate area you are working on. This is where your stiff piece of wire or bent paperclip comes into play. Take your wire and hook one end into a roller located about three inches to the left of the connection point.
Pull the wire across the connection point and hook the other end into a roller three inches to the right. This action pulls the two sections together, creating a completely slack loop right where the master link sits. By isolating this section from the pull of the rear derailleur, you make the manual disconnection process vastly easier. Check the loop to ensure it feels completely loose and floppy. If there is still tension, unhook the wire, pull the links closer together, and reattach your makeshift retention tool.
Step 4 – Disconnecting the Old Master Link
With the tension fully isolated, you can now separate the connecting plates. Grab your needle-nose pliers and carefully position the jaws diagonally across the master link. Place one tip of the pliers on the pin of the left plate and the other tip on the pin of the right plate.
Squeeze the pliers firmly while slightly twisting your wrist to slide the two opposite pins toward each other. You should hear a distinct clicking sound as the pins slide out of their locked positions and move into the larger release slots. Once they slide inward, the two plates will naturally pull apart. If the plates feel stubbornly stuck, apply a small drop of degreaser to loosen any compacted dirt inside the mechanism. Carefully separate the two halves and set them aside, ensuring you do not lose them if you plan to clean and reuse them later.
Step 5 – Removing the Old Chain from the Drivetrain
Now that the connection is severed, you must carefully extract the old material from the bicycle frame. Hold one end firmly in your hand and gently pull it away from the front chainring. Let the material snake its way backward through the front derailleur cage.
Continue pulling slowly so it unthreads from the rear cassette and passes through the jockey wheels of the rear derailleur. Pay close attention to exactly how the material was routed through the derailleur cage, as you will need to replicate this precise path shortly. Pulling too quickly can cause the metal edges to scratch your frame or snag on the delicate plastic jockey wheels. Once the entire length is free from the bicycle, lay it out completely flat on the ground. You will use this old piece as a template to measure your fresh replacement perfectly.
Step 6 – Sizing the New Bike Chain Appropriately
One of the most critical aspects of learning how to change a bike chain without a chain tool is establishing the correct length. Lay your brand new replacement completely flat on the ground right next to the old one you just removed. Ensure the ends line up perfectly flush with each other.
Since your old unit likely stretched out over time due to wear and tear, you must count the actual number of links rather than just looking at the overall physical length. Match the exact number of links from the old unit to the new one. If your replacement is too long, you will need to remove the excess. Because we are avoiding standard extraction devices, you must purchase a replacement specifically sized to your drivetrain or one that comes pre-cut from the manufacturer for your specific gear count.
Step 7 – Threading the New Chain Through the Derailleur
Routing the new material requires patience and careful observation. Take one end of your fresh replacement and drop it over the smallest cog on the rear cassette. Feed it downward toward the rear derailleur. Pass it behind the upper jockey wheel and carefully thread it down into the derailleur cage.
You must ensure the metal plates do not rub against the small metal tab separating the two sides of the cage. If you route it over this tab instead of under it, you will experience terrible grinding noises when you ride. Thread the end around the front of the lower jockey wheel and pull it forward toward the front of the bicycle. Pull enough slack through the mechanism so you have plenty of material to work with at the front chainring. Double-check the routing path to guarantee there are no twists or binds.
Step 8 – Positioning the Chain on the Chainring and Cassette
With the rear section properly routed through the derailleur, you need to set up the front section for the final connection. Pull the loose end forward and thread it carefully through the front derailleur cage, assuming your bicycle has one. Drape it over the top of the smallest front chainring.
Grab both loose ends and pull them toward each other in the open space between the bottom bracket and the rear cassette. The rear derailleur cage will swing forward as you apply tension, which is perfectly normal. Reattach your stiff wire or bent paperclip to hold the two ends closely together, just as you did during the removal process. This creates the slack necessary to install the fresh master link without fighting the constant spring tension of the rear derailleur mechanism. Ensure the two ends facing you are the correct inner links needed to accept the new outer plates.
Step 9 – Securing the New Master Link
Now you will finalize the connection. Take the two halves of your new quick link and apply a tiny drop of lubricant to the pins. Insert one pin through the back side of the right inner link, and insert the other pin through the front side of the left inner link. Learning how to change a bike chain without a chain tool relies heavily on snapping these plates together correctly.
Align the pins with the larger slotted holes on the opposing plates and push them together so they lock loosely. Remove your wire retention device to let the derailleur apply slight tension to the system. To lock the plates fully, position the master link above the chainstay. Hold the rear brake lever tightly to lock the back wheel, and step down firmly on the forward pedal. You will hear a loud, satisfying snap as the pins slide aggressively into their final locked positions.
Step 10 – Testing the Drivetrain and Gears
The final phase involves rigorous testing to guarantee everything functions smoothly. Lift the rear wheel off the ground or place the bicycle back into your maintenance stand. Slowly rotate the pedals forward while watching the new master link pass through the derailleur cage and over the cassette.
The movement should look completely fluid, without any stiff links or jumping as the connection point meets the gear teeth. Begin shifting through your gears one by one, moving from the smallest cogs up to the largest cogs. Listen closely for any clicking, grinding, or hesitation during the shifts. A properly installed replacement should transition seamlessly and silently between gears. Once you confirm all gears engage perfectly, apply a high-quality bicycle lubricant evenly across the rollers. Wipe away any excess fluid with a clean rag to prevent dirt from sticking to your freshly serviced drivetrain.
Common Mistakes When Changing a Chain
Many beginners make specific errors that compromise their drivetrain performance and safety. The most frequent mistake involves routing the material incorrectly through the rear derailleur cage. People often feed the links over the small retention tab located between the two jockey wheels instead of threading it below. This error results in a continuous, loud grinding noise and rapid wear on the metal plates. You must carefully inspect the path to ensure the rollers only make contact with the plastic jockey wheels.
Another major issue occurs when riders fail to lock the master link completely. If you only rely on hand pressure to snap the plates together, the connection remains precarious. You must use the pedal pressure method to force the pins into their locked positions. Failing to do so can result in the entire system snapping apart the moment you apply heavy torque on a steep climb.
Additionally, riders often measure their new replacement based on the physical length of the old one rather than counting the actual links. Because metal stretches significantly over hundreds of miles, cutting a new unit to match the stretched length of the old one leaves you with too much slack. This excess slack causes poor shifting performance and frequent drops over rough terrain. Always count the individual rollers to guarantee a perfectly sized replacement.
Expert Tips
Professional mechanics rely on several subtle techniques to make this process smoother and more efficient. Always carry a spare master link taped to your brake cables or tucked inside your saddlebag. This tiny component weighs practically nothing but saves you from total failure on the trail. When installing the quick link, inspect the tiny arrows stamped on the outer plates. These arrows must point in the direction of the drivetrain rotation when pedaling forward.
Apply your lubricant to the inside of the rollers rather than the outside plates. The outer metal surfaces do not require lubrication, and excess oil only attracts abrasive dirt and sand. Keep an old toothbrush in your cleaning kit. It works exceptionally well for scrubbing compacted grime out of your cassette teeth before you install a fresh drivetrain. Finally, always shift into your smallest gears before starting any maintenance to drastically reduce the tension you have to fight against.
Frequently Asked Questions
What happens if I install the master link backward?
Installing the connecting plates backward can severely compromise your shifting performance. The specific directional arrows stamped on the plates ensure the metal glides smoothly over the complex ramping on your cassette teeth. If reversed, the raised edges of the connection point will catch on the gear teeth, causing skipping and accelerated wear on your drivetrain components.
Can I reuse an old master link on a new drivetrain?
You should never reuse an old connecting link when installing fresh components. Manufacturers design these specific pieces to stretch and lock securely only one time. Once you force them apart, the metal grooves lose their precise tolerance. Reusing an old connection dramatically increases the risk of it snapping open under heavy pedaling pressure.
How do I know if my drivetrain is too long?
You can easily spot a setup with too much slack by looking at the rear derailleur. Shift into your smallest front chainring and smallest rear cog. If the lower section of the cage pulls so far back that the links rub against themselves, you have too much slack. The cage should maintain light tension without allowing the metal to touch.
Why does my new installation skip on the cassette?
A fresh installation often skips because the rear cassette has worn down to match the stretched pattern of your old equipment. When you introduce tight, unworn metal to worn-out gear teeth, they no longer mesh together perfectly. You typically need to replace the rear cassette simultaneously to restore flawless shifting performance and eliminate the skipping issue.
Do I need to clean the factory grease off the new components?
You should leave the sticky factory grease inside the internal rollers because it provides incredible, long-lasting lubrication. However, you must wipe the sticky residue off the exterior plates using a rag lightly dampened with degreaser. Removing the exterior stickiness prevents dust and sand from instantly clinging to your freshly installed components during your first ride.
Conclusion
Mastering routine maintenance gives you the freedom to explore further without fear of mechanical breakdowns. Knowing how to change a bike chain without a chain tool proves that you do not need a fully equipped workshop to keep your bicycle running smoothly. By relying on basic pliers, a piece of wire, and a thorough understanding of your drivetrain, you can overcome one of the most common trailside emergencies.
Taking the time to practice this skill in your garage will pay massive dividends when you find yourself miles away from the nearest bike shop. Remember to carefully measure your replacement by counting links, double-check your derailleur routing, and firmly lock that master link into place. Regular maintenance extends the life of all your components and guarantees a safer, quieter ride. Grab your tools, inspect your equipment today, and enjoy the profound confidence that comes from genuine self-reliance on the trail.

About Caleb
Caleb Merritt is a Virginia-based outdoor writer and gear analyst who has spent over a decade sleeping on the ground, crossing mountain passes, and obsessively shaving grams off his pack weight. He holds a Bachelor of Science in Environmental Science from James Madison University, where he also served as president of the university’s outdoor recreation club. After graduating, he spent three years as a wilderness educator with a backcountry youth program in the Shenandoah Valley — teaching Leave No Trace ethics, backcountry navigation, and campcraft — before moving into full-time writing in 2018.
His work focuses on one core belief: the best gear is the gear you understand. Whether he’s doing a side-by-side weight comparison of ultralight shelters or writing a beginner’s guide to building a sub-20-lb base weight kit, Caleb writes with the same directness you’d expect from a trusted trail partner. He has logged more than 4,000 miles across iconic routes including the John Muir Trail, the Wind River Range, Vermont’s Long Trail, and the Collegiate Peaks Loop in Colorado.
Areas of Expertise
- Ultralight backpacking systems and base weight optimization
- Tent, tarp, and shelter testing across three-season and shoulder-season conditions
- Sleeping bag and quilt temperature rating verification
- Backpacking nutrition, meal planning, and calorie-per-ounce analysis
- Leave No Trace principles and wilderness ethics
- Campfire safety, bear country protocols, and water treatment methods
- Gear care, repair, and long-term durability assessment
Education
James Madison University — B.S. in Environmental Science, 2015
During his time at JMU, Caleb served as President of the Outdoor Recreation Club, where he planned and led more than 30 backcountry trips annually across the Blue Ridge Mountains and Appalachian Trail corridor. The role sharpened his ability to assess gear performance under real conditions, manage group safety in remote environments, and develop the kind of practical trail knowledge that no classroom can teach.
Professional Experience
Gear Writer & Senior Contributor — [campeox.com]
Produces in-depth gear reviews, buyer’s guides, and how-to content across backpacking, camping, and ultralight hiking categories. Tests all gear in real field conditions before publishing recommendations.
Wilderness Educator & Trip Leader — Shenandoah Backcountry Youth Program — 2015–2018 Led multi-day backcountry expeditions for teens and young adults throughout Shenandoah National Park and George Washington National Forest. Taught LNT principles, orienteering, first aid awareness, and campcraft fundamentals.
Outdoor Recreation Club President — James Madison University — 2013–2015 Organized and led university-sponsored hiking, backpacking, and camping trips in the Blue Ridge Mountains and Appalachian Trail corridor. Managed club budget, safety protocols, and trip logistics for a membership of 120+ students.
Editorial Standards
Every piece of gear Caleb recommends has been personally tested in the field — not just unboxed and described. His review process includes a minimum of two overnight trips per shelter, a full-season evaluation for sleep systems, and side-by-side comparisons wherever possible. He does not accept payment for positive reviews. Affiliate relationships, where they exist, are always disclosed in accordance with FTC guidelines.
All factual claims about gear specifications, trail distances, and safety recommendations are cross-referenced against manufacturer data sheets and established sources such as the Leave No Trace Center for Outdoor Ethics and the American Hiking Society before publication.