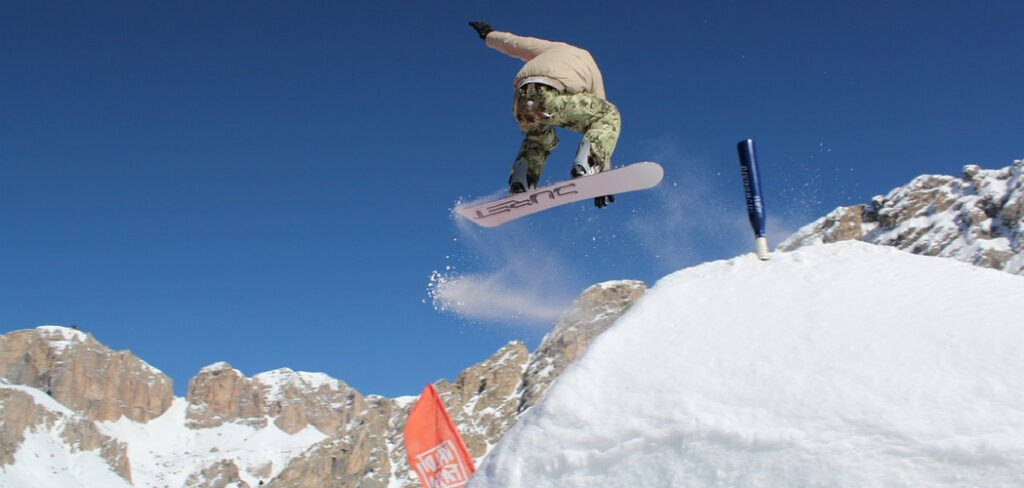
Getting ready to hit the snowy slopes for the very first time feels amazing. You probably picture yourself gliding down the mountain with cold air rushing past your face. But before you can carve up the fresh powder, you need the right gear under your boots. Learning how to choose a snowboard might seem a little overwhelming at first. You will encounter strange terms like camber, rocker, and flex ratings.
Do not let the technical jargon scare you away from this incredible winter sport. Every expert rider started exactly where you are standing right now. This guide breaks down the selection process into simple, easy pieces so you can feel confident making your purchase. We will walk through everything from measuring your height and weight to finding the perfect board profile for a beginner. By the end of this article, you will know exactly what to look for before you head to the mountain.
Why Understanding Your Gear Matters
Many beginners make the mistake of grabbing the first board that looks cool. Unfortunately, a board that features a great graphic might not actually fit your body type or skill level. Riding the wrong equipment makes learning much harder than it needs to be. You might struggle to turn, lose your balance often, or catch your edges on the snow.
When you understand your gear, you set yourself up for immediate success. The correct length and width provide stability as you learn to balance. A softer flex rating gives you the forgiveness you need when you make inevitable beginner mistakes. Getting familiar with your equipment also keeps you safe on the mountain. You will experience fewer hard falls and spend more time actually enjoying the ride. Understanding your board simply translates to a much faster, more enjoyable learning curve.
Tools and Materials You’ll Need
Before you start shopping for your new ride, you should gather a few basic items. Having these things ready will make the measuring and fitting process much easier. You do not need anything fancy, just a few household items to get accurate numbers.
- A flexible measuring tape to find your exact height and check your stance width.
- A standard bathroom scale to determine your current weight in pounds or kilograms.
- A well-fitting pair of snowboard boots to measure against the width of the deck.
- A notepad and pen to write down your measurements and track different board models.
- A pair of warm snowboard socks (optional, but highly recommended for getting an accurate boot fit).
10 Step-by-Step Guide on How to Choose a Snowboard
Step 1 – Measure Your True Body Weight
Your weight plays the biggest role in how a snowboard bends and flexes on the snow. Start by stepping onto a reliable bathroom scale. You want an honest number here because boards are engineered to respond to specific weight ranges. If you buy a board designed for someone much heavier, you will not be able to bend it properly. This makes turning feel stiff and exhausting.
On the other hand, if you exceed the board’s weight limit, it will feel loose and unstable under your feet. Every manufacturer prints a recommended weight range on the back of the board or on their website. Write your weight down and keep it handy as you look at different brands. This single measurement narrows down your choices faster than anything else.
Step 2 – Measure Your Height Accurately
While weight remains the most critical factor, your height also matters. Grab your flexible measuring tape and find your exact height without shoes on. Traditionally, people stood a board up next to them to see if it reached their chin. That old method still gives you a decent starting point for all-mountain riding.
However, modern board shapes mean you cannot rely on height alone anymore. A taller person naturally has a wider stance, which requires a slightly longer board for proper balance. If you are exceptionally tall but thin, you might need a customized size. Just record your height so you can cross-reference it with the manufacturer size charts. Combining your height and weight gives you the exact length range you need.
Step 3 – Determine Your Boot Size and Board Width
You cannot figure out how to choose a snowboard without looking at your feet. Your boot size dictates the width of the board you must buy. If your board runs too narrow, your toes and heels will drag in the snow when you turn. This causes immediate crashes known as toe drag or heel drag.
Conversely, a board that is too wide makes shifting your weight from edge to edge feel sluggish and difficult. Men with a boot size of eleven or larger usually need a wide board. Women with a size ten or larger should also look at wider options. Always place your boots on the deck before buying to ensure they only hang over the edges by about half an inch.
Step 4 – Identify Your Riding Style
Beginners should almost always start with an all-mountain snowboard. These versatile boards perform well in various snow conditions and handle different types of terrain. They allow you to explore groomed trails, small powder stashes, and even minor jumps as you improve.
As you progress, you might discover you prefer a specific style. Freestyle boards run shorter and feature twin shapes for riding in the terrain park. Freeride boards run longer and stiffer for carving fast down steep, deep mountainsides. But for now, stick to the all-mountain category. This style gives you a balanced, predictable ride while you master your fundamental turns and stops.
Step 5 – Select the Right Camber Profile
The profile refers to how the board curves when you look at it from the side. Traditional camber bows up in the middle, offering great edge hold and power. However, standard camber catches edges easily, making it frustrating for beginners. Rocker profiles bend upward like a banana, which feels incredibly loose and forgiving.
For your first board, look for a hybrid profile. A flat-to-rocker or camber-rocker-camber blend gives you the best of both worlds. The flat or cambered sections keep you stable on hard snow. The rockered tips prevent you from catching your edges when you make mistakes. This specific profile accelerates your learning process by keeping you upright.
Step 6 – Check the Flex Rating
Snowboards come with a flex rating usually ranging from one to ten. A rating of one means the board feels like a wet noodle, while a ten feels like a stiff plank of wood. When learning how to choose a snowboard, you want to focus strictly on softer flex ratings. Look for a number between two and four.
A soft board requires much less physical effort to turn and manipulate. It forgives clumsy weight shifts and sloppy foot movements. Stiff boards require precise technique and strong muscles to control, which you will develop later. Start soft to build your confidence, and upgrade to a stiffer flex once you start riding faster and more aggressively.
Step 7 – Choose the Board Shape
Snowboards come in three primary shapes: directional, true twin, and directional twin. True twin boards feature a perfectly symmetrical nose and tail. They ride exactly the same whether you face forward or backward. Directional boards have a longer nose and a stiffer tail, meant strictly for riding forward down the mountain.
For a beginner, a true twin or a directional twin makes the most sense. You will likely spend time figuring out if you ride “regular” (left foot forward) or “goofy” (right foot forward). A twin shape lets you experiment with both stances comfortably. It also helps you practice falling leaves and switch riding as you build your fundamental balance.
Step 8 – Inspect the Base Material
Turn the board over and look at the base material touching the snow. Manufacturers use two main types of bases: extruded and sintered. Sintered bases absorb a lot of wax and slide incredibly fast. However, they cost more money and require constant maintenance and waxing to perform well.
Extruded bases hold less wax and ride a bit slower. For a beginner, an extruded base is actually perfect. You do not need blazing speed while you learn to connect your turns. Extruded bases also require very little maintenance and remain highly durable if you hit rocks or branches. Save your money and stick with an extruded base for your first setup.
Step 9 – Verify the Mounting System
Your snowboard needs to connect to your bindings, and different brands use different mounting systems. Most companies use a standard four-by-four or two-by-four insert pattern. This features rows of holes where you screw the bindings directly into the deck.
One major brand uses a channel system instead of traditional holes. The channel allows for infinite stance adjustments, but it requires specific bindings to work properly. Before you finalize your board purchase, make sure you know which mounting system it uses. You want to ensure the bindings you plan to buy will actually fit the board without needing special adapter discs.
Step 10 – Set a Realistic Budget
Snowboarding gear adds up quickly, so you need to manage your money wisely. Do not blow your entire budget on a top-tier professional board. As a beginner, you will not even notice the high-tech features that make those boards so expensive. You might also ding the board up a bit as you learn to ride the chairlift.
Look for entry-level models from reputable brands. These boards provide plenty of quality without breaking the bank. You can also look for last year’s models, which often go on sale at a steep discount. Save the extra money to invest in a really comfortable pair of boots and a warm waterproof jacket.
Common Mistakes When Picking Your First Board
Many eager beginners rush into a purchase and end up regretting their choice on the mountain. One of the biggest mistakes involves buying a board purely based on the top sheet graphics. While a cool design looks great in photos, the graphic does nothing to help you ride better. You should always prioritize the length, width, and flex over the visual appeal.
Another frequent error involves borrowing an old, stiff board from a taller, heavier friend. A hand-me-down might save you money, but riding a board meant for an advanced, heavier rider will destroy your confidence. You will find it impossible to turn and will spend the entire day falling down.
People also frequently buy boards that run too narrow for their boots. They ignore the width measurement, leading to terrible toe drag that causes constant wipeouts. Finally, beginners often buy stiff freeride boards because they think they want to ride fast immediately. Starting on a stiff board feels like trying to learn how to drive in a professional race car. You must walk before you run, so stick to a soft, forgiving all-mountain board until your skills improve.
Expert Tips
Talk to the staff at your local snowboard shop instead of just guessing online. These professionals fit dozens of people every week and know exactly how different brands fit. They can measure your feet properly and point you toward entry-level boards that match your specific dimensions.
If you feel totally unsure about committing to a purchase, try renting first. Renting allows you to test out different lengths and profiles on the mountain. You can figure out if you prefer a slightly longer or shorter deck before you spend your hard-earned money. Always prioritize your boots over the board. If your feet hurt, the best snowboard in the world will not save your day. Invest your time into finding boots that fit perfectly, then match the board width to those specific boots.
Frequently Asked Questions
What size snowboard should I buy for my height and weight?
You should prioritize your weight over your height when finding the right size. Check the manufacturer size charts, which list a specific weight range for every board length. Typically, a beginner board should stand somewhere between your collarbone and your chin. Heavier riders need slightly longer boards, while lighter riders need shorter ones to maintain proper flex.
Do I need a wide snowboard?
You only need a wide snowboard if your boots hang too far over the edges. Generally, men wearing a size eleven boot or larger require a wide deck. Women wearing a size ten or larger should also seek out wider options. This prevents your toes and heels from dragging in the snow during deep turns.
What is the difference between rocker and camber?
Camber refers to a board that arches upward in the middle, offering strong edge control for advanced riders. Rocker means the board curves upward at the nose and tail, resembling a banana shape. Rocker boards feel loose, catch-free, and highly forgiving. Beginners usually perform best on a hybrid profile that mixes both shapes together.
Should I buy a soft or stiff snowboard?
Beginners must start with a soft-flexing snowboard. Soft boards forgive clumsy mistakes and require very little leg strength to steer. They help you master the basic movements without catching your edges constantly. Stiff boards provide high-speed stability but demand aggressive, precise technique that takes years to develop.
Does the snowboard brand really matter?
Sticking to well-known, reputable snowboarding brands ensures you get quality materials and a solid warranty. However, you do not need to obsess over finding the most expensive brand on the market. Most major companies offer excellent entry-level boards designed specifically for new riders. Focus on the board’s specifications and fit rather than the logo printed on it.
Conclusion
Taking the time to research your gear transforms your first days on the mountain from frustrating to incredibly fun. Finding the right equipment simply comes down to knowing your own body and respecting your current skill level. You need a board that matches your weight, fits your boots perfectly, and offers a forgiving flex.
Do not let aggressive marketing push you toward advanced gear you are not ready to ride yet. Stick to a soft, twin-shaped, all-mountain deck with a hybrid profile. This combination gives you the absolute best foundation for learning edge control and balance. Now that you understand how to choose a snowboard, you can shop with confidence and excitement. Grab your measuring tape, check your boot size, and get ready to carve up your first snowy trails this winter.

About Caleb
Caleb Merritt is a Virginia-based outdoor writer and gear analyst who has spent over a decade sleeping on the ground, crossing mountain passes, and obsessively shaving grams off his pack weight. He holds a Bachelor of Science in Environmental Science from James Madison University, where he also served as president of the university’s outdoor recreation club. After graduating, he spent three years as a wilderness educator with a backcountry youth program in the Shenandoah Valley — teaching Leave No Trace ethics, backcountry navigation, and campcraft — before moving into full-time writing in 2018.
His work focuses on one core belief: the best gear is the gear you understand. Whether he’s doing a side-by-side weight comparison of ultralight shelters or writing a beginner’s guide to building a sub-20-lb base weight kit, Caleb writes with the same directness you’d expect from a trusted trail partner. He has logged more than 4,000 miles across iconic routes including the John Muir Trail, the Wind River Range, Vermont’s Long Trail, and the Collegiate Peaks Loop in Colorado.
Areas of Expertise
- Ultralight backpacking systems and base weight optimization
- Tent, tarp, and shelter testing across three-season and shoulder-season conditions
- Sleeping bag and quilt temperature rating verification
- Backpacking nutrition, meal planning, and calorie-per-ounce analysis
- Leave No Trace principles and wilderness ethics
- Campfire safety, bear country protocols, and water treatment methods
- Gear care, repair, and long-term durability assessment
Education
James Madison University — B.S. in Environmental Science, 2015
During his time at JMU, Caleb served as President of the Outdoor Recreation Club, where he planned and led more than 30 backcountry trips annually across the Blue Ridge Mountains and Appalachian Trail corridor. The role sharpened his ability to assess gear performance under real conditions, manage group safety in remote environments, and develop the kind of practical trail knowledge that no classroom can teach.
Professional Experience
Gear Writer & Senior Contributor — [campeox.com]
Produces in-depth gear reviews, buyer’s guides, and how-to content across backpacking, camping, and ultralight hiking categories. Tests all gear in real field conditions before publishing recommendations.
Wilderness Educator & Trip Leader — Shenandoah Backcountry Youth Program — 2015–2018 Led multi-day backcountry expeditions for teens and young adults throughout Shenandoah National Park and George Washington National Forest. Taught LNT principles, orienteering, first aid awareness, and campcraft fundamentals.
Outdoor Recreation Club President — James Madison University — 2013–2015 Organized and led university-sponsored hiking, backpacking, and camping trips in the Blue Ridge Mountains and Appalachian Trail corridor. Managed club budget, safety protocols, and trip logistics for a membership of 120+ students.
Editorial Standards
Every piece of gear Caleb recommends has been personally tested in the field — not just unboxed and described. His review process includes a minimum of two overnight trips per shelter, a full-season evaluation for sleep systems, and side-by-side comparisons wherever possible. He does not accept payment for positive reviews. Affiliate relationships, where they exist, are always disclosed in accordance with FTC guidelines.
All factual claims about gear specifications, trail distances, and safety recommendations are cross-referenced against manufacturer data sheets and established sources such as the Leave No Trace Center for Outdoor Ethics and the American Hiking Society before publication.