Customizing your travel gear is an exciting way to showcase your adventures, personality, and style. Whether you just returned from an epic camping trip or simply want to refresh your everyday carry, adding flair makes your gear distinctly yours. But if you have never done it before, you might wonder about the best method to make sure those cool designs actually stay put.
Learning how to stick patches on backpacks is easier than you might think, and it requires just a few basic tools. In this guide, we will walk you through the entire process from start to finish. You will discover exactly what you need to do to achieve a secure, long-lasting hold. Get ready to transform that plain fabric into a storytelling canvas that travels everywhere with you.
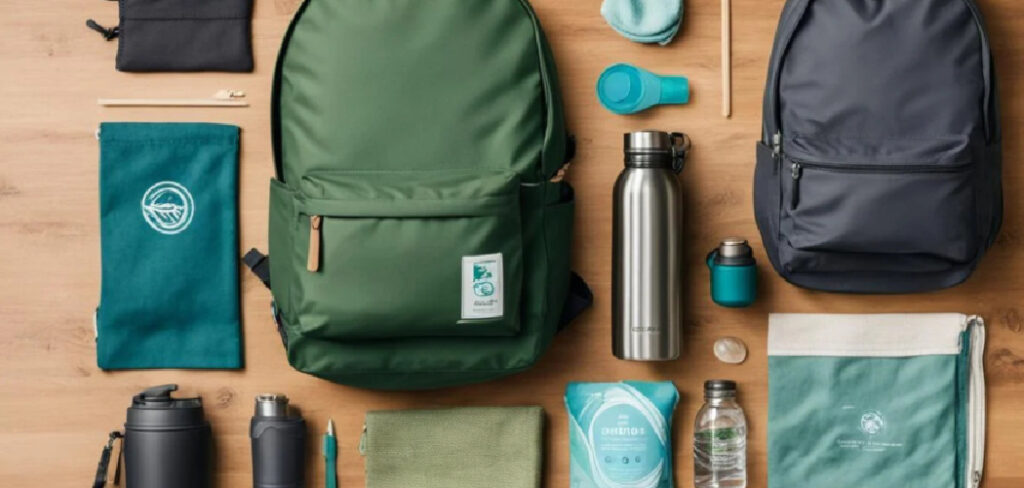
Why Customize Your Gear With Patches?
Adding personalized designs to your camping gear serves multiple practical and creative purposes. First, it makes identifying your bag at a crowded airport luggage carousel or a busy campsite incredibly easy. You will never grab the wrong black rucksack again. Beyond the practical benefits, customizing your gear allows you to weave a visual tapestry of your life experiences.
Every national park you visit, every country you explore, and every trail you conquer can be represented right there on your favorite bag. It transforms a simple piece of nylon or canvas into a cherished keepsake. Furthermore, applying these emblems can actually extend the life of your equipment. A well-placed applique can easily cover up an ugly scratch, a small tear, or a stubborn stain, saving you the cost of replacing an otherwise perfectly good bag.
7 Step-by-Step Guide on How to Stick Patches on Backpacks
Step 1: Gather Your Necessary Supplies
Before you begin the application process, you need to assemble the right materials to ensure a durable bond. For a classic iron-on application, grab a standard household iron, a clean cotton pressing cloth or a simple bandana, and a sturdy ironing board. If your bag is made of sensitive synthetic materials like nylon, which might melt under intense heat, you will need a strong fabric adhesive instead of an iron.
Fabric glue provides an excellent alternative for heat-sensitive camping equipment. Additionally, having a few safety pins on hand helps you temporarily secure the design in place before you make the final commitment. Gathering everything beforehand keeps the process smooth and prevents any mid-project scrambling.
Step 2: Clean and Prep the Fabric Surface
A clean surface is absolutely crucial for any adhesive to create a strong, permanent bond with the fabric. Take a damp cloth and gently wipe down the specific area where you plan to place your new emblem. If your bag has been through intense hiking trails and is visibly dirty, you might need to use a mild detergent to spot-clean the area thoroughly.
Allow the spot to air dry completely before moving forward, as moisture will interfere with the glue or the heat-activated backing. A smooth, dirt-free foundation ensures that the edges will not peel up after just a few trips. Taking a few extra minutes to prep the material makes a massive difference in longevity.
Step 3: Determine the Perfect Placement
Deciding exactly where your emblem should go is the most creative part of the process. Lay your empty bag flat on a table and experiment with different locations until you find the spot that looks best. Keep in mind how the bag folds, bends, and stretches when fully loaded with heavy camping gear.
Avoid placing designs directly over zippers, seams, or heavily creased areas, as the constant movement will eventually cause the edges to lift. Once you find the ideal location, use two or three small safety pins to pin it temporarily. Put the bag on your shoulders and look in the mirror to confirm the placement looks exactly right before applying any heat or glue.
Step 4: Check the Material Compatibility
Knowing exactly what type of fabric you are working with dictates the best application method. Heavy cotton and sturdy canvas fabrics handle intense heat incredibly well, making them perfect candidates for standard iron-on methods. However, many modern hiking bags are crafted from lightweight nylon or polyester.
These synthetic fibers can easily melt, warp, or scorch if you apply a hot iron directly to them. Always check the manufacturer care label tucked inside the main compartment. If the label explicitly warns against ironing, skip the heat method entirely. Figuring out how to stick patches on backpacks made of delicate synthetics means relying heavily on premium fabric glue or permanent double-sided tape designed specifically for outdoor fabrics.
Step 5: Apply Heat With a Pressing Cloth
If your fabric is heat-safe, turn your iron to the highest cotton setting and make sure the steam function is completely turned off. Remove the safety pins and place your pressing cloth directly over the emblem to protect its embroidered threads from scorching. Press the hot iron down firmly over the cloth, holding it absolutely still for about thirty to forty-five seconds.
Do not move the iron back and forth like you are ironing a dress shirt, as this can shift the design out of place. The steady, heavy pressure forces the melted adhesive deep into the woven fibers of your bag. Lift the iron carefully and let the entire area cool down for a few seconds.
Step 6: Secure the Edges From the Inside
For maximum durability, you need to apply heat from both sides of the material. Once the exterior feels relatively cool to the touch, open up your main compartment and maneuver the fabric so you can access the exact reverse side of your freshly applied design. Place your pressing cloth over this interior area and apply firm pressure with your hot iron for another thirty seconds.
Heating the underside pulls the adhesive even further through the tough fibers, creating a much stronger bond that can withstand rough travel conditions. This simple extra step significantly reduces the chances of those dreaded peeling corners when you brush up against rocks or tree branches on the trail.
Step 7: Allow Ample Cooling and Curing Time
Patience is your best friend during this final stage of the application process. Whether you utilized a hot iron or opted for heavy-duty fabric adhesive, you must let the chemical bond cure completely undisturbed. Leave the bag lying flat on a table for at least twenty-four hours before you pack it full of heavy gear or take it outside.
If you used fabric glue, this waiting period allows the liquid to solidify into a flexible, waterproof grip. Rushing this curing process by immediately wearing the bag will almost certainly cause the design to slide out of place or peel off completely. Give it the time it needs, and your customized gear will be ready for endless adventures.
Frequently Asked Questions (FAQ)
Can I Use Super Glue to Attach Patches?
You should generally avoid using standard super glue for fabric applications. Super glue dries incredibly hard and brittle, which ruins the natural flexibility of woven materials. As your bag bends and stretches during travel, the brittle glue will eventually crack and peel. Instead, you should always choose dedicated fabric adhesives. These specialized glues dry flexible, remain waterproof, and move naturally with the underlying material without causing stiff spots.
Will Iron-On Patches Come Off in the Rain?
Properly applied iron-on designs are generally water-resistant and will easily survive light rain showers during your camping trips. However, prolonged exposure to heavy downpours or repeated runs through a washing machine can eventually weaken the adhesive backing over time. To ensure maximum weather resistance, consider reinforcing the outer edges. You can do this by either:
- Adding a few quick hand stitches around the border.
- Applying a thin bead of waterproof fabric glue.
How Do I Remove an Old Patch Without Damaging the Bag?
Removing an old design requires a delicate touch to avoid tearing the underlying material. First, use a hairdryer on a medium heat setting to gently warm up the old adhesive. Once the glue softens, carefully lift the edge using a pair of dull tweezers. If sticky residue remains on the bag, you can remove it by dabbing a small amount of rubbing alcohol or an adhesive remover onto the spot with a clean rag.
Are Sew-On Patches Better Than Iron-On Ones?
Sewing provides the most durable and permanent hold possible, especially for heavy-duty outdoor equipment that sees frequent abuse. While heat-activated adhesives are incredibly convenient and fast to apply, they can eventually weaken under extreme conditions. Many experienced travelers prefer a hybrid approach. They use the iron-on method to secure the design precisely in place, and then they add a simple running stitch around the perimeter for unbeatable, long-lasting security.
Can I Iron Patches Onto a Leather Backpack?
You must never use a hot iron directly on a genuine or synthetic leather surface. The intense heat will instantly warp, scorch, and permanently ruin the material. For leather goods, your best options are utilizing a specialized leather adhesive or taking the bag to a professional cobbler for heavy-duty sewing. Double-sided fabric tape can also provide a decent temporary hold if you just want to test a design out before committing.
Conclusion
Customizing your travel gear is an incredibly rewarding process that turns ordinary equipment into a personalized journal of your outdoor adventures. By taking the time to prep your fabric, verifying your material compatibility, and applying the right amount of heat or adhesive, you ensure your designs stay firmly attached for years to come.
Remember to always double-check your placement and give the bond plenty of time to cure before hitting the trail. Now that you know exactly how to stick patches on backpacks, it is time to dig out those souvenirs you have been collecting. Gather your supplies, pick your favorite designs, and start transforming your everyday bag into a rugged masterpiece today!
About Caleb
Caleb Merritt is a Virginia-based outdoor writer and gear analyst who has spent over a decade sleeping on the ground, crossing mountain passes, and obsessively shaving grams off his pack weight. He holds a Bachelor of Science in Environmental Science from James Madison University, where he also served as president of the university’s outdoor recreation club. After graduating, he spent three years as a wilderness educator with a backcountry youth program in the Shenandoah Valley — teaching Leave No Trace ethics, backcountry navigation, and campcraft — before moving into full-time writing in 2018.
His work focuses on one core belief: the best gear is the gear you understand. Whether he’s doing a side-by-side weight comparison of ultralight shelters or writing a beginner’s guide to building a sub-20-lb base weight kit, Caleb writes with the same directness you’d expect from a trusted trail partner. He has logged more than 4,000 miles across iconic routes including the John Muir Trail, the Wind River Range, Vermont’s Long Trail, and the Collegiate Peaks Loop in Colorado.
Areas of Expertise
- Ultralight backpacking systems and base weight optimization
- Tent, tarp, and shelter testing across three-season and shoulder-season conditions
- Sleeping bag and quilt temperature rating verification
- Backpacking nutrition, meal planning, and calorie-per-ounce analysis
- Leave No Trace principles and wilderness ethics
- Campfire safety, bear country protocols, and water treatment methods
- Gear care, repair, and long-term durability assessment
Education
James Madison University — B.S. in Environmental Science, 2015
During his time at JMU, Caleb served as President of the Outdoor Recreation Club, where he planned and led more than 30 backcountry trips annually across the Blue Ridge Mountains and Appalachian Trail corridor. The role sharpened his ability to assess gear performance under real conditions, manage group safety in remote environments, and develop the kind of practical trail knowledge that no classroom can teach.
Professional Experience
Gear Writer & Senior Contributor — [campeox.com]
Produces in-depth gear reviews, buyer’s guides, and how-to content across backpacking, camping, and ultralight hiking categories. Tests all gear in real field conditions before publishing recommendations.
Wilderness Educator & Trip Leader — Shenandoah Backcountry Youth Program — 2015–2018 Led multi-day backcountry expeditions for teens and young adults throughout Shenandoah National Park and George Washington National Forest. Taught LNT principles, orienteering, first aid awareness, and campcraft fundamentals.
Outdoor Recreation Club President — James Madison University — 2013–2015 Organized and led university-sponsored hiking, backpacking, and camping trips in the Blue Ridge Mountains and Appalachian Trail corridor. Managed club budget, safety protocols, and trip logistics for a membership of 120+ students.
Editorial Standards
Every piece of gear Caleb recommends has been personally tested in the field — not just unboxed and described. His review process includes a minimum of two overnight trips per shelter, a full-season evaluation for sleep systems, and side-by-side comparisons wherever possible. He does not accept payment for positive reviews. Affiliate relationships, where they exist, are always disclosed in accordance with FTC guidelines.
All factual claims about gear specifications, trail distances, and safety recommendations are cross-referenced against manufacturer data sheets and established sources such as the Leave No Trace Center for Outdoor Ethics and the American Hiking Society before publication.