Your premium bag deserves exceptional care after accompanying you on countless commutes, flights, and daily adventures. Dirt, coffee spills, and general wear can easily compromise the sleek appearance of high-end ballistic nylon and leather. You might feel hesitant about washing such a valuable item, fearing you could damage the material or ruin its shape. Fortunately, learning how to clean tumi backpack the right way guarantees your gear stays pristine and functional for years.
The process requires gentle techniques, the proper supplies, and a little patience. You do not need expensive professional services to restore that brand-new look. This guide provides a straightforward, expert approach to maintaining your bag safely at home. Read on to discover the complete step-by-step method for refreshing your favorite travel companion.
Why Cleaning Your Tumi Matters
Regular maintenance goes far beyond basic aesthetics when it comes to premium luggage and daily carry items. Grime and dirt particles actively degrade fabric fibers over time, weakening the structural integrity of your bag. Outdoor enthusiasts, frequent flyers, and daily commuters expose their gear to harsh elements, pollution, and unexpected spills. By keeping the exterior and interior clean, you prevent permanent stains from setting into the ballistic nylon or premium leather trim.
Proper care also protects the intricate zippers and hardware from jamming due to accumulated dust. A well-maintained bag simply performs better and lasts significantly longer, giving you the best return on your investment. Establishing a routine cleaning habit ensures your gear always looks professional for business meetings and stays durable for rugged weekend getaways.
Tools and Materials You’ll Need
Gathering the correct supplies beforehand ensures a smooth and effective cleaning process. You want to avoid harsh chemicals or abrasive tools that could scratch hardware or fade the nylon.
- Mild liquid dish soap or specialized nylon cleaner
- Two soft-bristled brushes (a clean toothbrush works well for tight spaces)
- Three clean, lint-free microfiber cloths
- A small bowl of lukewarm water
- A handheld vacuum with a brush attachment
- Gentle leather conditioner (if your bag features leather accents)
- Optional: A handheld fabric steamer to help lift stubborn wrinkles and refresh the nylon material after washing.
Having these items ready will streamline your workflow. You can transition seamlessly from dry brushing to spot treating without leaving your bag soaking wet while you search for a cloth.
10 Step-by-Step Guide on How to Clean Tumi Backpack
Step 1 – Empty Every Compartment and Pocket
Begin by completely emptying your bag. Unzip every main compartment, side pocket, and hidden stash area to ensure nothing remains inside. It is incredibly easy to overlook a rogue pen, a forgotten lip balm, or small electronics tucked away in a deep pocket. Leaving these items inside during the washing process will ruin them and potentially cause permanent stains on the fabric.
Shake the bag gently upside down over a trash can to dislodge loose debris, wrappers, and large crumbs. Pull the interior linings outward if the design allows it, as this makes the internal space much more accessible. Taking your time during this initial phase prevents disastrous accidents later on. You want a completely bare canvas before applying any water or cleaning solutions.
Step 2 – Vacuum the Interior Thoroughly
Once you remove all personal items, grab your handheld vacuum equipped with a soft brush attachment. Turn the suction to a moderate setting to avoid damaging the delicate interior lining. Carefully run the vacuum nozzle along the bottom seams, corners, and edges where dust and lint naturally gather over time.
Pay special attention to the laptop compartment, as small grit can easily scratch your devices if left behind. Vacuuming removes the dry, loose dirt that a cloth simply pushes around. If you lack a brush attachment, use a dry, clean paintbrush to sweep the dirt out of tight crevices while holding the vacuum hose nearby. This dry cleaning method prepares the interior fabric for any necessary spot treatments without creating muddy streaks.
Step 3 – Dry Brush the Exterior Nylon
Before introducing any water to the exterior, you must remove surface-level dust and dried mud. Take a dry, soft-bristled brush and gently sweep the outside of your bag. Work in long, even strokes, following the weave of the ballistic nylon or fabric. Brushing lifts abrasive particles that could otherwise get ground into the material during the wet washing phase.
Focus heavily on the bottom panel, the shoulder straps, and the back mesh area, as these spots endure the most friction and accumulate the most grime. Do not apply heavy pressure, especially around leather monograms or delicate zippers. This gentle sweeping action is a crucial preliminary step for anyone learning how to clean tumi backpack safely. It prevents superficial dirt from turning into stubborn mud once the soapy water touches the fabric.
Step 4 – Prepare Your Cleaning Solution
Creating the right cleaning mixture is essential for protecting your bag’s premium materials. Fill a small bowl with lukewarm water—never use hot water, as high temperatures can warp synthetic fibers and damage water-resistant coatings. Add just two or three drops of mild liquid dish soap to the water and stir gently. You want a heavily diluted solution that produces a light, soapy lather rather than a dense foam.
Avoid using bleach, harsh laundry detergents, or heavy degreasers, as these will strip the color and degrade the nylon. If you prefer a specialized approach, you can substitute the dish soap with a dedicated fabric or luggage cleaner. The goal is to create a gentle, lifting agent that breaks down oils and stains without leaving a sticky, chemical residue behind.
Step 5 – Spot Treat Stubborn Stains
Dip a corner of your clean microfiber cloth into the soapy solution and wring out the excess liquid. The cloth should feel slightly damp, never dripping wet. Gently dab the stained areas on the exterior nylon, using a light tapping motion to lift the stain out of the fabric. Never scrub vigorously or use a circular rubbing motion, as this forces the dirt deeper into the weave and causes the material to pill.
For highly stubborn marks, like coffee or food spills, let the damp cloth rest on the spot for a minute to loosen the grime. You can use a soft toothbrush with a tiny amount of soap to gently agitate the affected area. Always test your soap solution on a hidden area first, such as the bottom panel, to ensure colorfastness.
Step 6 – Wipe Down the Entire Exterior
After tackling the specific stains, it is time to refresh the rest of the bag. Moisten a fresh section of your microfiber cloth with the soapy water and wring it out completely. Lightly wipe down the entire exterior surface, moving systematically from top to bottom. This ensures an even, clean finish and prevents water rings from forming around the previously spot-treated areas.
Pay close attention to the padded shoulder straps and the back panel, as sweat and body oils accumulate heavily in these zones. Use a gentle, sweeping motion to clean the ballistic nylon. Remember that the goal of learning how to clean tumi backpack is to refresh the material without oversaturating it. The exterior should only feel slightly cool and damp to the touch when you finish wiping it down.
Step 7 – Clean the Hardware and Zippers
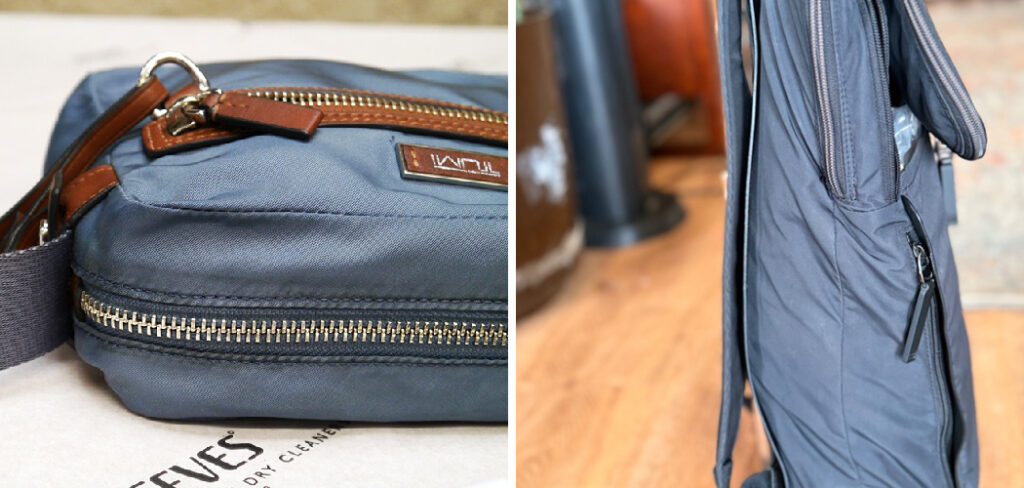
Your bag features heavy-duty metal zippers, buckles, and logo plaques that require specific care to maintain their shine. Take a dry, soft toothbrush and gently brush the zipper tracks to remove any trapped dust or grit. This simple action prevents the zippers from catching and keeps them running smoothly.
Next, slightly dampen a microfiber cloth with plain water and carefully wipe down the metal hardware. Avoid getting soapy water on the metal, as soap residue can cause tarnishing over time. If the zippers feel stiff after cleaning, apply a tiny amount of zipper wax or a clear silicone lubricant to the teeth. Work the zipper back and forth a few times to distribute the lubricant evenly, ensuring smooth operation for your next trip.
Step 8 – Condition the Leather Accents
Many premium bags feature beautiful leather trim on the handles, zipper pulls, and monogram patches. Water and soap quickly dry out genuine leather, leading to unsightly cracking and peeling. If your damp cloth accidentally touched the leather components during the previous steps, quickly dry them with a fresh towel.
Take a premium leather conditioner and apply a pea-sized amount to a dry microfiber cloth. Gently massage the conditioner into the leather accents using smooth, even strokes. This replenishes the natural oils, restores the supple texture, and provides a layer of protection against future moisture. Allow the conditioner to absorb completely before handling the bag. Proper leather care elevates the entire look of your luggage and prevents premature aging.
Step 9 – Rinse with a Clean Damp Cloth
You must remove all residual soap from the nylon fabric to prevent stiffness and white streaks. Empty your bowl of soapy water, rinse it out, and fill it with fresh, lukewarm water. Take a brand-new microfiber cloth, dip it into the clean water, and wring it out until it is barely damp.
Wipe down the entire exterior of the bag again, working carefully over the areas you previously washed. You may need to rinse the cloth several times during this process to ensure you are lifting the soap rather than spreading it. Leaving soap residue behind attracts dirt much faster, ruining all your hard work. Take your time with this rinsing phase to guarantee a flawless, soft finish on the ballistic nylon.
Step 10 – Air Dry in a Well-Ventilated Area
The drying phase requires patience and the right environment to protect the bag’s structural shape. Never put your bag in a mechanical dryer or use a high-heat hair dryer, as intense heat permanently warps synthetic fibers and melts adhesives. Instead, hang the bag by its top handle in a shaded, well-ventilated room.
Leave all the compartments and pockets completely unzipped to promote maximum airflow throughout the interior. You can stuff the main compartments with clean, dry towels or plain packing paper to help the bag hold its shape while it dries. Keep the bag away from direct sunlight, which causes severe color fading. Allow the bag to air dry naturally for at least twenty-four hours before packing your items back inside.
Common Mistakes When Washing Your Gear
Many owners accidentally damage their premium luggage by taking harmful shortcuts during the cleaning process. The most severe mistake is tossing the bag directly into a washing machine. The intense agitation and complete water submersion will destroy the internal structure, warp the leather accents, and strip away the water-resistant coating on the nylon. Hand washing is the only safe method for preserving the shape and integrity of high-end travel gear.
Another frequent error involves using harsh household cleaners, bleach, or stiff-bristled scrub brushes. Heavy-duty chemicals strip the dye from ballistic nylon, leaving permanent discolored patches. Stiff brushes rip the top layer of the fabric, causing severe pilling and a fuzzy, worn-out appearance. You must always rely on mild dish soap, soft microfiber cloths, and gentle brushing techniques.
Finally, many people rush the drying phase by placing their wet gear near a radiator, space heater, or in direct sunlight. Artificial heat melts the interior linings and damages the heavy-duty zippers. Direct sunlight aggressively fades the dark nylon and dries out the leather trim until it cracks. Always practice patience by air-drying your luggage in a cool, well-ventilated indoor space. Proper drying guarantees your bag remains structurally sound and ready for daily use.
Expert Tips
Maintaining your bag between deep washes dramatically extends its lifespan and keeps it looking professional. Keep a pack of unscented baby wipes or gentle electronic wipes in one of the side pockets. When you encounter a minor coffee drip or a scuff mark, wipe it away immediately before the stain has a chance to set into the nylon fibers.
You should also apply a high-quality fabric protector spray to the exterior once every six months. This creates an invisible barrier that repels water and prevents dirt from bonding to the ballistic nylon. Always apply the spray outdoors and let it cure fully before using the bag. Finally, store your bag in a breathable dust bag when you are not using it to prevent dust accumulation in your closet.
Frequently Asked Questions
Can I submerge my bag in a bathtub to wash it?
You should never fully submerge your premium bag in a bathtub or sink. Complete submersion ruins the internal padding, degrades the water-resistant treatments, and severely damages any leather trim. Water gets trapped between the interior lining and exterior shell, leading to mold and mildew growth. Always stick to careful spot cleaning with a slightly damp cloth.
How do I remove bad odors from the interior?
Eliminate lingering odors by placing an open box of baking soda or a few activated charcoal pouches inside the main compartment. Zip the bag completely shut and let it sit undisturbed for two to three days. The baking soda naturally absorbs the trapped smells without relying on heavy chemical perfumes. Vacuum the interior afterward to catch any spilled powder.
Is it safe to use disinfecting wipes on the nylon?
You should avoid using standard household disinfecting wipes on your bag. These wipes often contain harsh alcohols, bleach, and strong chemicals that strip the color from ballistic nylon and dry out leather handles. If you need to sanitize the exterior, stick to a highly diluted mixture of mild soap and water applied with a soft cloth.
What should I do if the leather handles feel sticky?
Sticky leather handles usually occur when body oils, hand sanitizers, and dirt build up on the surface over time. Wipe the handles gently with a specialized leather cleaner on a microfiber cloth to lift the grime. Once the leather is completely dry, apply a premium leather conditioner to restore the smooth texture and seal the material properly.
How often should I deeply clean my luggage?
You only need to perform a thorough deep clean once or twice a year, depending on your travel habits and daily commute. Over-washing causes unnecessary wear on the fabric and zippers. Focus instead on regular, light maintenance, like dusting the exterior and immediately spot-treating minor spills as they happen.
Conclusion
Taking the time to maintain your premium luggage ensures it remains a reliable, stylish companion for years of travel. By using gentle soap, soft brushes, and careful spot-treating techniques, you preserve the durable ballistic nylon and rich leather accents. Knowing how to clean tumi backpack correctly saves you from making costly mistakes, like using harsh chemicals or relying on a washing machine. The effort you put into wiping down the hardware, conditioning the trim, and vacuuming the interior directly impacts the bag’s longevity and performance.
You do not need to settle for a dusty, stained daily carry item. With these simple, expert methods, you can confidently restore your gear right at home. Gather your supplies, follow the steps carefully, and enjoy the satisfaction of carrying a bag that looks completely revitalized. Your next business trip or weekend adventure deserves luggage that looks as good as the day you first bought it.

About Caleb
Caleb Merritt is a Virginia-based outdoor writer and gear analyst who has spent over a decade sleeping on the ground, crossing mountain passes, and obsessively shaving grams off his pack weight. He holds a Bachelor of Science in Environmental Science from James Madison University, where he also served as president of the university’s outdoor recreation club. After graduating, he spent three years as a wilderness educator with a backcountry youth program in the Shenandoah Valley — teaching Leave No Trace ethics, backcountry navigation, and campcraft — before moving into full-time writing in 2018.
His work focuses on one core belief: the best gear is the gear you understand. Whether he’s doing a side-by-side weight comparison of ultralight shelters or writing a beginner’s guide to building a sub-20-lb base weight kit, Caleb writes with the same directness you’d expect from a trusted trail partner. He has logged more than 4,000 miles across iconic routes including the John Muir Trail, the Wind River Range, Vermont’s Long Trail, and the Collegiate Peaks Loop in Colorado.
Areas of Expertise
- Ultralight backpacking systems and base weight optimization
- Tent, tarp, and shelter testing across three-season and shoulder-season conditions
- Sleeping bag and quilt temperature rating verification
- Backpacking nutrition, meal planning, and calorie-per-ounce analysis
- Leave No Trace principles and wilderness ethics
- Campfire safety, bear country protocols, and water treatment methods
- Gear care, repair, and long-term durability assessment
Education
James Madison University — B.S. in Environmental Science, 2015
During his time at JMU, Caleb served as President of the Outdoor Recreation Club, where he planned and led more than 30 backcountry trips annually across the Blue Ridge Mountains and Appalachian Trail corridor. The role sharpened his ability to assess gear performance under real conditions, manage group safety in remote environments, and develop the kind of practical trail knowledge that no classroom can teach.
Professional Experience
Gear Writer & Senior Contributor — [campeox.com]
Produces in-depth gear reviews, buyer’s guides, and how-to content across backpacking, camping, and ultralight hiking categories. Tests all gear in real field conditions before publishing recommendations.
Wilderness Educator & Trip Leader — Shenandoah Backcountry Youth Program — 2015–2018 Led multi-day backcountry expeditions for teens and young adults throughout Shenandoah National Park and George Washington National Forest. Taught LNT principles, orienteering, first aid awareness, and campcraft fundamentals.
Outdoor Recreation Club President — James Madison University — 2013–2015 Organized and led university-sponsored hiking, backpacking, and camping trips in the Blue Ridge Mountains and Appalachian Trail corridor. Managed club budget, safety protocols, and trip logistics for a membership of 120+ students.
Editorial Standards
Every piece of gear Caleb recommends has been personally tested in the field — not just unboxed and described. His review process includes a minimum of two overnight trips per shelter, a full-season evaluation for sleep systems, and side-by-side comparisons wherever possible. He does not accept payment for positive reviews. Affiliate relationships, where they exist, are always disclosed in accordance with FTC guidelines.
All factual claims about gear specifications, trail distances, and safety recommendations are cross-referenced against manufacturer data sheets and established sources such as the Leave No Trace Center for Outdoor Ethics and the American Hiking Society before publication.