

Pulling off a soaked wetsuit after a great session feels good, but the work isn’t quite done yet. If you toss that damp neoprene into a bag or leave it crumpled in your trunk, you’ll soon meet a smelly, mildew-covered mess. Knowing how to dry a wetsuit the right way keeps it fresh, flexible, and ready for your next adventure.

The good news? It’s simple once you know the steps. You don’t need fancy gear or hours of effort—just a little care and the right routine. This guide walks you through everything, from the first rinse to long-term storage, so your suit stays in top shape for years to come.
Why Drying Your Wetsuit Properly Matters
Your wetsuit works hard. It traps a thin layer of water against your skin and keeps you warm in cold seas and chilly lakes. That neoprene deserves good care in return.
When you dry your suit correctly, you protect the material from breaking down. Saltwater, sand, and sweat eat away at the lining and seams over time. Leaving moisture trapped inside invites mildew and a stubborn odor that’s hard to remove.
For campers and outdoor beginners, this skill matters even more. You often work with limited space and no garage to hang things. Learning a reliable drying habit means your suit lasts longer, smells better, and saves you money. A well-cared-for wetsuit can serve you for many seasons instead of just a few trips.
Tools and Materials You’ll Need
Gathering a few basics makes the whole process faster and easier. Most of these items you probably already own.
- Freshwater source – a hose, tap, or jug of clean water for rinsing
- A wide, sturdy hanger – ideally a thick or wetsuit-specific hanger to protect the shoulders
- A shaded spot – somewhere with good airflow but out of direct sunlight
- A clean towel – for blotting excess water if you’re short on time
- Mild wetsuit wash (optional) – a gentle cleaner that removes saltwater, odor, and bacteria without harming the neoprene
That optional wetsuit wash is the one convenience item worth adding to your kit. It keeps your suit smelling fresh between deep cleans and takes only a minute to use during your rinse.
8 Step-by-Step Guide on Drying a Wetsuit
Step 1 – Rinse with freshwater right away
The moment you finish your session, give your suit a thorough rinse with cool freshwater. Saltwater, sand, and chlorine cling to the neoprene and slowly damage it. A quick rinse washes those away before they settle into the lining and seams.
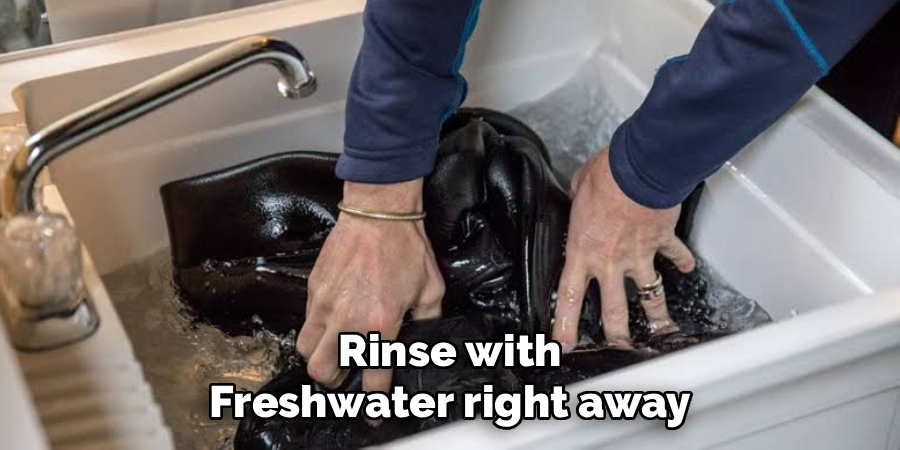
Run the water over the outside first, then turn your attention to the inside. Sand loves to hide in the cuffs and ankles, so flush those areas well. You’ll feel the grit loosen and slide away under your fingers.
This first step matters more than people think. Learning how to dry a wetsuit always starts with a clean rinse, because trapped salt holds moisture and speeds up odor. Take your time here.
Step 2 – Turn the suit inside out
After rinsing, flip your wetsuit inside out. The inner lining sits against your skin during every session, so it soaks up sweat, body oils, and warmth. That side needs to dry first and fastest.
Gently work the arms and legs through, taking care not to yank at the seams. Neoprene stretches well, but rough tugging strains the stitching over time. Smooth the fabric out as you go.
With the inside facing out, air reaches the part that traps the most moisture. You’ll notice the lining feels cool and damp to the touch. Exposing it now prevents that musty smell from building up later and gives you a much faster, cleaner dry.
Step 3 – Squeeze out excess water gently
Resist the urge to wring your wetsuit like a wet towel. Twisting puts heavy stress on the seams and can cause them to split or peel apart. Instead, press the water out with gentle, steady pressure.
Fold sections of the suit and squeeze softly, working from the top down. You’ll see water drip out in steady streams. Let gravity help by holding the suit up and letting it drain on its own for a minute or two.
If you packed a clean towel, lay the suit flat and blot the heaviest areas. This removes surface water quickly. The drier you get it now, the less time the full drying process takes afterward.
Step 4 – Hang it on a wide hanger
Choose a thick, wide hanger to support the shoulders. Thin wire hangers create sharp pressure points that stretch and weaken the neoprene over time. A wetsuit-specific hanger works best, but a sturdy plastic one does the job too.

Fold the suit at the waist over the hanger rather than hanging it by the shoulders alone. This spreads the weight evenly and keeps the material from sagging. Wet neoprene is heavy, and uneven hanging leaves permanent stretch marks.
Position the suit so air can move freely around both sides. Good airflow is the secret to fast, even drying. You’ll feel the difference within the first hour as the outer surface starts to lose its slick, wet sheen.
Step 5 – Find shade with good airflow
Now place your hanging suit in a shaded spot with plenty of moving air. A covered porch, a breezy garage, or a tree’s shadow all work well. The goal is steady airflow without harsh light beating down on the neoprene.
Direct sunlight is the enemy here. UV rays break down the material, fade the color, and make the rubber brittle and cracked. A breezy, shaded area dries the suit just as fast without that damage.
If there’s a gentle wind, even better. Air movement pulls moisture away from the fabric quickly. Knowing how to dry a wetsuit comes down to this balance: plenty of air, no direct heat, and patience. Let it hang freely.
Step 6 – Let the inside dry fully
Give the inner lining the time it needs to dry completely. This is the side that holds the most sweat and warmth, so it takes longer than the outer shell. Rushing this step is where odor problems begin.
Check the cuffs, the small of the back, and the underarms. These tucked-away spots stay damp the longest. Run your fingers across the lining—if it still feels cool or clammy, it needs more time.
Depending on the weather and airflow, the inside may take several hours to dry. A humid day stretches that out. Be patient and resist the urge to flip it over too soon. A fully dry lining means a fresh suit.
Step 7 – Flip and dry the outside
Once the inside feels dry to the touch, turn the wetsuit right-side out again. Now the outer surface gets its turn in the air. This side dries faster since it’s smoother and less absorbent than the lining.
Reposition the suit on your hanger and check that air still flows around it. Smooth any folded areas where water might collect, especially around the knees and elbows. These bends tend to trap small pockets of moisture.
The outside usually dries within a couple of hours in a breezy, shaded spot. Press your palm against the neoprene to test it. When it feels dry and cool but not damp, your suit is nearly ready to store.
Step 8 – Store it the right way
Once both sides are completely dry, store your wetsuit with care. Keep it on that wide hanger in a cool, dry place away from sunlight and heat sources. Folding it for long stretches creates creases that weaken the neoprene.
Avoid sealing a wetsuit in a bag or plastic bin while there’s any moisture left. Trapped dampness leads straight to mildew and a stale smell. Make sure it’s bone dry first.
For campers tight on space, hang the suit inside your tent or vehicle overnight before packing. A short hang keeps the material fresh and flexible. Proper storage protects all the effort you put into drying it correctly.
Common Mistakes When Drying a Wetsuit
Even careful beginners slip up, so let’s look at the errors that cause the most damage. The biggest one is leaving your suit in direct sunlight. The sun feels like a quick fix, but UV rays dry out the neoprene, fade the color, and leave the rubber cracked and brittle. A shaded spot with airflow does the job far more safely.
Another frequent mistake is wringing the suit to squeeze out water. Twisting tortures the seams and shortens the life of your suit dramatically. Always press gently instead of wringing.
Many people also skip the freshwater rinse, especially after ocean sessions. Saltwater left in the fabric holds moisture, breeds odor, and slowly eats the lining. A quick rinse prevents all of it.
Hanging the suit on a thin wire hanger is another quiet killer. The narrow edge digs into the shoulders and stretches the material out of shape. Finally, packing a damp suit away invites mildew within days. Always confirm it’s fully dry before storage.
Expert Tips
A few small habits separate a long-lasting wetsuit from one that wears out fast. Always rinse the inside as well as the outside, even when you’re tired and tempted to skip it. The lining holds the most sweat and bacteria.
Add a splash of mild wetsuit wash during your rinse every few sessions. It cuts through built-up odor and keeps the neoprene supple.
Rotate the suit’s position on the hanger if you live somewhere humid, so no single spot stays damp. And never use a hairdryer, radiator, or dryer—artificial heat ruins the material quickly. Patience and airflow always win. Treat your suit gently, and it’ll keep you warm and comfortable for many seasons to come.
Frequently Asked Questions
How long does it take to dry a wetsuit?
In a shaded, breezy spot, a wetsuit usually dries in 6 to 12 hours. The inside takes longest because it holds the most moisture. Humid weather extends that time, while a dry, windy day speeds it up. Flip the suit halfway through to dry both sides evenly and avoid trapped dampness.
Can I dry my wetsuit in direct sunlight?
It’s best to avoid direct sunlight. UV rays break down the neoprene, fade the color, and make the rubber brittle and prone to cracking. A shaded area with good airflow dries your suit just as quickly without the damage. If you must use sun briefly, keep it short and turn the suit often.
Should I turn my wetsuit inside out to dry it?
Yes, always start by drying the inside out. The lining sits against your skin and absorbs sweat, oils, and the most moisture during use. Drying that side first prevents odor and mildew from building up. Once the inside feels completely dry, flip the suit right-side out and let the smooth outer surface finish drying.
How do I stop my wetsuit from smelling?
Rinse with freshwater after every session and dry the suit fully before storing. Trapped moisture and leftover saltwater cause that musty odor and mildew. Using a mild wetsuit wash now and then helps too. Never pack a damp suit into a bag, and always store it in a cool, dry place with airflow.
Can I use a dryer or hairdryer to speed things up?
No, avoid all artificial heat. Dryers, hairdryers, and radiators damage neoprene fast, making it stiff, cracked, and less flexible. Heat ruins the material’s ability to stretch and keep you warm. Stick with natural air drying in a shaded, breezy spot. It takes a little longer but keeps your suit in great shape for years.
Conclusion
Caring for your gear doesn’t have to be complicated. Once you understand how to dry a wetsuit properly, the routine becomes second nature. Start with a thorough freshwater rinse, turn the suit inside out, and press the water out gently without wringing. Hang it on a wide hanger in a shaded spot with plenty of airflow, dry the inside first, then flip it to finish the outside. When both sides feel completely dry, store it somewhere cool and dark.
Avoid the common traps—direct sunlight, wire hangers, skipped rinses, and packing away a damp suit. These small mistakes cause big damage over time. With a little patience and the right habits, your neoprene stays flexible, fresh, and free of mildew and odor for many seasons.
So next time you finish a session, take those extra few minutes. Your wetsuit will thank you by keeping you warm and comfortable, trip after trip. Now grab your hanger and put these steps into action.

About Caleb
Caleb Merritt is a Virginia-based outdoor writer and gear analyst who has spent over a decade sleeping on the ground, crossing mountain passes, and obsessively shaving grams off his pack weight. He holds a Bachelor of Science in Environmental Science from James Madison University, where he also served as president of the university’s outdoor recreation club. After graduating, he spent three years as a wilderness educator with a backcountry youth program in the Shenandoah Valley — teaching Leave No Trace ethics, backcountry navigation, and campcraft — before moving into full-time writing in 2018.
His work focuses on one core belief: the best gear is the gear you understand. Whether he’s doing a side-by-side weight comparison of ultralight shelters or writing a beginner’s guide to building a sub-20-lb base weight kit, Caleb writes with the same directness you’d expect from a trusted trail partner. He has logged more than 4,000 miles across iconic routes including the John Muir Trail, the Wind River Range, Vermont’s Long Trail, and the Collegiate Peaks Loop in Colorado.
Areas of Expertise
- Ultralight backpacking systems and base weight optimization
- Tent, tarp, and shelter testing across three-season and shoulder-season conditions
- Sleeping bag and quilt temperature rating verification
- Backpacking nutrition, meal planning, and calorie-per-ounce analysis
- Leave No Trace principles and wilderness ethics
- Campfire safety, bear country protocols, and water treatment methods
- Gear care, repair, and long-term durability assessment
Education
James Madison University — B.S. in Environmental Science, 2015
During his time at JMU, Caleb served as President of the Outdoor Recreation Club, where he planned and led more than 30 backcountry trips annually across the Blue Ridge Mountains and Appalachian Trail corridor. The role sharpened his ability to assess gear performance under real conditions, manage group safety in remote environments, and develop the kind of practical trail knowledge that no classroom can teach.
Professional Experience
Gear Writer & Senior Contributor — [campeox.com]
Produces in-depth gear reviews, buyer’s guides, and how-to content across backpacking, camping, and ultralight hiking categories. Tests all gear in real field conditions before publishing recommendations.
Wilderness Educator & Trip Leader — Shenandoah Backcountry Youth Program — 2015–2018 Led multi-day backcountry expeditions for teens and young adults throughout Shenandoah National Park and George Washington National Forest. Taught LNT principles, orienteering, first aid awareness, and campcraft fundamentals.
Outdoor Recreation Club President — James Madison University — 2013–2015 Organized and led university-sponsored hiking, backpacking, and camping trips in the Blue Ridge Mountains and Appalachian Trail corridor. Managed club budget, safety protocols, and trip logistics for a membership of 120+ students.
Editorial Standards
Every piece of gear Caleb recommends has been personally tested in the field — not just unboxed and described. His review process includes a minimum of two overnight trips per shelter, a full-season evaluation for sleep systems, and side-by-side comparisons wherever possible. He does not accept payment for positive reviews. Affiliate relationships, where they exist, are always disclosed in accordance with FTC guidelines.
All factual claims about gear specifications, trail distances, and safety recommendations are cross-referenced against manufacturer data sheets and established sources such as the Leave No Trace Center for Outdoor Ethics and the American Hiking Society before publication.




