Nothing beats the comfort of a crackling campfire as the sun dips below the horizon. The warmth chases away the evening chill, and the glowing embers provide the perfect backdrop for sharing stories. But before you can strike a match and roast your marshmallows, you need fuel. Figuring out how to find firewood while camping can feel overwhelming for beginners.
You might look at a dense forest and wonder which branches will burn well and which will just create a smoky mess. Knowing exactly what to look for keeps your campsite safe and ensures your fire burns bright all night. This guide walks you through the entire process, from identifying the best dry wood to understanding local regulations. The purpose of this guide is to teach you the skills needed to safely and sustainably source the perfect fuel for your next campfire.
Why Learning to Gather Wood Matters
Mastering wood gathering transforms you from a nervous beginner into a confident outdoors person. Relying solely on camp store bundles often means spending extra money or running out of fuel halfway through the evening. When you know how to harvest natural fuel from the landscape, you become fully self-sufficient.
This skill also protects the delicate balance of the wilderness you came to enjoy. Haphazardly ripping branches off live trees damages the local ecosystem and ruins the scenery for future visitors. Gathering proper fuel means selecting dead, downed timber that actually burns hot and clean.
Understanding these principles saves you from coughing through a cloud of thick, white smoke caused by green logs. Ultimately, gathering your own fuel connects you deeply to your environment and builds essential outdoor survival skills.
Tools and Materials You’ll Need
Gathering fuel safely requires a few basic pieces of gear. You do not need to pack a heavy lumberjack kit, but having the right essentials makes the job much easier. Bringing the correct equipment protects your hands and helps you process larger pieces of timber into usable sizes.
Here is what you should pack for your trip:
- Heavy-duty leather gloves to protect your hands from splinters, sap, and rough bark.
- A folding camp saw to cut longer fallen branches into manageable lengths.
- A small camping hatchet for splitting medium logs into kindling.
- Sturdy hiking boots to protect your feet while walking through thick brush.
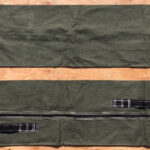
- A durable canvas log carrier (optional) to make hauling your haul back to the campsite much easier.
Step-by-Step Guide on How to Find Firewood While Camping
Step 1 – Check the Local Campground Rules
Before you start searching the forest floor, you must understand the rules of your specific location. Every park, national forest, and private site has its own regulations regarding wood gathering. Some heavily trafficked areas completely ban collecting natural fuel to preserve the local ecosystem. Others restrict gathering to specific zones or only allow you to collect what has already fallen to the ground.
You need to verify these rules at the ranger station or the park website before your trip begins. Ignoring these regulations can result in hefty fines and severe damage to fragile habitats. When learning how to find firewood while camping, following the law is always your first priority. Always ask a park ranger if you feel unsure about the gathering policies.
Step 2 – Look for Dead and Downed Timber
The golden rule of sourcing natural fuel is to only collect wood that is completely dead and detached from the tree. You should never chop, break, or saw branches off a living tree. Green timber contains too much moisture to burn properly and will only fill your campsite with blinding smoke. Instead, focus your search on branches and logs resting on the forest floor.
Look for timber that snaps cleanly when you apply pressure. If a branch bends without breaking, it still holds water and belongs back on the ground. Searching under large canopies often reveals excellent dry branches that have fallen naturally during recent storms. Scanning the ground around your immediate campsite usually provides plenty of excellent starting material.
Step 3 – Search for the Squaw Wood Above Ground
Sometimes the ground feels entirely soaked after a heavy rainstorm, making fallen logs useless for a good fire. In these damp conditions, you need to shift your gaze slightly upward into the lower branches of standing trees. Look for dead, dry branches caught in the lower limbs of living trees. Because this timber sits elevated off the wet soil, it catches the breeze and stays remarkably dry.
You can usually pull these brittle branches down with a gentle tug. If a branch requires serious force to remove, leave it alone, as it might still be alive. Elevated dead branches provide the absolute best kindling when the forest floor feels like a wet sponge. Always inspect the tree carefully to ensure you only take dead materials.
Step 4 – Gather Three Different Sizes of Fuel
Building a successful fire requires more than just massive logs; you need a strategic variety of sizes. Start by collecting handfuls of tinder, which includes tiny dry twigs, pine needles, or dry leaves that ignite instantly. Next, gather plenty of kindling, consisting of sticks roughly the thickness of your thumb. Finally, hunt for your main fuel wood, which should be about the size of your forearm or slightly larger.
Many beginners make the mistake of only gathering large chunks of timber. Without the smaller twigs to build up the heat, those big logs will never catch fire. Sort your collection into three distinct piles near your fire ring so you can feed the flames efficiently once the sparks fly.
Step 5 – Test the Wood for Moisture
Determining whether your gathered timber is dry enough requires a quick physical assessment. First, listen for the snap. A dry branch will break with a sharp, crisp cracking sound when you snap it over your knee. Next, check the weight of the piece you are holding. Dry timber feels surprisingly light for its size because all the internal moisture has evaporated.
You can also peel back a small section of bark to inspect the inner layers. If the wood beneath looks green or feels damp to the touch, toss it aside. Discovering how to find firewood while camping means developing a keen sense of touch and sound. Practicing these simple moisture tests guarantees a hot, roaring fire every single time.
Step 6 – Look for Hardwoods Over Softwoods
Understanding the difference between hardwood and softwood drastically improves your campfire experience. Hardwoods like oak, hickory, and maple grow slower and produce dense timber. These woods take a little longer to ignite, but they burn incredibly hot and leave behind long-lasting coals.
Softwoods like pine, cedar, and spruce catch fire quickly and smell wonderful. However, they burn fast and throw lots of sparks, making them better suited for kindling rather than sustained heat. When scanning the forest, try to identify fallen branches from broadleaf trees for your main fuel supply. Mixing the two works best; use the soft pine to get the fire roaring, then transition to thick oak logs.
Step 7 – Transport Your Haul Safely
Once you gather a sufficient pile of fuel, you must transport it back to your fire ring efficiently. Carrying loose branches in your arms often leads to scratched forearms and dropped sticks trailing behind you. If you brought a canvas log carrier, simply lay it flat, stack your timber in the center, and grab the handles.
If you lack a carrier, you can improvise by using a sturdy jacket or wrapping a small tarp around the bundle. Always carry the bundle close to your body to maintain your balance on uneven terrain. Make sure you collect more fuel than you think you need before the sun goes down. Stumbling through the dark forest looking for extra branches presents a major safety hazard.
Step 8 – Store Your Fuel Properly at Camp
Bringing the timber back to your site is only half the battle; you must store it correctly to keep it dry. Never dump your collection directly on damp grass or bare dirt, as the wood will quickly absorb ground moisture. Instead, lay down a small tarp or arrange a row of thicker, damp logs to create a raised platform.
Stack your dry fuel on top of this barrier to allow air to circulate freely through the pile. Keep your stash a safe distance from the fire ring to prevent rogue sparks from igniting the entire supply at once. If rain threatens your evening plans, cover the stack with a waterproof cover until you are ready to strike your match.
Common Mistakes When Sourcing Campfire Wood
First-time campers often make easily avoidable errors when gathering fuel in the wild. The most frequent mistake involves attempting to burn green wood stripped directly from living trees. This severely damages the forest and creates an incredibly smoky, miserable fire that refuses to produce adequate heat. Another major error involves transporting wood from distant locations to your campsite. Moving timber across state or county lines can introduce invasive insects and devastating tree diseases into new, vulnerable ecosystems.
You should always buy it where you burn it or gather it completely locally. Furthermore, many beginners fail to collect enough small tinder and kindling, expecting a lighter to magically ignite a massive oak log. Without the proper progression of small twigs to medium sticks, a fire simply will not establish itself.
Finally, people often collect wood that lies flat in muddy, low-lying areas. Timber resting in drainage ditches or boggy patches absorbs too much water and rots quickly inside. You must seek out elevated ground where fallen branches have a fair chance to dry in the sun and wind. Avoiding these specific pitfalls ensures your evening around the fire pit remains warm, safe, and completely stress-free for everyone involved.
Expert Tips
Seasoned outdoor enthusiasts rely on a few clever tricks to make wood gathering effortless. Always start your gathering mission well before sunset. Trying to identify dry branches in the fading light often leads to grabbing wet, rotten logs by mistake. You should also look for natural funnels like dry creek beds or the base of steep hillsides, as wind and gravity naturally deposit dead branches in these areas over time.
When processing your timber, angle your camp saw slightly away from your body for a smoother, safer cut. Finally, keep an eye out for fallen birch bark if you camp in northern regions. The natural oils inside birch bark make it an incredible fire starter, even when the surrounding forest feels slightly damp from morning dew.
Frequently Asked Questions
Can I cut branches off trees for a campfire?
You should never cut branches off standing, living trees for your campfire. Live wood contains a massive amount of water, making it nearly impossible to ignite. Burning green timber produces thick smoke that will ruin your evening. Furthermore, cutting live branches damages the tree and violates the principles of leaving no trace in the wilderness.
Is it safe to burn driftwood found on the beach?
Burning ocean driftwood is generally a bad idea. The wood absorbs high amounts of sea salt, which releases toxic chemicals and heavy metals into the air when burned. These hazardous fumes can cause respiratory irritation for anyone sitting nearby. If you camp near a freshwater lake, however, that driftwood is perfectly safe to use.
How much wood do I need for one night of camping?
A typical campfire consumes roughly two to three bundles of wood for a standard evening lasting three to four hours. If you gather natural fuel, aim for an armload of thick logs, two armloads of medium kindling, and a large grocery bag worth of tinder. Always collect slightly more than you anticipate needing.
Why shouldn’t I bring firewood from home?
Transporting fuel from your backyard to a distant campground poses a massive threat to local ecosystems. Firewood often hides invasive insects, larvae, and fungal diseases deep inside the bark. Moving this wood introduces these pests to new forests, which can devastate local tree populations. Always gather or purchase your wood near your destination.
What should I do if all the fallen wood is wet?
If recent rains have soaked the ground, search for elevated dead branches caught in the lower limbs of standing trees. You can also use a camp hatchet to split wet logs down the middle. The interior heartwood usually remains bone dry even when the outer bark feels completely saturated from the heavy rain.
Conclusion
Mastering the art of building a perfect campfire starts long before you strike a match. It begins with taking a mindful walk through the forest and understanding exactly what the landscape offers. Knowing how to find firewood while camping gives you the confidence to stay warm and comfortable on any outdoor adventure. You no longer have to rely on overpriced bundles or struggle with smoky, uncooperative flames.
By following local rules, selecting dead timber, and gathering the right progression of sizes, you ensure a blazing success. Remember to gather your fuel early in the afternoon, process it safely with the right tools, and store it off the damp ground. Now that you understand the mechanics of sourcing natural fuel, you are fully prepared for your next trip into the wild. Grab your heavy gloves, head into the woods, and enjoy the unmatched satisfaction of sitting beside a crackling fire you built entirely from scratch.
About Caleb
Caleb Merritt is a Virginia-based outdoor writer and gear analyst who has spent over a decade sleeping on the ground, crossing mountain passes, and obsessively shaving grams off his pack weight. He holds a Bachelor of Science in Environmental Science from James Madison University, where he also served as president of the university’s outdoor recreation club. After graduating, he spent three years as a wilderness educator with a backcountry youth program in the Shenandoah Valley — teaching Leave No Trace ethics, backcountry navigation, and campcraft — before moving into full-time writing in 2018.
His work focuses on one core belief: the best gear is the gear you understand. Whether he’s doing a side-by-side weight comparison of ultralight shelters or writing a beginner’s guide to building a sub-20-lb base weight kit, Caleb writes with the same directness you’d expect from a trusted trail partner. He has logged more than 4,000 miles across iconic routes including the John Muir Trail, the Wind River Range, Vermont’s Long Trail, and the Collegiate Peaks Loop in Colorado.
Areas of Expertise
- Ultralight backpacking systems and base weight optimization
- Tent, tarp, and shelter testing across three-season and shoulder-season conditions
- Sleeping bag and quilt temperature rating verification
- Backpacking nutrition, meal planning, and calorie-per-ounce analysis
- Leave No Trace principles and wilderness ethics
- Campfire safety, bear country protocols, and water treatment methods
- Gear care, repair, and long-term durability assessment
Education
James Madison University — B.S. in Environmental Science, 2015
During his time at JMU, Caleb served as President of the Outdoor Recreation Club, where he planned and led more than 30 backcountry trips annually across the Blue Ridge Mountains and Appalachian Trail corridor. The role sharpened his ability to assess gear performance under real conditions, manage group safety in remote environments, and develop the kind of practical trail knowledge that no classroom can teach.
Professional Experience
Gear Writer & Senior Contributor — [Your Website Name]
Produces in-depth gear reviews, buyer’s guides, and how-to content across backpacking, camping, and ultralight hiking categories. Tests all gear in real field conditions before publishing recommendations.
Wilderness Educator & Trip Leader — Shenandoah Backcountry Youth Program — 2015–2018 Led multi-day backcountry expeditions for teens and young adults throughout Shenandoah National Park and George Washington National Forest. Taught LNT principles, orienteering, first aid awareness, and campcraft fundamentals.
Outdoor Recreation Club President — James Madison University — 2013–2015 Organized and led university-sponsored hiking, backpacking, and camping trips in the Blue Ridge Mountains and Appalachian Trail corridor. Managed club budget, safety protocols, and trip logistics for a membership of 120+ students.
Editorial Standards
Every piece of gear Caleb recommends has been personally tested in the field — not just unboxed and described. His review process includes a minimum of two overnight trips per shelter, a full-season evaluation for sleep systems, and side-by-side comparisons wherever possible. He does not accept payment for positive reviews. Affiliate relationships, where they exist, are always disclosed in accordance with FTC guidelines.
All factual claims about gear specifications, trail distances, and safety recommendations are cross-referenced against manufacturer data sheets and established sources such as the Leave No Trace Center for Outdoor Ethics and the American Hiking Society before publication.