Gliding across a serene lake with only the sound of water lapping against your boat offers a unique sense of peace. Many people dream of exploring waterways but hesitate because they do not know where to start. Learning how to paddle a kayak opens up a lifetime of outdoor adventures and memorable wilderness explorations.
You will quickly discover that this activity requires more technique than sheer physical strength. Mastering the fundamental strokes allows you to maneuver with confidence, grace, and minimal effort. Proper training transforms an intimidating first-time experience into a highly rewarding aquatic journey. This expert guide will equip you with the foundational skills needed to navigate the water safely and efficiently on your very first trip.
Importance of Paddling Skills for Campers
Understanding proper maneuvering techniques significantly enhances your overall camping experience. When you set up camp near a lake or river, having the skills to explore the shoreline adds an entirely new dimension to your trip. You gain access to hidden coves, secluded fishing spots, and pristine wildlife habitats that remain completely unreachable on foot. Relying on correct body mechanics also prevents early fatigue and unnecessary muscle strain during your outdoor excursions.
A well-trained camper can travel for miles, enjoying the scenery without returning to the tent exhausted and sore. Building this confidence turns an intimidating water activity into a relaxing extension of your wilderness journey. You can quietly approach wildlife, capture stunning landscape photographs, and transport camping gear to remote island sites. Developing this core outdoor competency simply makes you a more capable and versatile adventurer.
Tools and Materials You Need
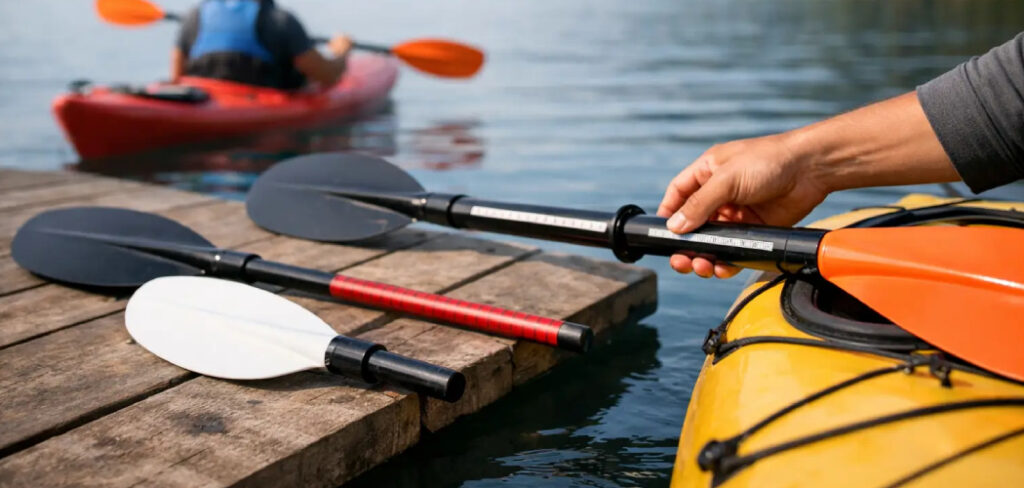
Before heading out to the water, you must gather a few essential pieces of gear to ensure a safe and enjoyable experience. The most obvious requirement is a stable, beginner-friendly recreational watercraft suited for calm lakes or slow-moving rivers. You will also need a proper two-bladed paddle sized appropriately for your height and the width of your boat. Safety regulations mandate wearing a well-fitted personal flotation device at all times while out on the water.
A loud safety whistle attached to your life jacket provides a reliable way to signal for help if an unexpected emergency arises. For added convenience, bring along a waterproof dry bag to protect your phone, keys, and snacks from sudden splashes. Finally, pack plenty of drinking water and apply a broad-spectrum waterproof sunscreen to shield yourself from the harsh UV rays reflecting off the surface.
8 Step-by-Step Guide on How to Paddle a Kayak
Step 1 – Entering the Boat Safely
Getting into your watercraft without tipping over requires patience and a low center of gravity. Start by placing the boat parallel to the shoreline in shallow water that is free from sharp rocks. Place your paddle across the deck right behind the seat so it remains within easy reach. Keep one hand on the dock or the bank while you step your closest foot directly into the center of the cockpit.
Transfer your weight smoothly to that center foot while lowering your body into the seat. Bring your other leg inside quickly but gently to avoid rocking the hull back and forth. Settle your hips firmly into the seat bottom to establish your balance before attempting to push away from the shore.
Step 2 – Finding Your Ideal Posture
Your seating position dictates your overall stability and the amount of power you can generate with each stroke. Sit up completely straight with your lower back pressed firmly against the backrest of your seat. Avoid slouching, as a collapsed posture restricts your breathing and limits the rotational movement of your torso.
Place your feet on the internal foot pegs so that your knees retain a slight, comfortable bend. Your knees should rest gently against the sides of the cockpit to give you better control over the boat’s side-to-side balance. Keeping your upper body relaxed but engaged prevents stiffness and ensures you can turn your shoulders freely.
Step 3 – Gripping the Shaft Correctly
Holding the shaft improperly often leads to severe wrist pain and terrible inefficiency on the water. Rest the center of the shaft on top of your head to easily check your hand placement. Your elbows should bend at exactly ninety degrees, creating a box-like shape with your arms and the shaft.
Grasp the shaft securely but gently, keeping your knuckles pointed upward and your wrists completely straight. Gripping the material too tightly causes rapid forearm fatigue and painful blisters on your palms. The right hand typically controls the blade angle, gripping firmly while the left hand allows the shaft to rotate smoothly during strokes.
Step 4 – Executing the Forward Stroke
Learning how to paddle a kayak efficiently begins with mastering a powerful and fluid forward stroke. Submerge the blade fully into the water near your toes, keeping the active face pointing toward the back of the boat. Rotate your torso backward to pull the blade alongside the hull rather than relying entirely on your arm muscles.
Push forward with your upper hand while pulling backward with your lower hand to maximize the leverage. Remove the blade from the water the moment it reaches your hip to prevent it from dragging and slowing your momentum. Repeat this motion smoothly on the opposite side, maintaining a steady and rhythmic cadence as you glide forward.
Step 5 – Performing the Sweep Stroke for Turning
Altering your direction requires a wide, sweeping motion that pushes the nose of your boat to the side. Submerge the blade completely into the water near your toes, just as you would for a standard forward stroke. Instead of pulling the blade straight back along the hull, carve a wide, exaggerated arc away from the boat.
Keep your arms relatively straight and use your core muscles to drive the blade all the way back toward the stern. This wide, semicircular movement forcibly pivots the vessel in the opposite direction of your stroke. To execute a sharp turn quickly, perform a forward sweep on one side followed immediately by a reverse sweep on the other side.
Step 6 – Using the Reverse Stroke to Stop
Knowing how to halt your momentum quickly is crucial for avoiding unexpected obstacles and navigating crowded waterways. The reverse stroke acts as your primary braking mechanism and functions exactly like the forward stroke in reverse. Look over your shoulder to ensure the path behind you remains clear before initiating the movement.
Insert the blade into the water just behind your hip and forcefully push the water forward toward the front of the boat. Keep your torso engaged and your arms strong as the resistance of the water rapidly slows your forward progress. Alternate sides evenly to bring the vessel to a complete, controlled stop without veering drastically off course.
Step 7 – Practicing the Draw Stroke for Sideways Movement
Sometimes you need to pull up parallel to a dock or another boat without moving forward or backward. The draw stroke allows you to move laterally by pulling the water directly toward the side of your hull. Reach your arms out over the water and plant the blade parallel to the side of your boat.
Pull the blade forcefully straight toward your hip, keeping the shaft as vertical as possible during the motion. Stop the blade just before it hits the hull and quickly slice it backward out of the water to reset the position. Repeating this precise motion allows you to edge sideways gracefully and dock your vessel with professional precision.
Step 8 – Exiting the Watercraft Gracefully
The final major lesson in mastering how to paddle a kayak involves getting out without taking an unexpected swim. Paddle slowly toward a shallow, sandy bank or a low dock until the hull rests firmly against the edge. Place your paddle securely across the deck or hand it to someone waiting patiently on the shore.
Grab the sides of the cockpit with both hands and lift your hips slightly out of the seat to shift your center of gravity. Swing one leg carefully over the side and place your foot firmly on solid ground. Keep your weight centered over your grounded foot as you stand up entirely and pull your other leg free from the cockpit.
Common Mistakes
Beginners often make a few predictable errors that drain their energy and diminish their enjoyment of the sport. The most frequent mistake involves relying solely on arm muscles to pull the blade through the water. This improper technique leads to rapid fatigue, sore shoulders, and a weak, inefficient stroke that barely moves the boat. You must engage your core muscles and rotate your torso with every stroke to generate real power and endurance.
Another widespread issue occurs when novices grip the shaft with incredible tension, famously known as the “death grip.” Squeezing the shaft too tightly causes severe cramping in your forearms and unnecessary strain on your delicate wrist joints. Your grip should remain relaxed enough that someone could easily pull the shaft from your hands when you are resting.
Many new users also forget to adjust their foot pegs before launching away from the safety of the shore. Improperly adjusted pegs leave your legs either crammed against your chest or stretched out helplessly without any brace. Taking the time to dial in your seating position on dry land prevents uncomfortable adjusting while floating in deep water. Finally, beginners frequently look down at their blade instead of keeping their eyes focused on the horizon. Staring down disrupts your balance and inevitably causes the boat to zigzag wildly instead of tracking in a straight line.
Expert Tips
Elevating your technique from a novice level to an expert standard requires focusing on subtle, biomechanical details. Always aim to bury the entire blade in the water before you begin applying pulling pressure to the shaft. Splashing the surface wastes valuable energy and creates noisy turbulence that easily frightens away local wildlife.
Focus heavily on pushing your upper hand forward like you are throwing a punch during the forward stroke. This push-pull dynamic utilizes the leverage of the shaft perfectly and significantly reduces the workload on your pulling arm. Practice bracing techniques early in your journey to develop muscle memory for preventing unexpected capsizes in choppy conditions. Finally, remember to dress appropriately for the water temperature rather than the air temperature to avoid hypothermia in case you accidentally flip.
Frequently Asked Questions
Do I need to be incredibly strong to maneuver a boat?
You do not need massive upper body strength to navigate the water effectively and efficiently. Proper technique relies heavily on the large muscles in your core, back, and torso rather than just your arms. Maintaining good posture and using torso rotation allows people of all fitness levels to enjoy long trips without exhaustion.
What should I do if my boat flips over?
Stay calm, hold onto your paddle, and immediately grab the side of your overturned hull. Float on your back while wearing your personal flotation device to conserve energy and assess your surroundings. You can then swim the boat toward the nearest shallow shore to drain the water safely before re-entering.
Can I wear regular sneakers on the water?
Heavy sneakers quickly become waterlogged, heavy, and extremely uncomfortable when they inevitably get splashed. You should wear designated water shoes, supportive sandals with heel straps, or lightweight neoprene booties instead. These specialized footwear options protect your soles from sharp rocks while draining moisture efficiently and drying rapidly in the sun.
How do I choose the correct paddle length?
Your ideal paddle length depends entirely on your overall height and the maximum width of your chosen vessel. Taller individuals and wider boats generally require significantly longer shafts to reach the water comfortably without leaning over. Visit a local outfitter or consult a reliable sizing chart to find the precise measurement tailored to your specific body type.
Is it safe to go out on the water entirely alone?
Beginners should always travel with an experienced companion until they master basic self-rescue techniques and navigation skills. If you must go alone eventually, inform a trusted friend about your specific launch location and expected return time. Always stick to calm, familiar waterways and closely monitor the local weather forecast before leaving your house.
Conclusion
Taking the time to master foundational techniques transforms a strenuous upper-body workout into a relaxing, meditative outdoor experience. By engaging your core, adjusting your posture, and holding the shaft correctly, you prevent unnecessary soreness and maximize your efficiency. Remembering to focus on the horizon and practicing your turning strokes will quickly build your confidence in open water.
There is nothing quite like the freedom of slipping quietly across a glassy lake at sunrise. Once you fully understand how to paddle a kayak, an entirely new world of wilderness exploration becomes available to you. You can discover hidden waterways, embark on multi-day camping trips, and connect with nature from a spectacular new vantage point. Gather your gear, secure your life jacket tightly, and confidently launch yourself into your next great aquatic adventure.

About Caleb
Caleb Merritt is a Virginia-based outdoor writer and gear analyst who has spent over a decade sleeping on the ground, crossing mountain passes, and obsessively shaving grams off his pack weight. He holds a Bachelor of Science in Environmental Science from James Madison University, where he also served as president of the university’s outdoor recreation club. After graduating, he spent three years as a wilderness educator with a backcountry youth program in the Shenandoah Valley — teaching Leave No Trace ethics, backcountry navigation, and campcraft — before moving into full-time writing in 2018.
His work focuses on one core belief: the best gear is the gear you understand. Whether he’s doing a side-by-side weight comparison of ultralight shelters or writing a beginner’s guide to building a sub-20-lb base weight kit, Caleb writes with the same directness you’d expect from a trusted trail partner. He has logged more than 4,000 miles across iconic routes including the John Muir Trail, the Wind River Range, Vermont’s Long Trail, and the Collegiate Peaks Loop in Colorado.
Areas of Expertise
- Ultralight backpacking systems and base weight optimization
- Tent, tarp, and shelter testing across three-season and shoulder-season conditions
- Sleeping bag and quilt temperature rating verification
- Backpacking nutrition, meal planning, and calorie-per-ounce analysis
- Leave No Trace principles and wilderness ethics
- Campfire safety, bear country protocols, and water treatment methods
- Gear care, repair, and long-term durability assessment
Education
James Madison University — B.S. in Environmental Science, 2015
During his time at JMU, Caleb served as President of the Outdoor Recreation Club, where he planned and led more than 30 backcountry trips annually across the Blue Ridge Mountains and Appalachian Trail corridor. The role sharpened his ability to assess gear performance under real conditions, manage group safety in remote environments, and develop the kind of practical trail knowledge that no classroom can teach.
Professional Experience
Gear Writer & Senior Contributor — [campeox.com]
Produces in-depth gear reviews, buyer’s guides, and how-to content across backpacking, camping, and ultralight hiking categories. Tests all gear in real field conditions before publishing recommendations.
Wilderness Educator & Trip Leader — Shenandoah Backcountry Youth Program — 2015–2018 Led multi-day backcountry expeditions for teens and young adults throughout Shenandoah National Park and George Washington National Forest. Taught LNT principles, orienteering, first aid awareness, and campcraft fundamentals.
Outdoor Recreation Club President — James Madison University — 2013–2015 Organized and led university-sponsored hiking, backpacking, and camping trips in the Blue Ridge Mountains and Appalachian Trail corridor. Managed club budget, safety protocols, and trip logistics for a membership of 120+ students.
Editorial Standards
Every piece of gear Caleb recommends has been personally tested in the field — not just unboxed and described. His review process includes a minimum of two overnight trips per shelter, a full-season evaluation for sleep systems, and side-by-side comparisons wherever possible. He does not accept payment for positive reviews. Affiliate relationships, where they exist, are always disclosed in accordance with FTC guidelines.
All factual claims about gear specifications, trail distances, and safety recommendations are cross-referenced against manufacturer data sheets and established sources such as the Leave No Trace Center for Outdoor Ethics and the American Hiking Society before publication.