Camping in an open field or on a barren beach offers stunning views, but it completely removes your natural anchors for a shelter. When the rain starts pouring and there is not a single trunk in sight, you need a reliable backup plan to stay dry. Figuring out how to put a tarp over a tent without trees is an essential skill for any serious outdoor enthusiast.
This guide will walk you through the entire process from start to finish. You will learn the exact techniques needed to build a sturdy, freestanding shelter that can withstand high winds and heavy downpours. By the end of this post, you will have the confidence to set up camp anywhere, regardless of the local foliage.
Why Learning to Pitch a Tarp Without Trees Matters
Relying solely on wooded areas severely limits your camping options. Many beautiful destinations, such as alpine meadows and desert landscapes, lack the tall vegetation needed for traditional ridge lines. If you only know how to tie ropes to branches, you will eventually find yourself exposed to harsh weather. Mastering a freestanding shelter gives you complete freedom to explore diverse environments.
Beyond simply expanding your horizons, this skill drastically improves your safety and comfort. Sudden storms can roll in quickly when you are camping in exposed terrain. Having a reliable method to shield your tent prevents water from seeping through the fabric and ruining your night. A well-pitched cover also provides excellent shade during blistering summer afternoons, keeping your sleeping area significantly cooler.
Furthermore, relying on your own equipment rather than natural features aligns with Leave No Trace principles. Tying tight ropes around delicate saplings can damage the bark and harm the local ecosystem. By using poles and ground anchors, you minimize your impact on the environment while still enjoying top-tier protection. It is a win-win scenario for both you and the wilderness.
Tools and Materials You’ll Need
Before you head out into the wild, you must ensure your gear kit is fully stocked. Missing a single component can make it incredibly difficult to erect a stable structure in an open space. Gather the following items before packing your bag:
- A large, durable camping tarp with reinforced grommets or tie-out loops.
- Two tall, adjustable tarp poles or sturdy trekking poles.
- At least six lengths of high-visibility paracord or guy lines with tensioners.
- Eight heavy-duty tent stakes suitable for the soil type you will encounter.
- A mallet or a heavy, flat rock for driving stakes into the ground.
Having high-quality materials makes a massive difference when the wind picks up. Flimsy stakes or cheap cordage will quickly snap under pressure, leaving your shelter collapsed in the mud. Invest in reliable equipment, and practice packing it together so you never leave an essential piece behind.
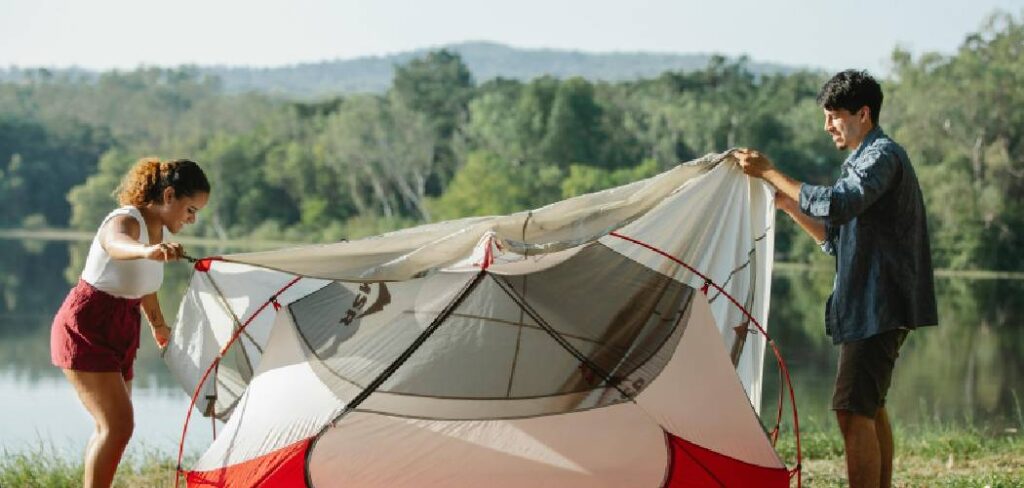
Step-by-Step Guide on How to Put a Tarp Over a Tent Without Trees
Step 1 – Find a Flat and Secure Location
The foundation of any good campsite is the ground you choose to sleep on. Look for a relatively flat area that is free of sharp rocks, thorny bushes, and ant nests. You also want to avoid setting up in a ditch or a slight depression where rainwater might naturally pool.
Once you find a smooth spot, assess the wind direction before unpacking your gear. Pitching your shelter so that the lowest side faces the incoming wind will help deflect aggressive gusts. Taking five extra minutes to analyze your surroundings will save you hours of frustration later.
Step 2 – Lay Out Your Tarp and Tent
Unpack your tent and set it up completely in the center of your chosen location. This gives you a physical reference point to ensure your cover will be perfectly centered over your sleeping quarters. Once the tent is staked down, unfold your tarp and lay it flat on the ground right next to the tent.
Inspect the fabric for any unexpected tears or missing tie-out loops before you begin the heavy lifting. Taking a moment to organize your guy lines and stakes around the perimeter will streamline the rest of the process. Keeping your workspace tidy prevents you from tripping over loose cords while you work.
Step 3 – Assemble Your Tarp Poles
Now it is time to prepare the primary supports that will replace the missing natural anchors. Extend your adjustable poles to a height that clears the top of your tent by at least a foot. If you are using trekking poles, lock the mechanisms tightly so they do not collapse under tension.
Knowing how to put a tarp over a tent without trees requires a solid understanding of structural balance. These poles will bear the brunt of the wind and the weight of the fabric, so they must be absolutely rigid. Double-check the locking pins or twist-locks on your poles to guarantee they are fully engaged.
Step 4 – Position the First Support Pole
Take your first assembled pole and stand it upright near the front entrance of your tent. Slip the metal tip of the pole through the center grommet or loop on the front edge of the tarp. Hold the pole completely vertical with one hand while keeping the fabric lightly draped over your shoulder.
At this stage, the structure will be very unstable since nothing is staked down yet. It helps to have a camping partner hold the pole, but you can easily manage it alone with a bit of coordination. Keep a firm grip on the pole so it does not topple over and puncture your tent fabric.
Step 5 – Secure the Primary Guy Lines
With the first pole held upright, attach two guy lines to the top of the pole or the same grommet. Walk these lines out at a 45-degree angle from the pole and stake them firmly into the ground. Apply a moderate amount of tension to both lines so the pole can stand on its own.
This creates a stable tripod effect using the pole and the two tensioned ropes. Ensure the stakes are driven deep into the soil at an angle pointing away from the shelter. You can now let go of the front pole and focus on the back half of the setup.
Step 6 – Erect the Second Support Pole
Grab your second pole and move to the rear of your tent. Lift the back edge of the tarp, insert the pole tip into the corresponding center grommet, and pull the fabric taut across the ridge. Just like the front setup, you need to keep this pole perfectly upright while you prepare the next ropes.
The ridge line of the fabric should now be suspended tightly above your tent, resembling a classic A-frame roof. If the fabric is sagging heavily in the middle, you may need to move the rear pole slightly further back. Adjust the distance until the central spine of the shelter looks sharp and flat.
Step 7 – Tension the Remaining Guy Lines
Attach two more guy lines to the top of the rear pole and walk them out at 45-degree angles. Drive your stakes into the dirt and pull the ropes tight using your tensioners or a simple taut-line hitch. Both poles should now be standing completely on their own, supporting the suspended fabric.
Walk back to the front of the shelter and check the tension on your initial ropes. You will likely need to adjust the tensioners on all four main lines to balance the load evenly. A properly balanced ridge line will not sway dramatically when you push lightly against the poles.
Step 8 – Stake the Corners Firmly
With the main spine established, it is time to secure the remaining loose fabric flapping in the wind. Take the four corners of your material and pull them out and away from the center of the tent. Once you are satisfied with the coverage, drive a stake through the corner loops to pin them to the earth.
Learning how to put a tarp over a tent without trees is all about managing geometry and tension. If you want more headroom, attach short guy lines to these corners instead of pinning them directly to the dirt. This lifts the side walls slightly, increasing airflow and making the space feel significantly larger.
Step 9 – Adjust for Optimal Water Runoff
The final step is crucial for preventing disaster during a heavy rainstorm. Walk around your shelter and look for any flat spots or loose sections where water could potentially gather. Adjust the corner stakes or shorten the pole heights slightly to create a steep, smooth pitch for water to run off.
A tight shelter is a quiet and dry shelter. Flick the side of the fabric with your finger; it should sound like a tight drum rather than a loose flag. Make any final tweaks to your tensioners, and your freestanding oasis is officially ready for the night.
Read More: How to Stay Cool While Camping
Critical Mistakes That Will Ruin Your Lenses
It might seem strange to worry about camera gear while discussing shelter building, but a collapsed canopy is a photographer’s worst nightmare. Many outdoor enthusiasts bring expensive cameras to capture the stark beauty of treeless landscapes. If your setup fails during a downpour, the water will instantly flood your tent and saturate your delicate equipment. Once moisture enters the internal glass elements of a lens, it creates irreversible fungus and fogging that destroys the optics.
Failing to angle your stakes properly is the fastest way to cause a catastrophic collapse. If you drive a stake straight down, a strong gust of wind will easily pluck it right out of the wet mud. Always drive your pegs into the earth at a 45-degree angle facing away from the shelter. This simple adjustment exponentially increases the holding power of your anchor points.
Another fatal error is allowing the guy lines to loosen over time without checking them. Nylon cordage stretches when it gets wet, causing your once-tight roof to sag dramatically during a storm. Water will pool in these sagging pockets, eventually gaining enough weight to snap your poles or tear the fabric entirely. Check your tensioners before you go to sleep, ensuring your expensive lenses remain perfectly safe and dry inside your tent.
Expert Tips
To truly master this technique, you must learn to adapt to the specific terrain you are facing. If you are camping on a sandy beach, standard metal pegs will slip out almost immediately. Bury a heavy log or a large rock in the sand and tie your guy lines to that instead. This “deadman anchor” technique is incredibly strong and works perfectly in loose, shifting soils.
Always carry an extra length of paracord in your pack for unexpected emergencies. Sometimes a single pole is not quite tall enough, and you may need to tie off to a nearby boulder or vehicle. Being flexible with your setup allows you to create a secure roof in almost any environment. Practice tying a bowline knot and a taut-line hitch until you can do them blindfolded.
Frequently Asked Questions
Can I use trekking poles instead of tarp poles?
Yes, trekking poles are an excellent, lightweight alternative for building freestanding shelters. You just need to make sure the locking mechanisms are tightened securely so they do not collapse under the tension of the ropes. Placing the handle end upward against the fabric can also prevent the sharp metal tip from puncturing the material.
How do I prevent water from pooling on the tarp?
The key to preventing water accumulation is creating a steep, tight angle on all sides of the shelter. Ensure your center ridge line is pulled extremely taut between your two support poles. If one side sags, adjust your guy lines to pull the fabric downward, forcing the water to run off immediately.
What size tarp is best for a standard camping tent?
A 10×10 foot or 12×12 foot cover is generally ideal for a standard two-person camping tent. This size provides enough overhang to protect the entrance and sides without catching too much excessive wind. If you have a massive family cabin tent, you will need to scale up to a much larger footprint.
How do I secure stakes in loose sand or soft dirt?
Standard metal pegs will easily rip out of soft ground under heavy wind pressure. You should use specialized sand stakes, which are wider and longer to provide more surface area resistance. Alternatively, you can bury a sturdy stick horizontally in the sand and tie your guy line directly to it.
Is it safe to cook under a tarp shelter?
Cooking under a canopy requires extreme caution and plenty of ventilation to prevent carbon monoxide buildup. You must ensure the fabric is pitched high enough to avoid catching fire from the stove’s heat. If the wind is blowing erratically, it is always safer to move your cooking station completely outside the covered area.
Conclusion
Setting up camp in an open landscape does not mean you have to sacrifice your comfort or safety. By utilizing sturdy poles, reliable tension knots, and strategic anchor points, you can build a fortress anywhere. You now know exactly how to put a tarp over a tent without trees, giving you the ultimate freedom to explore the backcountry.
Do not wait for a massive storm to hit before you test out these new skills. Head into your backyard this weekend and practice erecting your shelter until the process becomes second nature. Grab your gear, embrace the open spaces, and start planning your next great outdoor adventure today.
About Caleb
Caleb Merritt is a Virginia-based outdoor writer and gear analyst who has spent over a decade sleeping on the ground, crossing mountain passes, and obsessively shaving grams off his pack weight. He holds a Bachelor of Science in Environmental Science from James Madison University, where he also served as president of the university’s outdoor recreation club. After graduating, he spent three years as a wilderness educator with a backcountry youth program in the Shenandoah Valley — teaching Leave No Trace ethics, backcountry navigation, and campcraft — before moving into full-time writing in 2018.
His work focuses on one core belief: the best gear is the gear you understand. Whether he’s doing a side-by-side weight comparison of ultralight shelters or writing a beginner’s guide to building a sub-20-lb base weight kit, Caleb writes with the same directness you’d expect from a trusted trail partner. He has logged more than 4,000 miles across iconic routes including the John Muir Trail, the Wind River Range, Vermont’s Long Trail, and the Collegiate Peaks Loop in Colorado.
Areas of Expertise
- Ultralight backpacking systems and base weight optimization
- Tent, tarp, and shelter testing across three-season and shoulder-season conditions
- Sleeping bag and quilt temperature rating verification
- Backpacking nutrition, meal planning, and calorie-per-ounce analysis
- Leave No Trace principles and wilderness ethics
- Campfire safety, bear country protocols, and water treatment methods
- Gear care, repair, and long-term durability assessment
Education
James Madison University — B.S. in Environmental Science, 2015
During his time at JMU, Caleb served as President of the Outdoor Recreation Club, where he planned and led more than 30 backcountry trips annually across the Blue Ridge Mountains and Appalachian Trail corridor. The role sharpened his ability to assess gear performance under real conditions, manage group safety in remote environments, and develop the kind of practical trail knowledge that no classroom can teach.
Professional Experience
Gear Writer & Senior Contributor — [campeox.com]
Produces in-depth gear reviews, buyer’s guides, and how-to content across backpacking, camping, and ultralight hiking categories. Tests all gear in real field conditions before publishing recommendations.
Wilderness Educator & Trip Leader — Shenandoah Backcountry Youth Program — 2015–2018 Led multi-day backcountry expeditions for teens and young adults throughout Shenandoah National Park and George Washington National Forest. Taught LNT principles, orienteering, first aid awareness, and campcraft fundamentals.
Outdoor Recreation Club President — James Madison University — 2013–2015 Organized and led university-sponsored hiking, backpacking, and camping trips in the Blue Ridge Mountains and Appalachian Trail corridor. Managed club budget, safety protocols, and trip logistics for a membership of 120+ students.
Editorial Standards
Every piece of gear Caleb recommends has been personally tested in the field — not just unboxed and described. His review process includes a minimum of two overnight trips per shelter, a full-season evaluation for sleep systems, and side-by-side comparisons wherever possible. He does not accept payment for positive reviews. Affiliate relationships, where they exist, are always disclosed in accordance with FTC guidelines.
All factual claims about gear specifications, trail distances, and safety recommendations are cross-referenced against manufacturer data sheets and established sources such as the Leave No Trace Center for Outdoor Ethics and the American Hiking Society before publication.