Backpacks serve as a blank canvas for your personality and practical needs. Adding a personal touch to your daily carry or hiking gear makes it uniquely yours while adding functional value. Many people struggle with attaching small items securely, leading to lost charms, broken zippers, or annoying jingling sounds during a hike.
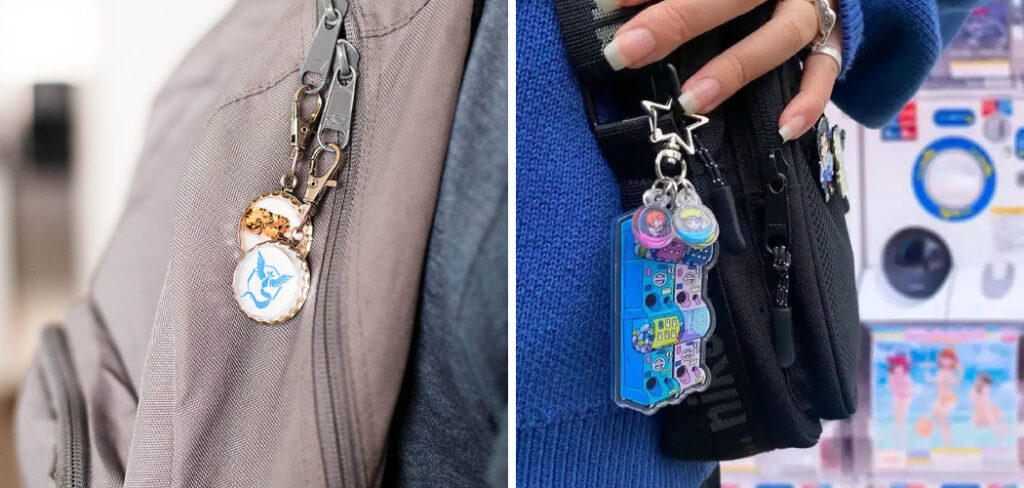
If you want to learn how to put keychains on backpack straps and zippers the right way, you need a method that protects your gear. Doing this properly ensures your items stay firmly in place regardless of where your travels take you. You will also avoid damaging the fabric or the essential mechanisms of your bag. This guide provides a clear, step-by-step process to help you safely and securely attach your favorite accessories.
Why Customizing Your Gear Matters
Personalizing your bag offers serious advantages for campers, hikers, and outdoor beginners. When you hit the trail, identifying your gear quickly saves time and prevents mix-ups at crowded campsites or trailheads. A brightly colored charm acts as a visual marker, instantly setting your bag apart from a pile of similar-looking outdoor equipment.
Customization also adds deep practical value to your outdoor experience. Attaching functional items like a small compass, a whistle, or a miniature flashlight directly to the outside of your bag keeps essential safety tools within immediate reach. You never have to dig through deep compartments in the dark or during an emergency. Building this simple skill builds your confidence and helps you create a highly efficient, personalized system for any adventure.
Tools and Materials You’ll Need
Before you start attaching items to your bag, you should gather a few basic supplies. Having the right tools prevents frustration and protects your fingernails from getting scratched or broken by tight metal rings.
- Your backpack: Any daypack, hiking bag, or school bag with zippers or loops will work perfectly.
- Keychains: Gather the charms, tools, or decorative pieces you plan to attach.
- Small flathead screwdriver: This tool helps pry open stubborn metal split rings without hurting your fingers.
- Carabiners: Small metal clips work beautifully for attaching items to fabric loops or D-rings.
- Split ring pliers (Optional): If you plan to attach multiple items, this inexpensive specialty tool easily holds tight metal rings open for you.
9 Step-by-Step Guide on How To Put Keychains On Backpack
Step 1 – Evaluate Your Attachment Points
Before you begin attaching anything, inspect your bag carefully to find the most secure attachment points. Look closely at the zipper pulls, the fabric daisy chains, and any plastic or metal D-rings sewn into the shoulder straps. You want to choose spots that will not interfere with the bag’s primary functions.
Avoid placing bulky items near the main zipper track where they might get caught in the teeth. Heavy metal charms belong on sturdy structural loops rather than fragile mesh pockets. Taking a minute to map out your desired locations prevents poor weight distribution later. Visualizing the layout ensures your favorite charms hang cleanly and remain highly visible while you walk.
Step 2 – Choose the Right Hardware
Selecting the correct hardware makes a massive difference in how securely your items stay attached. Most decorative charms come with standard steel split rings, which work well for zipper pulls. However, if you plan to attach gear to a thick fabric loop, a standard ring might not fit around the material.
If you want to master how to put keychains on backpack straps, you should upgrade to small aluminum carabiners or S-biners for those thicker sections. Carabiners clip on effortlessly and allow you to move items around whenever you want. Matching the hardware to the specific attachment point guarantees that your accessories will not stretch, snap, or fall off during your commute.
Step 3 – Open the Split Ring Safely
Opening a tight metal split ring with your bare fingernails often leads to painful bends or breaks. Instead, grab your small flathead screwdriver or a sturdy coin to do the heavy lifting. Hold the metal ring firmly between your thumb and index finger.
Gently wedge the tip of the screwdriver between the two overlapping layers of metal. Twist the handle slightly to create a small gap. The metal should separate just enough for you to slide the edge of your bag’s zipper pull or loop into the opening. Keeping the ring wedged open with the tool makes the next movement incredibly smooth and entirely painless.
Step 4 – Slide the Ring Onto the Zipper Pull
With the metal layers held apart by your tool, guide the edge of the zipper pull into the gap. You want to insert the solid part of the pull right between the separated metal bands. Once the zipper pull is securely caught between the bands, pull your screwdriver out of the gap.
The metal ring will snap down tightly, trapping the zipper pull inside the loop. Maintain a firm grip on both the bag and the charm to keep everything steady. You need to keep tension on the metal ring so it does not slip off the zipper pull before you finish rotating it.
Step 5 – Secure the Ring Completely
Now you must rotate the metal ring until the zipper pull travels entirely through the overlapping section. Pinch the metal ring tightly and turn it in a circular motion. You will hear a distinct clicking or scraping sound as the solid zipper pull slides past the cut end of the metal wire.
Once the pull passes the end of the wire, the ring will snap completely shut. Inspect the connection closely. The two layers of metal should sit perfectly flat against each other. If the metal looks bent or fails to close entirely, the ring has lost its tension and you should replace it with a fresh one.
Step 6 – Use Carabiners for Heavier Items
Some accessories weigh too much for a standard zipper pull to handle comfortably. Heavy metal charms, multitools, or thick rubber characters can actually bend a zipper mechanism over time. For these bulkier items, you should bypass the zippers entirely and utilize the bag’s structural points.
Locate the sturdy fabric loops on the front panel or the hard D-rings on the shoulder straps. Clip a small carabiner through the top of your heavy charm, and then snap the carabiner directly onto the structural loop. This method shifts the weight away from fragile moving parts and puts it onto the reinforced seams of your bag.
Step 7 – Distribute the Weight Evenly
When figuring out how to put keychains on backpack layouts, balance plays a crucial role in your comfort. Hanging five heavy metal charms on the left side of your bag will cause the fabric to sag unevenly. It might even make the shoulder strap pull awkwardly against your neck.
Spread your accessories out across the entire surface of the bag. Place a few items on the front panel, hang one from the right strap, and attach another to a left-side zipper. This thoughtful distribution keeps the bag symmetrical. Your bag will look much better aesthetically, and it will carry much more comfortably on long walks.
Step 8 – Test for Noise and Movement
Once you have everything attached, pick your bag up and give it a vigorous shake. Pay close attention to how much noise your newly attached items generate. Metal charms clanking against each other create a disruptive jingle that will quickly drive you crazy on a quiet hiking trail or in a silent hallway.
If you notice excessive noise, try moving the metal items further apart. You can also mix soft silicone or plush charms between the metal ones to act as sound dampeners. Ensuring your gear travels quietly makes the experience much more pleasant for both you and anyone walking nearby.
Step 9 – Adjust Placement for Easy Access
The final step requires you to test the functionality of your bag. Put the bag on your shoulders and try to reach your most useful accessories. If you attached a small flashlight or a compass, make sure you can grab it without taking the bag off.
Try opening and closing every zipper. Ensure that bulky charms do not block your water bottle pockets or get jammed in the main compartment flap. If an item gets in your way, simply unclip it and move it to a lower loop. Taking time to refine the layout guarantees your bag remains highly functional and deeply personal.
Common Mistakes Customizing Your Backpack
Many beginners accidentally damage their favorite bags by hanging heavy items directly from fragile zipper teeth rather than the sturdy metal pulls. When you attach dense metal objects to the actual track of the zipper, the constant bouncing motion slowly pries the teeth apart. Over time, this ruins the zipper mechanism entirely and requires expensive repairs. Always attach items to the designated metal pull tab or structural fabric loops to preserve the integrity of your bag.
Another frequent error involves overcrowding a single attachment point with too many items. Stuffing three or four metal rings onto one small zipper pull creates a tangled, heavy mess. This cluster makes it incredibly difficult to open your bag quickly. Furthermore, the concentrated weight causes the metal pull to stretch and eventually snap off. Spread your accessories evenly across different zones to maintain a clean aesthetic and protect the hardware.
Finally, people often ignore the climate when choosing their accessories. Hanging delicate plush toys or untreated leather charms on an outdoor hiking bag exposes them to rain, mud, and intense sunlight. These materials quickly rot, fade, or become permanently stained when exposed to the elements. You should always match the durability of your accessories to the environment you plan to explore, reserving delicate items for indoor use.
Expert Tips
Experienced outdoor enthusiasts use small strips of clear heat-shrink tubing to silence noisy metal connections. You simply slide a tiny piece of tubing over the metal split ring and apply warm air from a hairdryer. The plastic shrinks tightly over the metal, eliminating the annoying jingling sound instantly while keeping the connection incredibly secure.
If you carry essential tools like a whistle or a small pocket knife, connect them to your shoulder straps using a retractable lanyard. This allows you to pull the tool out, use it quickly, and let it snap back into place without ever unclipping it. Finally, apply a tiny drop of clear nail polish over the overlapping ends of your metal rings. This invisible barrier prevents thin threads or loose sweater fibers from getting caught and snagged in the metal gap.
Frequently Asked Questions
Can I attach heavy tools to my bag?
You can attach heavier tools, but you must choose the right location. Never hang heavy flashlights or multitools from your zippers, as the bouncing weight will eventually break the metal pull. Instead, clip these heavier objects directly to the reinforced nylon daisy chains or the thick plastic D-rings located on your shoulder straps.
Will metal rings damage my nylon bag?
Standard metal rings will not damage nylon if you install them correctly. However, if a split ring stretches out and leaves a sharp metal edge exposed, that edge can easily snag and tear thin fabric. Always check your hardware to ensure the rings are tightly closed, and replace any warped or bent metal immediately.
How do I stop my items from jingling loudly?
To stop the noise, separate your metal accessories so they cannot physically strike each other while you walk. You can place soft rubber or plush items between metal objects to act as natural bumpers. Alternatively, wrap a small piece of electrical tape around the metal loops to muffle the clicking sounds completely.
Can I wash my bag without removing my accessories?
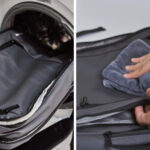
You should always remove your attached items before throwing your bag into a washing machine. Metal hardware will aggressively scratch the inside of your washer drum and could potentially damage the fabric of your bag during the spin cycle. Unclip everything and wash your charms separately by hand if they need cleaning.
What is the best hardware for frequent changes?
Small aluminum S-biners provide the best experience if you like to change your layout frequently. They feature dual spring-loaded gates that allow you to clip and unclip items in seconds without using tools. They hold securely during daily commutes but offer ultimate flexibility when you want to swap out your gear.
Conclusion
Personalizing your gear transforms a standard piece of equipment into a functional companion tailored specifically to your lifestyle. By taking the time to understand exactly how to put keychains on backpack loops and zippers, you protect your valuable gear from unnecessary wear and tear. You can now confidently secure your favorite charms, safety whistles, and miniature tools without fearing they will fall off on a busy trail.
Remember to distribute the weight evenly, choose the correct hardware for the job, and avoid overcrowding delicate zipper pulls. Whether you are preparing for a long semester at school or a weekend camping trip in the mountains, a well-organized bag makes every journey smoother. Grab your favorite accessories, gather a few small carabiners, and start customizing your bag today to reflect your unique personality and practical needs.

About Caleb
Caleb Merritt is a Virginia-based outdoor writer and gear analyst who has spent over a decade sleeping on the ground, crossing mountain passes, and obsessively shaving grams off his pack weight. He holds a Bachelor of Science in Environmental Science from James Madison University, where he also served as president of the university’s outdoor recreation club. After graduating, he spent three years as a wilderness educator with a backcountry youth program in the Shenandoah Valley — teaching Leave No Trace ethics, backcountry navigation, and campcraft — before moving into full-time writing in 2018.
His work focuses on one core belief: the best gear is the gear you understand. Whether he’s doing a side-by-side weight comparison of ultralight shelters or writing a beginner’s guide to building a sub-20-lb base weight kit, Caleb writes with the same directness you’d expect from a trusted trail partner. He has logged more than 4,000 miles across iconic routes including the John Muir Trail, the Wind River Range, Vermont’s Long Trail, and the Collegiate Peaks Loop in Colorado.
Areas of Expertise
- Ultralight backpacking systems and base weight optimization
- Tent, tarp, and shelter testing across three-season and shoulder-season conditions
- Sleeping bag and quilt temperature rating verification
- Backpacking nutrition, meal planning, and calorie-per-ounce analysis
- Leave No Trace principles and wilderness ethics
- Campfire safety, bear country protocols, and water treatment methods
- Gear care, repair, and long-term durability assessment
Education
James Madison University — B.S. in Environmental Science, 2015
During his time at JMU, Caleb served as President of the Outdoor Recreation Club, where he planned and led more than 30 backcountry trips annually across the Blue Ridge Mountains and Appalachian Trail corridor. The role sharpened his ability to assess gear performance under real conditions, manage group safety in remote environments, and develop the kind of practical trail knowledge that no classroom can teach.
Professional Experience
Gear Writer & Senior Contributor — [campeox.com]
Produces in-depth gear reviews, buyer’s guides, and how-to content across backpacking, camping, and ultralight hiking categories. Tests all gear in real field conditions before publishing recommendations.
Wilderness Educator & Trip Leader — Shenandoah Backcountry Youth Program — 2015–2018 Led multi-day backcountry expeditions for teens and young adults throughout Shenandoah National Park and George Washington National Forest. Taught LNT principles, orienteering, first aid awareness, and campcraft fundamentals.
Outdoor Recreation Club President — James Madison University — 2013–2015 Organized and led university-sponsored hiking, backpacking, and camping trips in the Blue Ridge Mountains and Appalachian Trail corridor. Managed club budget, safety protocols, and trip logistics for a membership of 120+ students.
Editorial Standards
Every piece of gear Caleb recommends has been personally tested in the field — not just unboxed and described. His review process includes a minimum of two overnight trips per shelter, a full-season evaluation for sleep systems, and side-by-side comparisons wherever possible. He does not accept payment for positive reviews. Affiliate relationships, where they exist, are always disclosed in accordance with FTC guidelines.
All factual claims about gear specifications, trail distances, and safety recommendations are cross-referenced against manufacturer data sheets and established sources such as the Leave No Trace Center for Outdoor Ethics and the American Hiking Society before publication.