Getting ready to leave the campsite is always bittersweet, but packing your gear should never be the hardest part of your trip. Many beginners find themselves wrestling with a stubborn mound of nylon and synthetic insulation, endlessly trying to cram it into a tiny stuff sack. If you have ever felt frustrated while breaking down camp, you are certainly not alone in this struggle.
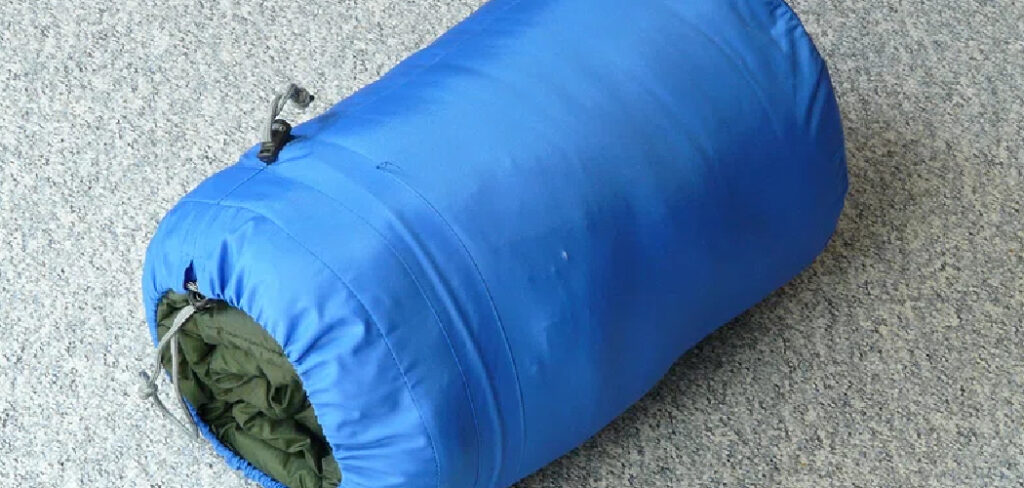
Learning exactly how to roll up a sleeping bag can save you precious time, protect your expensive gear, and make your next outdoor adventure much smoother. Whether you are packing up for a casual weekend car camping trip or preparing for a rugged backcountry hike, mastering this simple camp chore will get you on the trail faster. Let us dive into the best professional techniques to conquer that fluffy fabric so you can head home completely stress-free.
Why Rolling Up a Sleeping Bag Matters
Taking the time to properly pack your bedding is about much more than just maintaining a tidy campsite. Proper storage directly affects the long-term lifespan and overall performance of your expensive camping gear. When you pack your equipment correctly, you actively prevent the internal insulation from bunching up, tearing, or compressing unevenly. This careful process ensures your gear retains its loft, which is the necessary fluffiness that traps body heat and keeps you warm on chilly mountain nights.
Additionally, creating a compact, tight cylinder saves vital cargo space in your hiking backpack or car trunk, leaving plenty of room for extra food, clothes, or cooking equipment. Finally, securing your sleep setup properly protects the delicate exterior fabric from dirt, moisture, and unexpected rain during transit. Taking just a few extra minutes to fold and compress your gear correctly guarantees it will always be ready for your next big adventure in the great outdoors.
8 Step-by-Step Guide: How to Roll Up a Sleeping Bag
Step 1: Clear Your Workspace and Unzip the Fabric
Before you begin the actual packing process, you must create a clean and dry workspace. Find a flat patch of grass, a smooth picnic table, or the clean floor of your tent to prevent dirt, pine needles, or sharp rocks from damaging the delicate exterior fabric. Next, locate the main zipper and open it completely from the very top down to the bottom.
Unzipping the fabric allows trapped air to escape much faster when you start applying heavy pressure later. If your gear has any secondary zippers or velcro closures near the hood, make sure those are completely open as well. Taking this preparatory step ensures the synthetic fibers or down feathers compress evenly, preventing frustrating air bubbles from forming while you work.
Step 2: Fold the Material in Half Lengthwise
Once your bedding is completely unzipped and lying flat on the ground, grab one side and fold it over to meet the opposite edge. You want to create a long, narrow rectangle that is roughly half the original width. Align the edges as neatly as possible, paying special attention to the corners at the footbox and the hood section.
Smoothing out any large wrinkles at this stage prevents awkward, bulky lumps from forming later in the process. A straight, even fold is the absolute secret to achieving a tight cylinder that will actually fit inside your carrying container. Run your hands firmly along the folded seam to press out the initial layer of trapped air, which flattens the material significantly.
Step 3: Begin Wrapping Tightly from the Footbox
Now comes the most crucial part of the packing process. Move down to the bottom end, known as the footbox, and begin creating a very tight cylinder. You must start at the feet and work your way upward toward the head opening. This specific directional movement pushes all the internal trapped air out through the open top where the hood is located.
As you make that first initial fold, pinch the fabric tightly with your fingers and press down firmly with your palms. The tighter you make this very first rotation, the easier the rest of the packing task becomes. Keep your knees close by so you can use your body weight for leverage.
Step 4: Use Your Knees to Maintain Constant Compression
As the cylinder grows thicker, the insulation will naturally try to unroll and expand back to its original size. You must use your body weight to your advantage to prevent this from happening. Place your knees gently on top of the rolled section while your hands reach forward to pull the next section of fabric taut.
Mastering this efficient packing technique means letting your larger leg muscles do the heavy lifting rather than relying solely on your arm strength. Slowly crawl forward on the ground as you continue to wrap the material tightly over itself. Keep smoothing the sides inward if they start to flare out, maintaining a perfect rectangular shape.
Step 5: Expel the Final Pockets of Trapped Air
When you finally reach the top section near the hood, you will likely encounter a large pocket or balloon of trapped air. Do not rush this final phase of the process. Pause your forward momentum and lean your weight heavily onto the roll, giving the air plenty of time to slowly hiss out of the unzipped top edge. If you try to force the roll too quickly at this point, you risk popping the internal seams or creating a lopsided bundle. Press down firmly with your forearms and chest until the fabric is completely flat against the ground. Taking a few extra seconds to fully deflate the hood ensures your final bundle remains perfectly compact.
Step 6: Secure the Bundle with Built-In Ties or Straps
Many modern camping sleep systems come equipped with integrated straps, elastic loops, or tie strings attached near the hood or footbox. While keeping your knee planted firmly on the finished cylinder to prevent it from uncoiling, carefully reach for these securing straps. Pull the cords tightly around the center or the ends of the bundle and snap them into place or tie a secure knot.
If your gear does not feature built-in straps, you can easily use a spare piece of paracord or a simple bungee cord to hold everything securely together. This crucial step prevents the slippery nylon from exploding back into a messy pile.
Step 7: Slide the Tightly Rolled Bundle into the Sack
With your bundle safely secured, grab your carrying bag or compression sack. Instead of trying to force the wide cylinder into a narrow opening, gently slide the sack over one end of the roll like you are putting a sock on a foot. Wiggle the sack back and forth, slowly working it down over the fabric.
Once the bundle is partially inside, you can flip it upright and push the rest of the material down into the bottom of the container. Knowing exactly how to roll up a sleeping bag guarantees that your gear will slide effortlessly into its designated carrier without ripping the delicate side seams or breaking a sweat.
Step 8: Cinch the Drawstrings and Store Properly
Once the bundle rests completely inside the sack, pull the top drawstrings tightly to close the opening and secure the load. If you are using a specialized compression sack, buckle the exterior straps and pull them down evenly to shrink the package even further for transit. This makes the unit incredibly easy to strap to the outside of your hiking backpack. Remember that this tight configuration is intended strictly for travel. When you return home from your camping trip, you must remove the gear from its tight sack immediately. Hang it loosely in a dry closet to protect the delicate internal insulation long-term.
Frequently Asked Questions (FAQ)
Should I Roll or Stuff My Camping Gear?
You can actually do both, depending on the specific type of insulation you own. Down feathers generally perform better when stuffed randomly into a sack, as this prevents damaging creases from forming in the exact same spots repeatedly. Synthetic materials, however, often benefit from being wrapped tightly to minimize their bulky footprint. Always check your manufacturer’s care tag for the absolute best packing method.
How Do I Store My Gear After a Camping Trip?
Never leave your cold-weather gear tightly compressed in its tiny transport sack for long periods between trips. Long-term compression permanently damages the delicate internal fibers and drastically reduces their ability to trap body heat. Instead, store the item loosely by hanging it over a sturdy hanger in a dry, climate-controlled closet, or place it inside a large, breathable cotton storage sack.
Can I Wash My Gear in a Washing Machine?
Yes, you can wash most outdoor bedding, but you must take proper precautions to avoid destroying it.
- Use a front-loading commercial washer without a central agitator.
- Wash on a delicate cycle using cold water.
- Purchase a specialized detergent formulated specifically for down or synthetic gear.
- Tumble dry on low heat with clean tennis balls to safely restore fluffiness.
Why Is It So Hard to Get the Air Out?
Trapped air is the absolute most common frustrating issue campers face when packing up their site. The protective exterior nylon is explicitly designed to resist wind and morning moisture, which naturally traps massive pockets of air inside the baffling. You can completely solve this annoyance by fully unzipping the main zippers before you begin, and working slowly from the sealed bottom toward the open top.
Do I Really Need a Compression Sack for Backpacking?
While not strictly mandatory for weekend car trips, a heavy-duty compression sack is highly recommended for extended backcountry backpacking. These specialized carrying bags feature durable exterior webbing straps that crush your bulky gear down to a mere fraction of its original size. This simple upgrade frees up precious internal cargo space inside your main pack for essential survival items, extra water, and cooking supplies.
Conclusion
Packing up camp does not have to be a frustrating wrestling match with your outdoor gear. By taking the time to clear a workspace, fold the fabric evenly, and use your body weight to systematically expel trapped air, you can pack up your sleep system in record time.
Remember that practicing these simple techniques at home in your living room before your trip will make the actual process much smoother when you are out in the wilderness. Once you memorize how to roll up a sleeping bag, you will spend significantly less time fighting with nylon sacks and more time enjoying the beautiful morning scenery at your campsite. Grab your favorite outdoor gear, practice your new folding skills today, and start confidently planning your next great outdoor adventure.

About Caleb
Caleb Merritt is a Virginia-based outdoor writer and gear analyst who has spent over a decade sleeping on the ground, crossing mountain passes, and obsessively shaving grams off his pack weight. He holds a Bachelor of Science in Environmental Science from James Madison University, where he also served as president of the university’s outdoor recreation club. After graduating, he spent three years as a wilderness educator with a backcountry youth program in the Shenandoah Valley — teaching Leave No Trace ethics, backcountry navigation, and campcraft — before moving into full-time writing in 2018.
His work focuses on one core belief: the best gear is the gear you understand. Whether he’s doing a side-by-side weight comparison of ultralight shelters or writing a beginner’s guide to building a sub-20-lb base weight kit, Caleb writes with the same directness you’d expect from a trusted trail partner. He has logged more than 4,000 miles across iconic routes including the John Muir Trail, the Wind River Range, Vermont’s Long Trail, and the Collegiate Peaks Loop in Colorado.
Areas of Expertise
- Ultralight backpacking systems and base weight optimization
- Tent, tarp, and shelter testing across three-season and shoulder-season conditions
- Sleeping bag and quilt temperature rating verification
- Backpacking nutrition, meal planning, and calorie-per-ounce analysis
- Leave No Trace principles and wilderness ethics
- Campfire safety, bear country protocols, and water treatment methods
- Gear care, repair, and long-term durability assessment
Education
James Madison University — B.S. in Environmental Science, 2015
During his time at JMU, Caleb served as President of the Outdoor Recreation Club, where he planned and led more than 30 backcountry trips annually across the Blue Ridge Mountains and Appalachian Trail corridor. The role sharpened his ability to assess gear performance under real conditions, manage group safety in remote environments, and develop the kind of practical trail knowledge that no classroom can teach.
Professional Experience
Gear Writer & Senior Contributor — [campeox.com]
Produces in-depth gear reviews, buyer’s guides, and how-to content across backpacking, camping, and ultralight hiking categories. Tests all gear in real field conditions before publishing recommendations.
Wilderness Educator & Trip Leader — Shenandoah Backcountry Youth Program — 2015–2018 Led multi-day backcountry expeditions for teens and young adults throughout Shenandoah National Park and George Washington National Forest. Taught LNT principles, orienteering, first aid awareness, and campcraft fundamentals.
Outdoor Recreation Club President — James Madison University — 2013–2015 Organized and led university-sponsored hiking, backpacking, and camping trips in the Blue Ridge Mountains and Appalachian Trail corridor. Managed club budget, safety protocols, and trip logistics for a membership of 120+ students.
Editorial Standards
Every piece of gear Caleb recommends has been personally tested in the field — not just unboxed and described. His review process includes a minimum of two overnight trips per shelter, a full-season evaluation for sleep systems, and side-by-side comparisons wherever possible. He does not accept payment for positive reviews. Affiliate relationships, where they exist, are always disclosed in accordance with FTC guidelines.
All factual claims about gear specifications, trail distances, and safety recommendations are cross-referenced against manufacturer data sheets and established sources such as the Leave No Trace Center for Outdoor Ethics and the American Hiking Society before publication.