

Hitting the open road in your motorhome brings unmatched freedom and endless opportunities for adventure. However, that freedom comes with the serious responsibility of routine maintenance. Water remains the absolute biggest enemy of any travel trailer or motorhome. Even a tiny, invisible gap around an exterior screw can lead to massive structural decay over time. If you want to keep your rig dry, safe, and comfortable, you must understand how to seal rv camper wall fasteners.
This simple yet crucial maintenance task stops moisture before it ruins your wooden framing. You do not need professional mechanical skills to tackle this job. With basic tools, quality materials, and a free afternoon, anyone can properly waterproof their exterior fixtures. This guide will walk you through the entire process from start to finish, ensuring your upcoming family vacations stay completely leak-free and stress-free.
Why Sealing RV Camper Wall Fasteners Is Important
Your vehicle flexes, twists, and vibrates continuously as it travels down the highway at high speeds. This constant structural movement slowly loosens exterior screws, rivets, and decorative trim pieces over time. When these mounting points become loose, the original factory sealant cracks and eventually breaks away. Rainwater, melting snow, and heavy morning dew then easily slip behind the fiberglass or aluminum siding.
Once water penetrates the outer protective shell, it quickly soaks into the wooden wall framing and interior insulation. This hidden moisture creates a perfect environment for toxic mold, rots the critical structural supports, and causes massive, unsightly delamination of the exterior panels. Fixing a rotted frame costs thousands of dollars and typically ruins your entire camping season. By spending a few hours maintaining these exterior mounting points, you prevent catastrophic water damage. Regular inspection and proper caulking keep the harsh weather safely outside, protecting your expensive investment for many years of future travel.
8 Step-by-Step Guide: How to Seal RV Camper Wall Fasteners
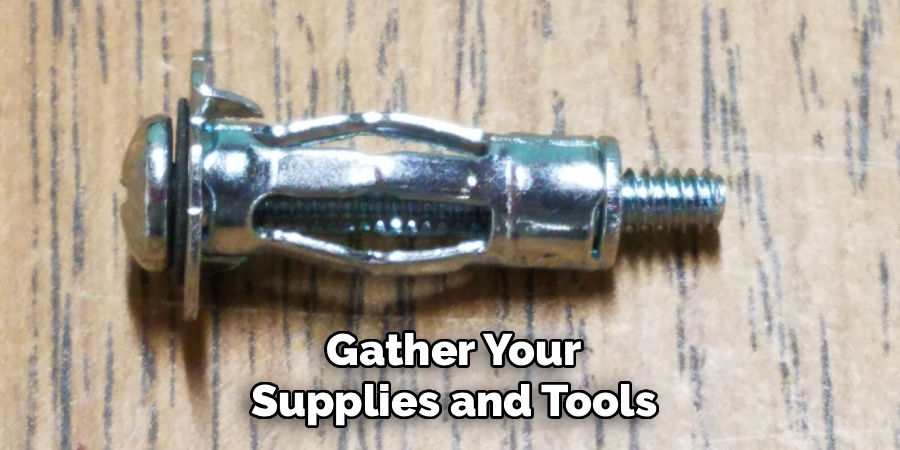
Step 1: Gather Your Supplies and Tools
Before starting the project, you need the right materials organized and ready to use. Avoid standard household silicone because it lacks the intense flexibility needed for a moving vehicle. Instead, purchase a high-quality non-leveling lap sealant or specialized polyurethane caulk designed explicitly for vertical exterior surfaces. You will also need a rigid plastic scraper, pure rubbing alcohol, clean microfiber rags, and a reliable, smooth-action caulk gun.
Having everything within easy reach prevents deep frustration once you begin working up high on the step ladder. Do not forget to wear safety glasses and heavy-duty work gloves to protect your hands from surprisingly sharp metal edges. Gathering the proper supplies makes learning how to seal rv camper wall fasteners a much smoother, safer, and highly rewarding experience for complete beginners.
Step 2: Inspect the Exterior Closely
Walk slowly around your entire vehicle to identify every single problematic screw, rivet, and trim piece. Look incredibly closely at the cargo storage doors, window frames, awning brackets, and corner molding strips. You are actively searching for any cracked, peeling, or completely missing putty.
Sometimes the factory caulk looks perfectly fine from a distance but reveals tiny, dangerous hairline fractures up close. Press firmly with your thumb around the mounting points to see if trapped water seeps out or if the siding feels suspiciously soft. Mark the compromised areas with a highly visible piece of blue painter’s tape so you do not lose track of them during the repair. A thorough, methodical inspection ensures you never accidentally miss a vulnerable entry point.
Step 3: Remove the Old and Damaged Sealant
You must never apply fresh liquid caulk directly over old, failing putty. The new layer will not adhere properly, and persistent water will quickly find its way right back inside the wall. Use your sturdy plastic scraper to gently chip away the brittle, discolored material around the exposed screw heads. Do not ever use metal putty knives because they easily scratch delicate fiberglass and permanently dent thin aluminum siding. Take your time carefully peeling back the degraded weatherproofing layer by layer. If a stubborn chunk absolutely refuses to budge, apply mild, sweeping heat from a standard hairdryer to soften the rubbery compound. Clean out as much of the old residue as humanly possible to expose the bare, solid surface underneath.
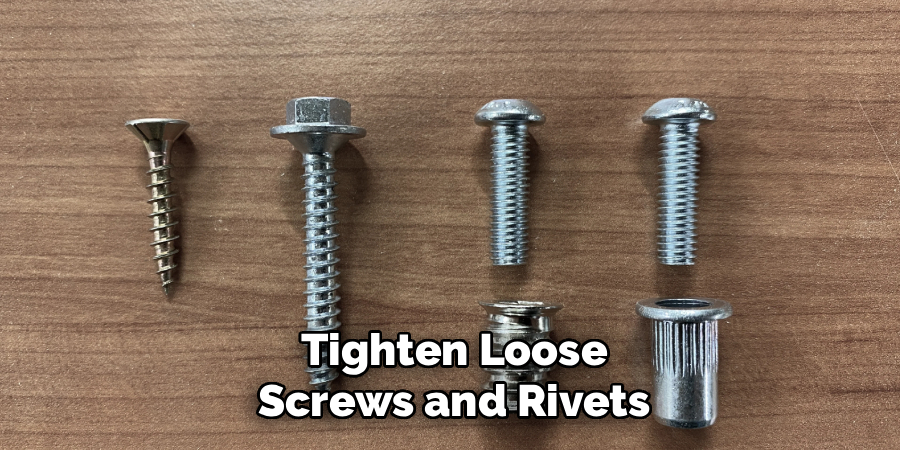
Step 4: Tighten Loose Screws and Rivets
Once the metal mounting hardware is fully exposed to the air, check for dangerously loose connections. The intense vibrations from heavy highway driving frequently back screws out of their factory-drilled holes. Grab a manual hand screwdriver and gently snug up any loose fixtures you find. Do not use a heavy-duty power drill for this step because it easily strips the incredibly thin metal or fiberglass backing plate. If a screw simply spins freely without grabbing the wood framing behind it, you might need to insert a slightly thicker fastener to properly secure the trim. Ensuring the hardware holds tightly prevents future structural movement, which is a critical part of mastering how to seal rv camper wall fasteners.
Step 5: Clean and Prep the Surface Area
New weatherproofing compounds absolutely demand a perfectly clean surface for maximum, long-lasting adhesion. Even microscopic layers of airborne dirt, greasy road grime, or natural oils from your fingers ruin the chemical bond. Dampen a clean, soft microfiber rag with pure rubbing alcohol or a specialized commercial surface prep solvent.
Wipe down the entire area heavily around the exposed hardware, aggressively scrubbing away any remaining stubborn adhesive residue. The alcohol evaporates very rapidly, leaving behind a pristine, bone-dry finish ready for the new material. Avoid using harsh chemical household cleaners or oil-based garage solvents that leave a problematic invisible film behind. Proper, meticulous surface preparation separates a temporary, failing patch from a permanent, professional repair.
Step 6: Apply the New Waterproofing Compound
Load your fresh tube of non-leveling caulk into the metal applicator gun and clearly snip the plastic tip at a forty-five-degree angle. Keep the opening relatively small so you can strictly control the flow of the material accurately. Squeeze the metal trigger slowly and cleanly apply a generous, thick bead of material directly over the head of the bare screw. You want to completely encapsulate the metal hardware, sealing the tiny gap between the fastener body and the exterior siding panel. Ensure the sticky compound wraps fully around the entire base without leaving any tiny, hidden air pockets trapped inside. Smooth, consistent application provides a robust, strong barrier against driving heavy rain and punishing high winds.
Step 7: Smooth the Finish for Maximum Protection
After successfully applying the thick bead, you need to properly tool the joint to ensure full surface contact and an attractive visual finish. Dip your heavily gloved index finger into a small paper cup of soapy water to completely prevent the incredibly sticky substance from clinging to you. Gently press down on the fresh bead, smoothing it nicely over the hardware and blending the soft edges flat into the surrounding siding.
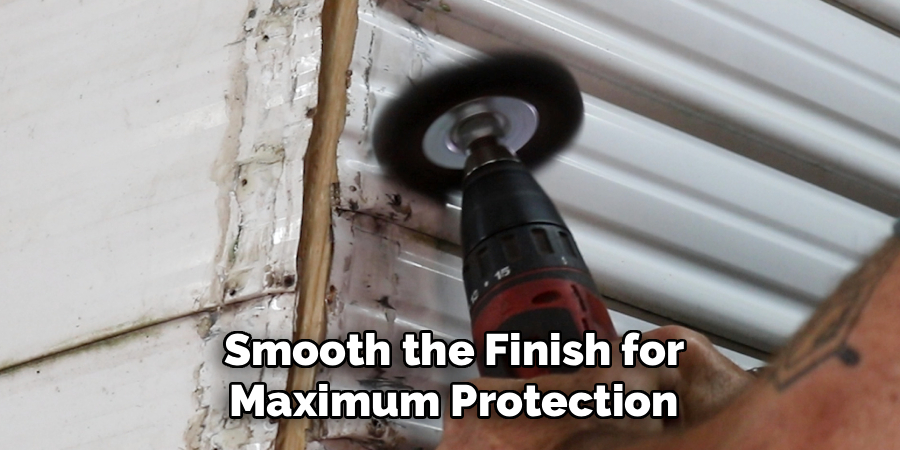
This light, consistent pressure forces the flexible compound deep into microscopic crevices, creating an absolutely impenetrable waterproof barrier. Wipe away any messy excess material immediately before it begins to heavily cure. A neat, smoothed finish looks highly professional and actively prevents outdoor dirt from accumulating.
Step 8: Allow Proper Curing Time Before Traveling
Patience is the final, essential requirement for a highly successful exterior maintenance project. Every specialized caulking product requires a very specific undisturbed curing period before safely facing the harsh outdoor elements. Read the manufacturer instructions printed clearly on the back of the tube to determine the exact waiting time required. Most high-quality exterior RV products need at least twenty-four to forty-eight full hours to fully set and dry. Keep your rig safely parked under a covered protective port or diligently check the local weather forecast to ensure absolutely no rain falls. Driving the heavy vehicle way too soon introduces massive structural vibrations that ruin the fresh chemical bond before it achieves maximum strength.

Frequently Asked Questions
What Is the Best Sealant for Motorhome Exteriors?
Non-leveling lap sealant and specialized polyurethane caulks remain the absolute best choices for vertical exterior siding applications. Unlike standard residential bathroom silicone, these highly advanced products stretch and flex safely with the vehicle’s highway movement. They also easily withstand intense ultraviolet sun radiation without dangerously cracking or turning ugly yellow over time. You should always avoid self-leveling products on side panels.
How Often Should I Inspect My Exterior Trim?
You must perform a highly thorough exterior wall inspection at least twice a single calendar year to remain totally safe.
- Inspect once in the early spring before the busy family camping season actively begins.
- Inspect again in the late fall right before properly winterizing the rig for storage.
Frequent travelers should check their exterior mounting hardware every three months.
Can I Put New Caulk Over the Old Layer?
Applying fresh, wet putty directly over a failing, dirty material practically guarantees a massive water leak. The old layer heavily loses its natural adhesion to the fiberglass or aluminum wall siding. If you simply trap the old, brittle putty underneath, the newly applied compound will eventually peel off entirely. Always heavily scrape away the degraded material first.
Why Is My Siding Bubbling Around the Screws?
Unusual bubbling or heavily wavy exterior siding clearly indicates that destructive water has already successfully bypassed the exterior weather barrier. This terrible process, widely known as structural delamination, causes the outer protective shell to physically separate from the inner wooden wall. Delamination absolutely requires immediate, professional attention to stop the spread of deep rot.
Do I Need to Remove the Screws to Waterproof Them?
You usually do not need to pull the metal hardware out entirely unless it appears completely rusted or heavily stripped. Simply tightening the existing loose screw and completely encapsulating the entire metal head with fresh, thick compound provides perfectly adequate weather protection. If a screw spins freely, remove it completely and insert a slightly thicker, stronger fastener.
Conclusion
Protecting your beloved travel trailer from devastating, expensive moisture damage does not require a costly, frustrating trip to the local dealership. By dedicating just a single quiet afternoon to proper, careful maintenance, you ensure your motorhome remains totally safe, incredibly dry, and completely ready for the next great family adventure.
We fully explored exactly why routine seasonal inspections matter deeply, what specialized chemical materials to purchase, and exactly how to seal rv camper wall fasteners using proven, professional techniques. Remember to clean the wall surface thoroughly with alcohol and neatly apply a generous, thick amount of flexible compound over every single exposed screw. Take confident control of your vehicle’s essential upkeep today. Grab your safety glasses, start inspecting those exterior trim pieces closely, and enjoy total, uninterrupted peace of mind during your next rainy camping trip.
Read More: How to Replace Camper Awning
About Caleb
Caleb Merritt is a Virginia-based outdoor writer and gear analyst who has spent over a decade sleeping on the ground, crossing mountain passes, and obsessively shaving grams off his pack weight. He holds a Bachelor of Science in Environmental Science from James Madison University, where he also served as president of the university’s outdoor recreation club. After graduating, he spent three years as a wilderness educator with a backcountry youth program in the Shenandoah Valley — teaching Leave No Trace ethics, backcountry navigation, and campcraft — before moving into full-time writing in 2018.
His work focuses on one core belief: the best gear is the gear you understand. Whether he’s doing a side-by-side weight comparison of ultralight shelters or writing a beginner’s guide to building a sub-20-lb base weight kit, Caleb writes with the same directness you’d expect from a trusted trail partner. He has logged more than 4,000 miles across iconic routes including the John Muir Trail, the Wind River Range, Vermont’s Long Trail, and the Collegiate Peaks Loop in Colorado.
Areas of Expertise
- Ultralight backpacking systems and base weight optimization
- Tent, tarp, and shelter testing across three-season and shoulder-season conditions
- Sleeping bag and quilt temperature rating verification
- Backpacking nutrition, meal planning, and calorie-per-ounce analysis
- Leave No Trace principles and wilderness ethics
- Campfire safety, bear country protocols, and water treatment methods
- Gear care, repair, and long-term durability assessment
Education
James Madison University — B.S. in Environmental Science, 2015
During his time at JMU, Caleb served as President of the Outdoor Recreation Club, where he planned and led more than 30 backcountry trips annually across the Blue Ridge Mountains and Appalachian Trail corridor. The role sharpened his ability to assess gear performance under real conditions, manage group safety in remote environments, and develop the kind of practical trail knowledge that no classroom can teach.
Professional Experience
Gear Writer & Senior Contributor — [campeox.com]
Produces in-depth gear reviews, buyer’s guides, and how-to content across backpacking, camping, and ultralight hiking categories. Tests all gear in real field conditions before publishing recommendations.
Wilderness Educator & Trip Leader — Shenandoah Backcountry Youth Program — 2015–2018 Led multi-day backcountry expeditions for teens and young adults throughout Shenandoah National Park and George Washington National Forest. Taught LNT principles, orienteering, first aid awareness, and campcraft fundamentals.
Outdoor Recreation Club President — James Madison University — 2013–2015 Organized and led university-sponsored hiking, backpacking, and camping trips in the Blue Ridge Mountains and Appalachian Trail corridor. Managed club budget, safety protocols, and trip logistics for a membership of 120+ students.
Editorial Standards
Every piece of gear Caleb recommends has been personally tested in the field — not just unboxed and described. His review process includes a minimum of two overnight trips per shelter, a full-season evaluation for sleep systems, and side-by-side comparisons wherever possible. He does not accept payment for positive reviews. Affiliate relationships, where they exist, are always disclosed in accordance with FTC guidelines.
All factual claims about gear specifications, trail distances, and safety recommendations are cross-referenced against manufacturer data sheets and established sources such as the Leave No Trace Center for Outdoor Ethics and the American Hiking Society before publication.


