A hot meal after a long day on the trail feels like a small miracle. That steaming bowl of noodles or fresh cup of coffee can turn a cold, tired evening into something you’ll remember for years. The secret? A tiny, packable burner that fits in your palm and weighs almost nothing.
If you’ve ever wondered how to use hiking mini stove setups without the guesswork, you’re in the right place. These compact cookers look intimidating at first, but they’re wonderfully simple once you understand the basics. This guide walks first-time hikers through every step, from screwing on the fuel canister to simmering your first backcountry dinner, so you can cook confidently anywhere the trail takes you.
Why Using a Hiking Mini Stove Matters
Cooking on the trail changes everything about your outdoor experience. A warm meal restores your energy, lifts your mood, and keeps your body fueled for the miles ahead. When the temperature drops, hot food and drink also help you stay warm from the inside out.
For campers and outdoor beginners, mastering a compact backpacking stove opens up longer trips and lighter packs. You skip heavy, pre-made meals and carry just fuel and a few ingredients instead. That freedom means more distance covered and more spots explored.
There’s also safety to consider. Knowing how to boil water quickly lets you purify questionable sources in a pinch. A reliable little burner isn’t a luxury out there. It’s a practical tool that makes every adventure safer and far more comfortable.
Tools and Materials You’ll Need
Gather these essentials before you head out, and pack them in a small stuff sack so nothing rattles loose in your bag:
- A hiking mini stove, the compact burner that screws onto your fuel canister
- An isobutane-propane fuel canister sized to match your trip length
- A lightweight cooking pot with a lid to speed up boiling
- A long-reach lighter or waterproof matches to spark the flame reliably
- A wind screen or natural windbreak to protect the flame in gusty weather
- A heat-resistant utensil for stirring without melting the handle
- A flat, stable surface like a rock or hard-packed ground for setup
- Optional: a small folding stove stand for extra stability on uneven terrain
Keep everything together in one place. When hunger hits after a hard climb, you’ll want your gear ready to go without digging through your whole pack.
8 Step-by-Step Guide on How to Use a Hiking Mini Stove
Step 1 – Choose a Safe, Level Cooking Spot
Before you light anything, scout out the right place to cook. A flat, stable surface keeps your pot from tipping and spilling boiling water onto your legs or gear.
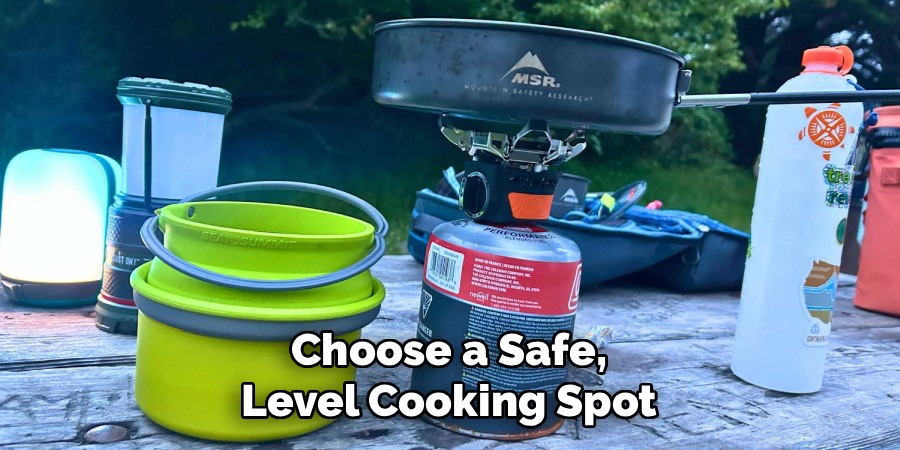
Look for hard ground, a wide flat rock, or a picnic table if your campsite has one. Clear away dry leaves, pine needles, and twigs within a foot or two, since stray sparks catch fast in dry conditions.
Feel the ground with your hand to check for wobble. A slight tilt might seem harmless, but a full pot of soup can slide off in seconds. Position yourself upwind so smoke drifts away from your face. This small bit of prep sets the stage for a smooth, stress-free cooking session.
Step 2 – Attach the Fuel Canister
Now connect your stove to its power source. Learning how to use hiking mini stove hardware starts with a secure, leak-free fuel connection.
Hold the canister upright and line up the threaded valve with the base of your burner. Twist the stove clockwise onto the canister, turning slowly and steadily. You’ll feel it tighten as the threads catch.
Stop when it feels snug. Don’t crank it hard, since overtightening can strip the threads or damage the seal. Give the connection a gentle wiggle to confirm it’s solid.
Take a quick sniff near the joint. If you smell gas, unscrew it and try again. A proper seal means no hissing and no odor, just a firm, quiet connection ready for the flame.
Step 3 – Open the Fuel Valve Slightly
With everything connected, it’s time to release a little gas. Locate the small control knob near the base of the burner, usually a folding wire handle.
Turn it counterclockwise just a touch. You’ll hear a soft hiss as fuel begins to flow. Only crack it open slightly at first, because too much gas creates a large, hard-to-control flame when you ignite it.
Listen closely to that gentle hiss. It tells you gas is moving without wasting your precious canister supply. Keep your face and hands clear of the burner head as you prepare to light it.
A light touch here makes ignition safer and easier. You can always add more fuel once the flame is burning steadily and under control.
Step 4 – Ignite the Burner
Here comes the satisfying part. Grab your long-reach lighter or a waterproof match and bring the flame close to the burner head from the side, never directly over the top.
Click the lighter or strike the match, and the gas should catch with a soft whoosh and a ring of blue flame. That crisp blue color means clean, efficient burning.
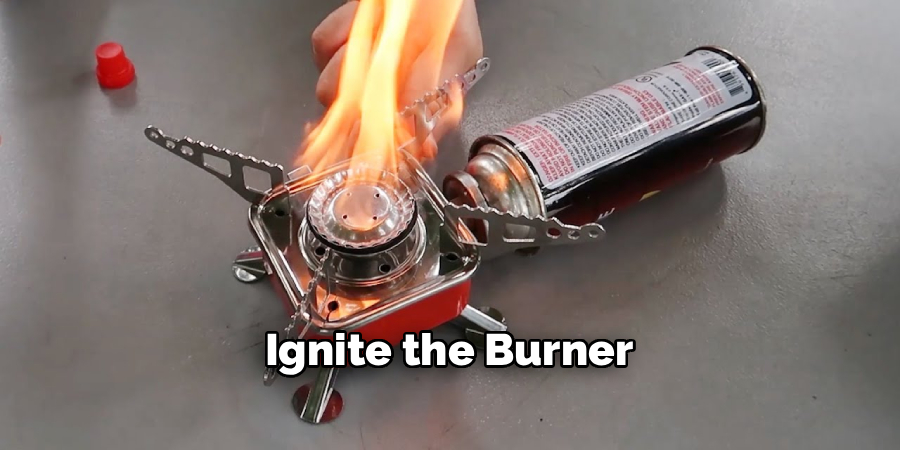
If it doesn’t light within a couple of seconds, turn off the gas, wait a moment for it to clear, then try again. Never let gas build up before igniting.
Watch the flame steady into a low, even circle. The warmth radiates upward instantly. That first whoosh of ignition is the moment your trail kitchen truly comes to life.
Step 5 – Adjust the Flame to Your Needs
Once lit, dial in the right heat for your task. Turn the control knob counterclockwise for a bigger flame or clockwise to bring it down.
For a fast, rolling boil, open it up until the blue flames dance vigorously beneath your pot. For a gentle simmer, ease it back until the flames barely flicker. You’ll feel the difference in heat with your hand held safely to the side.
A steady blue flame burns hotter and cleaner than a wavering yellow one. If you see orange or yellow, your stove may need a windbreak or a cleaner burner head.
Practice adjusting before your food’s on the line. Getting a feel for the controls now saves you from scorched dinners later.
Step 6 – Place and Monitor Your Pot
Set your cooking pot squarely on the burner’s pot supports. Center it carefully so the weight sits evenly and the whole setup stays balanced.
A lid speeds things up dramatically, trapping heat and cutting your boil time nearly in half. Water usually reaches a rolling boil in three to five minutes, depending on wind and altitude.
Stay close and keep watch. Never walk away from a lit stove, even for a minute. Listen for the bubbling and watch for steam escaping around the lid.
Stir occasionally with a heat-resistant utensil to prevent sticking. The rich smell of your meal will start rising as it heats. That aroma drifting across camp is your reward for doing each step right.
Step 7 – Turn Off and Cool Down Safely
When your food’s ready, shut down the stove properly. Turn the control knob fully clockwise until the hissing stops and the flame dies out completely.
Wait for the burner to cool before touching it. The metal stays scorching hot for several minutes, so resist the urge to grab it right away. Feel the heat radiating off it with your hand held nearby to gauge safety.
Once cool, unscrew the canister and store both pieces separately. Check that the valve is fully closed to prevent any slow leaks in your pack.
Knowing how to use hiking mini stove gear from ignition to shutdown keeps you safe and your equipment lasting for years. A careful cool-down is just as important as a careful start.
Step 8 – Clean and Pack Away
Finish by tidying up your trail kitchen. Wipe down the burner head and pot supports once they’ve cooled, removing any spilled food or soot with a cloth.
A clean stove lights more reliably next time and burns with fewer yellow flames. Grease and grime can clog the jets over time.
Pack the canister, burner, and pot back into your stuff sack. Nesting the stove inside the pot saves space and protects the delicate parts. Practice Leave No Trace by packing out every scrap of trash and leftover food.
Give your cooking spot a final glance. Scatter any ash and make sure no embers linger. Leaving the site clean protects the wild places you came to enjoy for the next hiker.
Common Mistakes When Using a Hiking Mini Stove
Even a simple burner trips up beginners who skip the fundamentals. The most common mistake is cooking on unstable ground. A wobbly rock or soft dirt lets a full pot slide off, spilling scalding food and wasting your fuel. Always test your surface before you light up, and clear flammable debris away from the flame.
Another frequent error is ignoring the wind. Gusts steal heat, waste fuel, and make ignition frustrating. Beginners often burn through half a canister just fighting a breeze. Set up behind a natural windbreak or use a proper wind screen, and you’ll boil faster while saving gas.
Many first-timers also crank the fuel valve wide open before lighting. This creates a sudden flare that can singe eyebrows or gear. Open the valve just slightly, light from the side, then adjust upward once the flame is steady.
Overtightening the canister connection damages the threads and seal, causing dangerous leaks. Snug is enough. Finally, plenty of hikers forget how long metal stays hot and grab the burner too soon, earning painful burns. Let everything cool fully before you touch or pack it. Patience here protects both your skin and your equipment.
Expert Tips
Want to get more from your little burner? Warm your fuel canister inside your jacket for a few minutes on cold mornings. Chilled fuel burns weakly, and a bit of body heat restores strong performance instantly.
Carry a small foil windscreen even on calm days. Weather shifts fast in the backcountry, and that lightweight shield saves fuel every single time you cook.
Measure your water before boiling. Heating only what you need trims minutes off your cook time and stretches your canister across a longer trip. Bring a spare canister too, since running dry miles from camp ruins dinner.
Finally, practice at home before your trip. Lighting, adjusting, and shutting down in your backyard builds muscle memory, so the real thing feels second nature when you’re tired and hungry on the trail.
Frequently Asked Questions
How long does a fuel canister last on a mini stove?
A standard small canister typically lasts around 60 to 90 minutes of continuous burn time, enough for roughly a dozen boils. Your actual mileage depends on wind, altitude, and how high you run the flame. For a weekend trip cooking two meals a day, one small canister usually covers you comfortably, though carrying a spare is always smart insurance.
Can I use a hiking mini stove inside a tent?
Never cook inside a closed tent. These stoves produce carbon monoxide, an odorless gas that can be deadly in enclosed spaces. There’s also a serious fire risk from the open flame near flammable fabric. Always cook outside in a well-ventilated area, at least a few feet from your tent. If bad weather forces you under a vestibule, keep it wide open for airflow.
Why won’t my stove light properly?
Several things cause ignition trouble. A cold or nearly empty canister delivers weak fuel flow, so warm it in your hands first. Wind can blow out the spark, so shield the burner. A clogged or dirty burner head also blocks the flame, so wipe it clean. Finally, check that your connection is secure and the valve is actually open before striking your lighter.
What kind of fuel does a mini stove use?
Most compact backpacking stoves run on a pressurized isobutane-propane blend sold in threaded canisters. This fuel burns clean, lights easily, and performs well in a range of temperatures. Canisters come in several sizes, so match yours to your trip length. Check that your stove and canister use the same threading, since a mismatched valve won’t connect safely.
Is a mini stove safe for beginners to use?
Absolutely, as long as you follow basic precautions. Cook on stable, level ground, keep flammable items away, and never leave a lit flame unattended. Open the fuel valve slowly and light from the side. Let everything cool before packing. Thousands of first-time hikers use these burners safely every season. A little care and practice make them one of the most beginner-friendly pieces of camp gear.
Conclusion
Cooking in the wild feels intimidating until you’ve done it once, and then it becomes one of the best parts of any trip. A compact burner gives you hot meals, warm drinks, and safe drinking water wherever you roam. The steps are simple: pick a stable spot, connect your fuel securely, open the valve slightly, light from the side, and adjust your flame to the task at hand.
Remember the details that matter most. Shield your flame from wind, watch your pot closely, and let everything cool before packing it away. Clean gear and Leave No Trace habits keep both your equipment and the trail in great shape.
Now that you understand how to use hiking mini stove basics from start to finish, you can head into the backcountry ready to cook with confidence. Practice once in your backyard, pack a spare canister, and treat every meal as part of the adventure. Your next hot dinner under the stars is waiting, and you’ve got everything you need to make it happen.

About Caleb
Caleb Merritt is a Virginia-based outdoor writer and gear analyst who has spent over a decade sleeping on the ground, crossing mountain passes, and obsessively shaving grams off his pack weight. He holds a Bachelor of Science in Environmental Science from James Madison University, where he also served as president of the university’s outdoor recreation club. After graduating, he spent three years as a wilderness educator with a backcountry youth program in the Shenandoah Valley — teaching Leave No Trace ethics, backcountry navigation, and campcraft — before moving into full-time writing in 2018.
His work focuses on one core belief: the best gear is the gear you understand. Whether he’s doing a side-by-side weight comparison of ultralight shelters or writing a beginner’s guide to building a sub-20-lb base weight kit, Caleb writes with the same directness you’d expect from a trusted trail partner. He has logged more than 4,000 miles across iconic routes including the John Muir Trail, the Wind River Range, Vermont’s Long Trail, and the Collegiate Peaks Loop in Colorado.
Areas of Expertise
- Ultralight backpacking systems and base weight optimization
- Tent, tarp, and shelter testing across three-season and shoulder-season conditions
- Sleeping bag and quilt temperature rating verification
- Backpacking nutrition, meal planning, and calorie-per-ounce analysis
- Leave No Trace principles and wilderness ethics
- Campfire safety, bear country protocols, and water treatment methods
- Gear care, repair, and long-term durability assessment
Education
James Madison University — B.S. in Environmental Science, 2015
During his time at JMU, Caleb served as President of the Outdoor Recreation Club, where he planned and led more than 30 backcountry trips annually across the Blue Ridge Mountains and Appalachian Trail corridor. The role sharpened his ability to assess gear performance under real conditions, manage group safety in remote environments, and develop the kind of practical trail knowledge that no classroom can teach.
Professional Experience
Gear Writer & Senior Contributor — [campeox.com]
Produces in-depth gear reviews, buyer’s guides, and how-to content across backpacking, camping, and ultralight hiking categories. Tests all gear in real field conditions before publishing recommendations.
Wilderness Educator & Trip Leader — Shenandoah Backcountry Youth Program — 2015–2018 Led multi-day backcountry expeditions for teens and young adults throughout Shenandoah National Park and George Washington National Forest. Taught LNT principles, orienteering, first aid awareness, and campcraft fundamentals.
Outdoor Recreation Club President — James Madison University — 2013–2015 Organized and led university-sponsored hiking, backpacking, and camping trips in the Blue Ridge Mountains and Appalachian Trail corridor. Managed club budget, safety protocols, and trip logistics for a membership of 120+ students.
Editorial Standards
Every piece of gear Caleb recommends has been personally tested in the field — not just unboxed and described. His review process includes a minimum of two overnight trips per shelter, a full-season evaluation for sleep systems, and side-by-side comparisons wherever possible. He does not accept payment for positive reviews. Affiliate relationships, where they exist, are always disclosed in accordance with FTC guidelines.
All factual claims about gear specifications, trail distances, and safety recommendations are cross-referenced against manufacturer data sheets and established sources such as the Leave No Trace Center for Outdoor Ethics and the American Hiking Society before publication.