Winter camping offers stunning snowy landscapes and a peaceful escape from crowded summer trails. However, the biting cold can quickly turn a magical adventure into an uncomfortable experience if you are not prepared. Staying warm starts long before you crawl into your sleeping bag. It begins with your shelter. Knowing how to insulate a tent for winter camping is the most important skill you can learn before heading into the frost.
When you trap heat effectively, you create a cozy microclimate inside your shelter, blocking the freezing wind and retaining your body heat. This guide breaks down the process into simple, actionable steps that anyone can follow. Whether you are a beginner looking to brave your first snowy trip or an experienced outdoors person wanting to upgrade your cold-weather comfort, these proven techniques will keep you toasty from sundown to sunrise.
Why Proper Insulation Matters for Cold Weather Camping
When the temperature drops, your tent becomes your only defense against the harsh elements. A standard three-season tent consists of thin nylon and mesh, designed specifically to let air flow and keep you cool. While that is perfect for July, it is a recipe for shivering through a December night. Proper insulation transforms that thin barrier into an effective shield against freezing gusts and heat loss.
Heat escapes your body in multiple ways, primarily through conduction when you sleep on the freezing ground and convection as cold wind pulls warmth away from your shelter. By layering the right materials, you block the wind, reflect your body heat back into your sleeping area, and stop the frozen earth from stealing your warmth. Doing this correctly ensures you wake up rested and ready to enjoy the winter wonderland, rather than tired, freezing, and rushing to pack up your gear.
7 Step-by-Step Guide on How to Insulate a Tent for Winter Camping
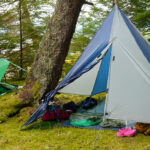
Step 1: Select a Wind-Protected Campsite
Your defense against the cold starts with picking the absolute best location for your shelter. Wind pulls heat away from your tent faster than anything else, so finding natural windbreaks is essential. Look for clusters of dense evergreen trees, large boulders, or small hills that can block incoming gusts. You want to position your shelter so the smallest profile faces the prevailing wind direction. Avoid setting up at the very bottom of valleys, as cold air settles in the lowest points overnight. Instead, seek a slightly elevated, flat spot. By simply choosing a smart location, you drastically reduce the chilling effect of the wind, giving your internal insulation a much easier job.
Step 2: Lay Down a Thick Tent Footprint
Ground insulation is arguably the most critical part of staying warm. The frozen earth acts like a giant sponge, constantly absorbing your body heat through conduction. Before you even unpack your main shelter, lay down a heavy-duty footprint or a thick canvas tarp. This first layer acts as a crucial moisture barrier between the snow or frozen soil and your tent floor. Ensure the footprint perfectly matches the dimensions of your shelter’s base. If it extends beyond the edges, it can catch melting snow or rain and funnel water directly underneath you. This simple barrier prevents ground moisture from seeping upward, which is the first step in keeping the interior dry and warm.
Step 3: Layer the Interior Floor with Foam
Once your shelter is pitched, you must fortify the floor from the inside. Bring several closed-cell foam sleeping pads or interlocking foam gym mats. Cover as much of the interior floor space as possible, not just the area where you sleep. Foam contains thousands of tiny trapped air pockets that serve as a brilliant thermal break between you and the frigid ground below. By carpeting the entire floor, you stop the cold from radiating upward into the living space. This also makes the floor much softer to kneel on while changing clothes. The more floor space you cover with closed-cell foam, the warmer your shelter will remain throughout the freezing night.
Step 4: Mastering How to Insulate a Tent for Winter Camping with Thermal Blankets
Reflective emergency blankets, often made of Mylar, are highly effective tools for retaining radiant heat. To use them properly, attach these lightweight blankets to the interior walls and ceiling of your shelter. Use small binder clips, safety pins, or gentle camping tape to secure them along the fabric. Ensure the reflective silver side faces inward toward your living area. As your body produces heat, or if you use a safe heated water bottle, the thermal blankets will bounce that warmth right back down to you instead of letting it escape through the thin nylon roof. Leave a small gap near the top vents to allow moisture to escape, preventing heavy condensation.
Step 5: Seal the Drafty Mesh Panels
Most standard tents feature large mesh panels designed for summer ventilation. During a snowy trip, these panels let icy drafts blow right through your sleeping area. You need to block these drafts while maintaining just enough airflow to breathe safely. Cut pieces of breathable, lightweight fleece or spare fabric and drape them over the mesh sections. You can attach them using safety pins or lightweight clips. This slows down the incoming freezing air significantly but still allows moisture from your breath to pass through, preventing the interior from turning into a damp, frosty cave. Do not completely seal every single vent, as managing internal condensation is just as important as blocking the wind.
Step 6: Throw a Heavy Tarp Over the Rainfly
Your rainfly is your primary defense against snow and wind, but you can upgrade its effectiveness. Bring a large, durable tarp and drape it securely over the top of your existing rainfly. Secure the tarp tightly using heavy-duty stakes and guy lines so it does not flap loudly in the wind. This extra layer creates a dead air space between the tarp and the rainfly, acting like double-pane glass in a home window. It adds significant wind resistance and traps a thick pocket of still air, which is a fantastic insulator. Make sure there is a slight gap between the two layers so they do not rub together and transfer the cold directly inside.
Step 7: Build a Snow Wall Exterior
If you have plenty of snow around your campsite, use it to your advantage. Snow is actually an excellent natural insulator. Use a collapsible camping shovel to pile snow around the bottom perimeter of your shelter, building a wall about one to two feet high. This snow skirt seals the gap between the bottom of your rainfly and the ground, stopping freezing drafts from sweeping under the edges. Make sure you do not pile the snow directly onto the main fabric of the shelter, as the weight can compress the structure. Just block the bottom edge. This technique locks the heat inside and provides incredible stability against harsh winter winds.
Frequently Asked Questions (FAQ)
Can You Safely Use a Heater Inside a Tent?
Using a standard propane or gas heater inside a nylon shelter is extremely dangerous due to carbon monoxide buildup and severe fire risks. If you must use a heater, ensure it is specifically rated for indoor tent use and features an automatic tip-over shut-off switch and low-oxygen sensor.
- Always keep vents open for fresh air.
- Keep all fabrics far away from the heat source.
Does a Smaller Tent Stay Warmer in Winter?
Yes, smaller tents stay significantly warmer in cold weather. Your body acts like a furnace, radiating heat into the surrounding air. A smaller interior volume means your body has less empty space to heat up. When sleeping in a massive six-person shelter by yourself, your body simply cannot produce enough warmth to heat all that extra air, leaving you feeling colder.
Why Is My Tent Wet on the Inside During Winter?
That moisture is condensation caused by your warm breath hitting the freezing cold fabric of your shelter walls. As you exhale throughout the night, the water vapor turns into liquid or frost upon contact with the cold surface. To prevent this, you must keep top vents slightly open to allow the humid air to escape, even if it lets a tiny bit of cold air inside.
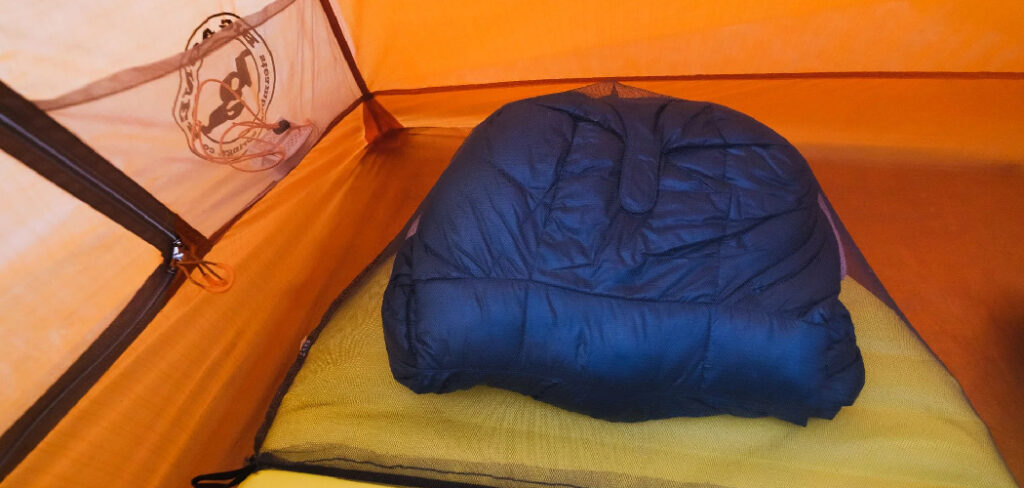
What Is the Best Blanket for Winter Camping?
The best option for winter camping is a high-quality down blanket or a thick wool blanket.
- Down provides an incredible warmth-to-weight ratio and traps heat efficiently.
- Wool is naturally highly insulating and retains its ability to keep you warm even if it gets slightly damp from condensation.
Always pair your blankets with an insulated sleeping pad.
Do Tents Lose Heat Through the Floor?
Yes, you lose a massive amount of body heat directly through the floor via conduction. The frozen ground is relentless and will pull warmth right out of you if you are not properly separated from it. This is why closed-cell foam pads and high R-value sleeping mattresses are absolute necessities. Insulating the floor is often more important than insulating the walls.
Conclusion
Winter camping does not have to mean shivering through a miserable, sleepless night. By taking the time to prepare your shelter properly, you can enjoy the serene beauty of the snowy outdoors in total comfort. Remember that ground insulation is your first line of defense, reflective layers bounce your hard-earned body heat back to you, and blocking the wind makes all the difference in the world.
Do not let the fear of freezing temperatures keep you indoors this season. Take these practical tips, gather your gear, and try out how to insulate a tent for winter camping on your next snowy adventure. With the right preparation, a solid foam floor, and some reflective blankets, you will be amazed at how warm and cozy your wilderness home can be. Stay safe, stay warm, and enjoy the trails!
About Caleb
Caleb Merritt is a Virginia-based outdoor writer and gear analyst who has spent over a decade sleeping on the ground, crossing mountain passes, and obsessively shaving grams off his pack weight. He holds a Bachelor of Science in Environmental Science from James Madison University, where he also served as president of the university’s outdoor recreation club. After graduating, he spent three years as a wilderness educator with a backcountry youth program in the Shenandoah Valley — teaching Leave No Trace ethics, backcountry navigation, and campcraft — before moving into full-time writing in 2018.
His work focuses on one core belief: the best gear is the gear you understand. Whether he’s doing a side-by-side weight comparison of ultralight shelters or writing a beginner’s guide to building a sub-20-lb base weight kit, Caleb writes with the same directness you’d expect from a trusted trail partner. He has logged more than 4,000 miles across iconic routes including the John Muir Trail, the Wind River Range, Vermont’s Long Trail, and the Collegiate Peaks Loop in Colorado.
Areas of Expertise
- Ultralight backpacking systems and base weight optimization
- Tent, tarp, and shelter testing across three-season and shoulder-season conditions
- Sleeping bag and quilt temperature rating verification
- Backpacking nutrition, meal planning, and calorie-per-ounce analysis
- Leave No Trace principles and wilderness ethics
- Campfire safety, bear country protocols, and water treatment methods
- Gear care, repair, and long-term durability assessment
Education
James Madison University — B.S. in Environmental Science, 2015
During his time at JMU, Caleb served as President of the Outdoor Recreation Club, where he planned and led more than 30 backcountry trips annually across the Blue Ridge Mountains and Appalachian Trail corridor. The role sharpened his ability to assess gear performance under real conditions, manage group safety in remote environments, and develop the kind of practical trail knowledge that no classroom can teach.
Professional Experience
Gear Writer & Senior Contributor — [Your Website Name]
Produces in-depth gear reviews, buyer’s guides, and how-to content across backpacking, camping, and ultralight hiking categories. Tests all gear in real field conditions before publishing recommendations.
Wilderness Educator & Trip Leader — Shenandoah Backcountry Youth Program — 2015–2018 Led multi-day backcountry expeditions for teens and young adults throughout Shenandoah National Park and George Washington National Forest. Taught LNT principles, orienteering, first aid awareness, and campcraft fundamentals.
Outdoor Recreation Club President — James Madison University — 2013–2015 Organized and led university-sponsored hiking, backpacking, and camping trips in the Blue Ridge Mountains and Appalachian Trail corridor. Managed club budget, safety protocols, and trip logistics for a membership of 120+ students.
Editorial Standards
Every piece of gear Caleb recommends has been personally tested in the field — not just unboxed and described. His review process includes a minimum of two overnight trips per shelter, a full-season evaluation for sleep systems, and side-by-side comparisons wherever possible. He does not accept payment for positive reviews. Affiliate relationships, where they exist, are always disclosed in accordance with FTC guidelines.
All factual claims about gear specifications, trail distances, and safety recommendations are cross-referenced against manufacturer data sheets and established sources such as the Leave No Trace Center for Outdoor Ethics and the American Hiking Society before publication.