Planning a camping trip during the warmer months brings excitement, but sweltering nights can quickly ruin the fun. When the sun beats down, a poorly ventilated shelter turns into an absolute oven. If you want to wake up feeling refreshed instead of drenched in sweat, you need a solid plan.
Whether you are a first-time camper or an outdoor veteran, understanding how to keep tent cool in summer makes a massive difference in your overall experience. You do not need expensive gear or complicated setups to stay comfortable. Simple adjustments to your location, airflow, and equipment will easily transform your sleeping space into a breathable oasis. Let us explore the easiest, most effective ways to lower the temperature inside your shelter so you can focus entirely on making great memories around the campfire.
Why Heat Management Matters for Campers
High temperatures do more than just make you physically uncomfortable; they directly impact your safety and energy levels. Sleeping in a hot, stuffy space leads to restless nights, leaving you exhausted for the next day’s hikes and outdoor activities. Worse, extreme heat trapped inside enclosed spaces significantly increases the risk of dehydration and heat exhaustion. Managing your shelter’s temperature ensures you have a safe, welcoming retreat to escape the harsh midday sun.
Furthermore, protecting your gear from baking heat helps extend the lifespan of your expensive camping equipment, as ultraviolet rays and extreme temperatures degrade synthetic fabrics over time. By taking a proactive approach to cooling, you protect your personal health, boost your daily energy, and guarantee a much more enjoyable outdoor vacation for both you and your family.
10 Step-by-Step Guide on How to Keep Tent Cool in Summer
Step 1: Choose a Shaded Location
The foundation of a comfortable camping trip starts before you even unpack your gear. Finding the right campsite plays a massive role in regulating your temperature. Look for spots nestled under large, leafy trees that offer natural canopy coverage. By keeping direct sunlight off your fabric walls, you prevent the interior from turning into a greenhouse. Pay attention to the sun’s trajectory throughout the day, ensuring your spot gets shade during the intense afternoon hours. If natural shade is scarce, position yourself near hills or large boulders that block the late-day sun. This simple strategy significantly lowers your baseline temperature, setting you up for success.
Step 2: Set Up a Reflective Tarp Canopy
If you lack natural shade, bringing your own makes all the difference. Suspending a reflective tarp above your shelter acts as a powerful barrier against intense ultraviolet rays. Ensure you leave a gap of at least twelve inches between the tarp and your roof. This critical space allows hot air to escape rather than radiating directly into your sleeping area. Use sturdy paracord and nearby trees or adjustable poles to secure the canopy tightly. A reflective surface bounces the sun’s energy away, effectively dropping the interior heat index. This method proves absolutely essential when camping in open fields or exposed desert landscapes.
Step 3: Disassemble During the Day
Many beginners make the mistake of leaving their shelter fully assembled throughout the hottest parts of the afternoon. Modern synthetic fabrics trap heat incredibly well, baking everything inside. If your frame features a simple pop-up or quick-pitch design, consider dropping it down flat during peak sunlight hours. This prevents the trapped air from heating up like a closed oven. When evening approaches and the ambient temperature drops, simply pop it back up. If complete disassembly feels like too much work, removing the rainfly and opening every single flap offers a similar cooling effect without the hassle of a full breakdown.
Step 4: Maximize Cross-Ventilation Airflow
Airflow serves as your absolute best friend when battling warm weather conditions. As you set up your camp, pay close attention to the prevailing wind direction. Orient your main doors and large mesh windows so they face directly into the incoming breeze. Open all vents, windows, and ground-level ports to create a strong cross-breeze. As cool air enters through the lower sections, warmer air gets pushed up and out through the ceiling vents. Learning how to keep tent cool in summer relies heavily on this natural circulation. Keep the bug screens zipped, but pull back all solid fabric panels completely.
Step 5: Ditch the Insulated Rainfly
Rainflies exist to keep moisture out, but they also excel at trapping body heat and stale air inside. If the weather forecast guarantees a dry, clear night, leave the rainfly packed away in your bag. Sleeping beneath just the mesh ceiling allows maximum heat dissipation while letting you enjoy a beautiful view of the stars. The unobstructed mesh provides the ultimate ventilation system for your sleeping quarters. If you worry about unexpected morning dew, loosely drape the fly over half of the roof, ready to pull over if a sudden drizzle occurs, while still maintaining excellent upward airflow.
Step 6: Utilize Battery-Powered Fans
When the evening air sits perfectly still and natural breezes disappear, you must create your own circulation. Portable, battery-operated fans are absolute lifesavers for warm-weather campers. Hang a lightweight fan directly from the center ceiling loop to push stagnant hot air out the open doors. Alternatively, place a fan near a ground-level mesh window to aggressively pull fresh, cooler outside air into the space. Many modern camping fans feature rechargeable batteries and built-in hooks for easy mounting. This active cooling technique dramatically improves your comfort levels, ensuring you fall asleep faster even on the most humid summer nights.
Step 7: Block Heat From the Ground
The ground holds onto heat generated during the day, which transfers directly to your sleeping pad at night. To combat this, place a reflective emergency blanket underneath your floor footprint, shiny side facing down. This reflects the earth’s residual warmth away from your body. Furthermore, elevate your sleeping position by using a camping cot instead of a traditional ground pad. A cot allows air to circulate completely around your body, taking advantage of the cooler air that naturally settles near the floor. Understanding heat transfer often comes down to making these incredibly smart bedding choices.
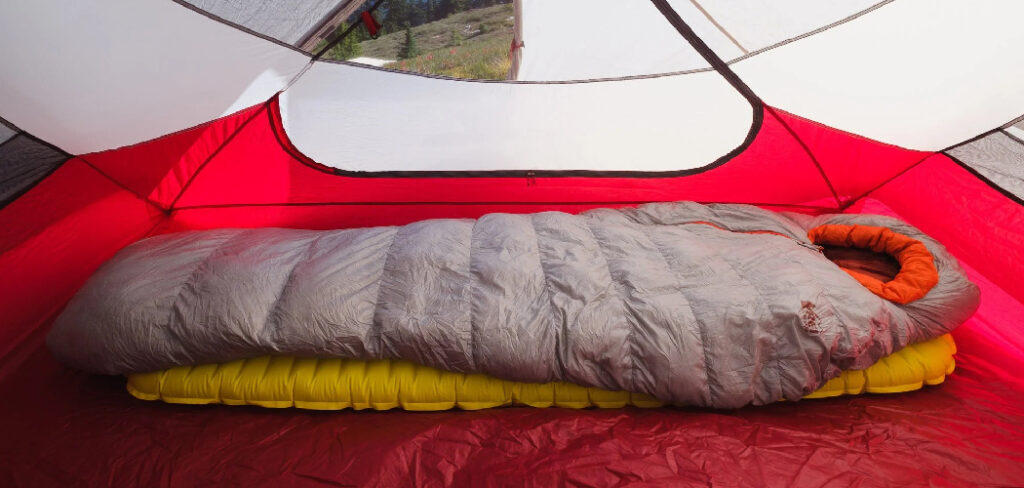
Step 8: Choose Breathable Sleeping Gear
Heavy winter sleeping bags have no place in a July camping trip. Swap out thick insulated gear for lightweight, breathable alternatives. Consider using just a simple cotton sheet or a moisture-wicking sleeping bag liner. Cotton and specialized synthetic blends pull sweat away from your skin, allowing it to evaporate quickly and cool your body. If you prefer the familiar feel of a sleeping bag, choose a rectangular summer-rated model that unzips completely so you can use it like a loose quilt. Wearing loose-fitting, light-colored sleepwear also helps regulate your core temperature throughout the long, warm summer night.
Step 9: Cool Down Your Body Before Bed
Managing your internal body temperature matters just as much as managing your environment. Before climbing into your sleeping bag, take actionable steps to cool yourself down. Drink plenty of cold water to stay hydrated and lower your core temperature. If you have access to a lake or shower, take a quick, refreshing dip. Alternatively, wipe down your face, neck, and arms with a damp, cool cloth. Applying cold water to your pulse points, like your wrists and neck, rapidly cools your circulating blood. Going to bed with a lowered body temperature makes the ambient heat feel much less oppressive.
Step 10: Deploy Thermal Space Blankets
If you camp in completely exposed environments like beaches or deserts, standard shade tactics fall short. In these extreme situations, thermal emergency blankets offer a fantastic solution. Drape large Mylar blankets over the outside of your roof, ensuring the highly reflective silver side faces directly up toward the sun. Secure them tightly with clips or cords so they do not blow away. The shiny surface acts like a mirror, reflecting intense solar radiation away from your living space before it can penetrate the fabric. This specialized approach drastically reduces interior temperatures when natural canopy coverage simply does not exist.
Frequently Asked Questions (FAQ)
Can placing ice inside help cool the air?
Yes, you can create a makeshift air conditioner using ice. Place a block of ice or a bowl of frozen water bottles directly in front of a battery-powered floor fan. As the ice slowly melts, the fan blows air across the cold surface, circulating a refreshing, chilled breeze throughout your sleeping area. This method works incredibly well for dropping the temperature right before bedtime.
Does the color of my shelter affect interior temperatures?
Color heavily influences how much heat your fabric absorbs. Dark colors like black, navy, and forest green absorb sunlight and transfer that heat inward, creating a much hotter environment. Light colors like white, light gray, or tan reflect solar radiation away. If you frequently camp in hot climates, always choose a light-colored model to naturally minimize heat buildup during the day.
Should I leave my windows open during the day?
It entirely depends on the outside temperature. If a cool breeze is blowing, leaving your mesh windows open encourages cross-ventilation.
- Close the solid flaps slightly if the midday air is scorching hot and stagnant.
- Keep the interior shaded to remain cooler than the sweltering outdoor air.
Always keep your bug screens fully zipped to prevent insects from moving in while you are away.
Are cotton fabrics better than nylon for summer camping?
Canvas and cotton models provide excellent breathability compared to traditional synthetic nylon or polyester materials. Cotton fibers allow moisture and warm air to escape naturally through the fabric itself. While they offer superior cooling and comfort in warm weather, keep in mind that canvas options are significantly heavier and bulkier, making them better suited for car camping rather than backpacking.
Is it safe to use a portable air conditioner?
Using a portable air conditioner is perfectly safe and highly effective, provided you have access to electrical power at your campsite. You will need a model with a dedicated exhaust hose. Route the exhaust hose carefully through a zippered door or specialized AC port to vent the hot air outside. Ensure your power cords are outdoor-rated to maintain complete safety.
Conclusion
Warm weather should never stop you from enjoying the great outdoors. By utilizing natural shade, maximizing cross-ventilation, and choosing the right breathable sleeping gear, you can easily conquer the heat. Remember to drop your rainfly on clear nights and utilize portable battery fans to keep the air moving freely around your body. These simple, proactive steps guarantee a much more comfortable resting environment after a long day of hiking. Do not let the fear of sweating through the night keep you stuck at home. Put these practical tips on how to keep tent cool in summer into action on your next trip, and experience the pure joy of truly refreshing outdoor sleep.
About Caleb
Caleb Merritt is a Virginia-based outdoor writer and gear analyst who has spent over a decade sleeping on the ground, crossing mountain passes, and obsessively shaving grams off his pack weight. He holds a Bachelor of Science in Environmental Science from James Madison University, where he also served as president of the university’s outdoor recreation club. After graduating, he spent three years as a wilderness educator with a backcountry youth program in the Shenandoah Valley — teaching Leave No Trace ethics, backcountry navigation, and campcraft — before moving into full-time writing in 2018.
His work focuses on one core belief: the best gear is the gear you understand. Whether he’s doing a side-by-side weight comparison of ultralight shelters or writing a beginner’s guide to building a sub-20-lb base weight kit, Caleb writes with the same directness you’d expect from a trusted trail partner. He has logged more than 4,000 miles across iconic routes including the John Muir Trail, the Wind River Range, Vermont’s Long Trail, and the Collegiate Peaks Loop in Colorado.
Areas of Expertise
- Ultralight backpacking systems and base weight optimization
- Tent, tarp, and shelter testing across three-season and shoulder-season conditions
- Sleeping bag and quilt temperature rating verification
- Backpacking nutrition, meal planning, and calorie-per-ounce analysis
- Leave No Trace principles and wilderness ethics
- Campfire safety, bear country protocols, and water treatment methods
- Gear care, repair, and long-term durability assessment
Education
James Madison University — B.S. in Environmental Science, 2015
During his time at JMU, Caleb served as President of the Outdoor Recreation Club, where he planned and led more than 30 backcountry trips annually across the Blue Ridge Mountains and Appalachian Trail corridor. The role sharpened his ability to assess gear performance under real conditions, manage group safety in remote environments, and develop the kind of practical trail knowledge that no classroom can teach.
Professional Experience
Gear Writer & Senior Contributor — [campeox.com]
Produces in-depth gear reviews, buyer’s guides, and how-to content across backpacking, camping, and ultralight hiking categories. Tests all gear in real field conditions before publishing recommendations.
Wilderness Educator & Trip Leader — Shenandoah Backcountry Youth Program — 2015–2018 Led multi-day backcountry expeditions for teens and young adults throughout Shenandoah National Park and George Washington National Forest. Taught LNT principles, orienteering, first aid awareness, and campcraft fundamentals.
Outdoor Recreation Club President — James Madison University — 2013–2015 Organized and led university-sponsored hiking, backpacking, and camping trips in the Blue Ridge Mountains and Appalachian Trail corridor. Managed club budget, safety protocols, and trip logistics for a membership of 120+ students.
Editorial Standards
Every piece of gear Caleb recommends has been personally tested in the field — not just unboxed and described. His review process includes a minimum of two overnight trips per shelter, a full-season evaluation for sleep systems, and side-by-side comparisons wherever possible. He does not accept payment for positive reviews. Affiliate relationships, where they exist, are always disclosed in accordance with FTC guidelines.
All factual claims about gear specifications, trail distances, and safety recommendations are cross-referenced against manufacturer data sheets and established sources such as the Leave No Trace Center for Outdoor Ethics and the American Hiking Society before publication.